adventure

Discover Panglao Island

COVER.jpg

It’s been a year since my last travel blog, and now I am back at it again. In this blog, I will be writing about my recent trip to the Philippines when I visited one of the many islands in the Philippines - Panglao Island. Let me share what  I have seen and experienced during this memorable trip.

ABOUT PANGLAO ISLAND

Panglao Island is in the Visayas region in Bohol. Panglao Island is becoming more accessible now through plane and ferry rides. There is an aircraft available to fly directly to Tagbilaran, 30 minutes away from Panglao. I believe Panglao Island will be the next Boracay spot in Bohol.

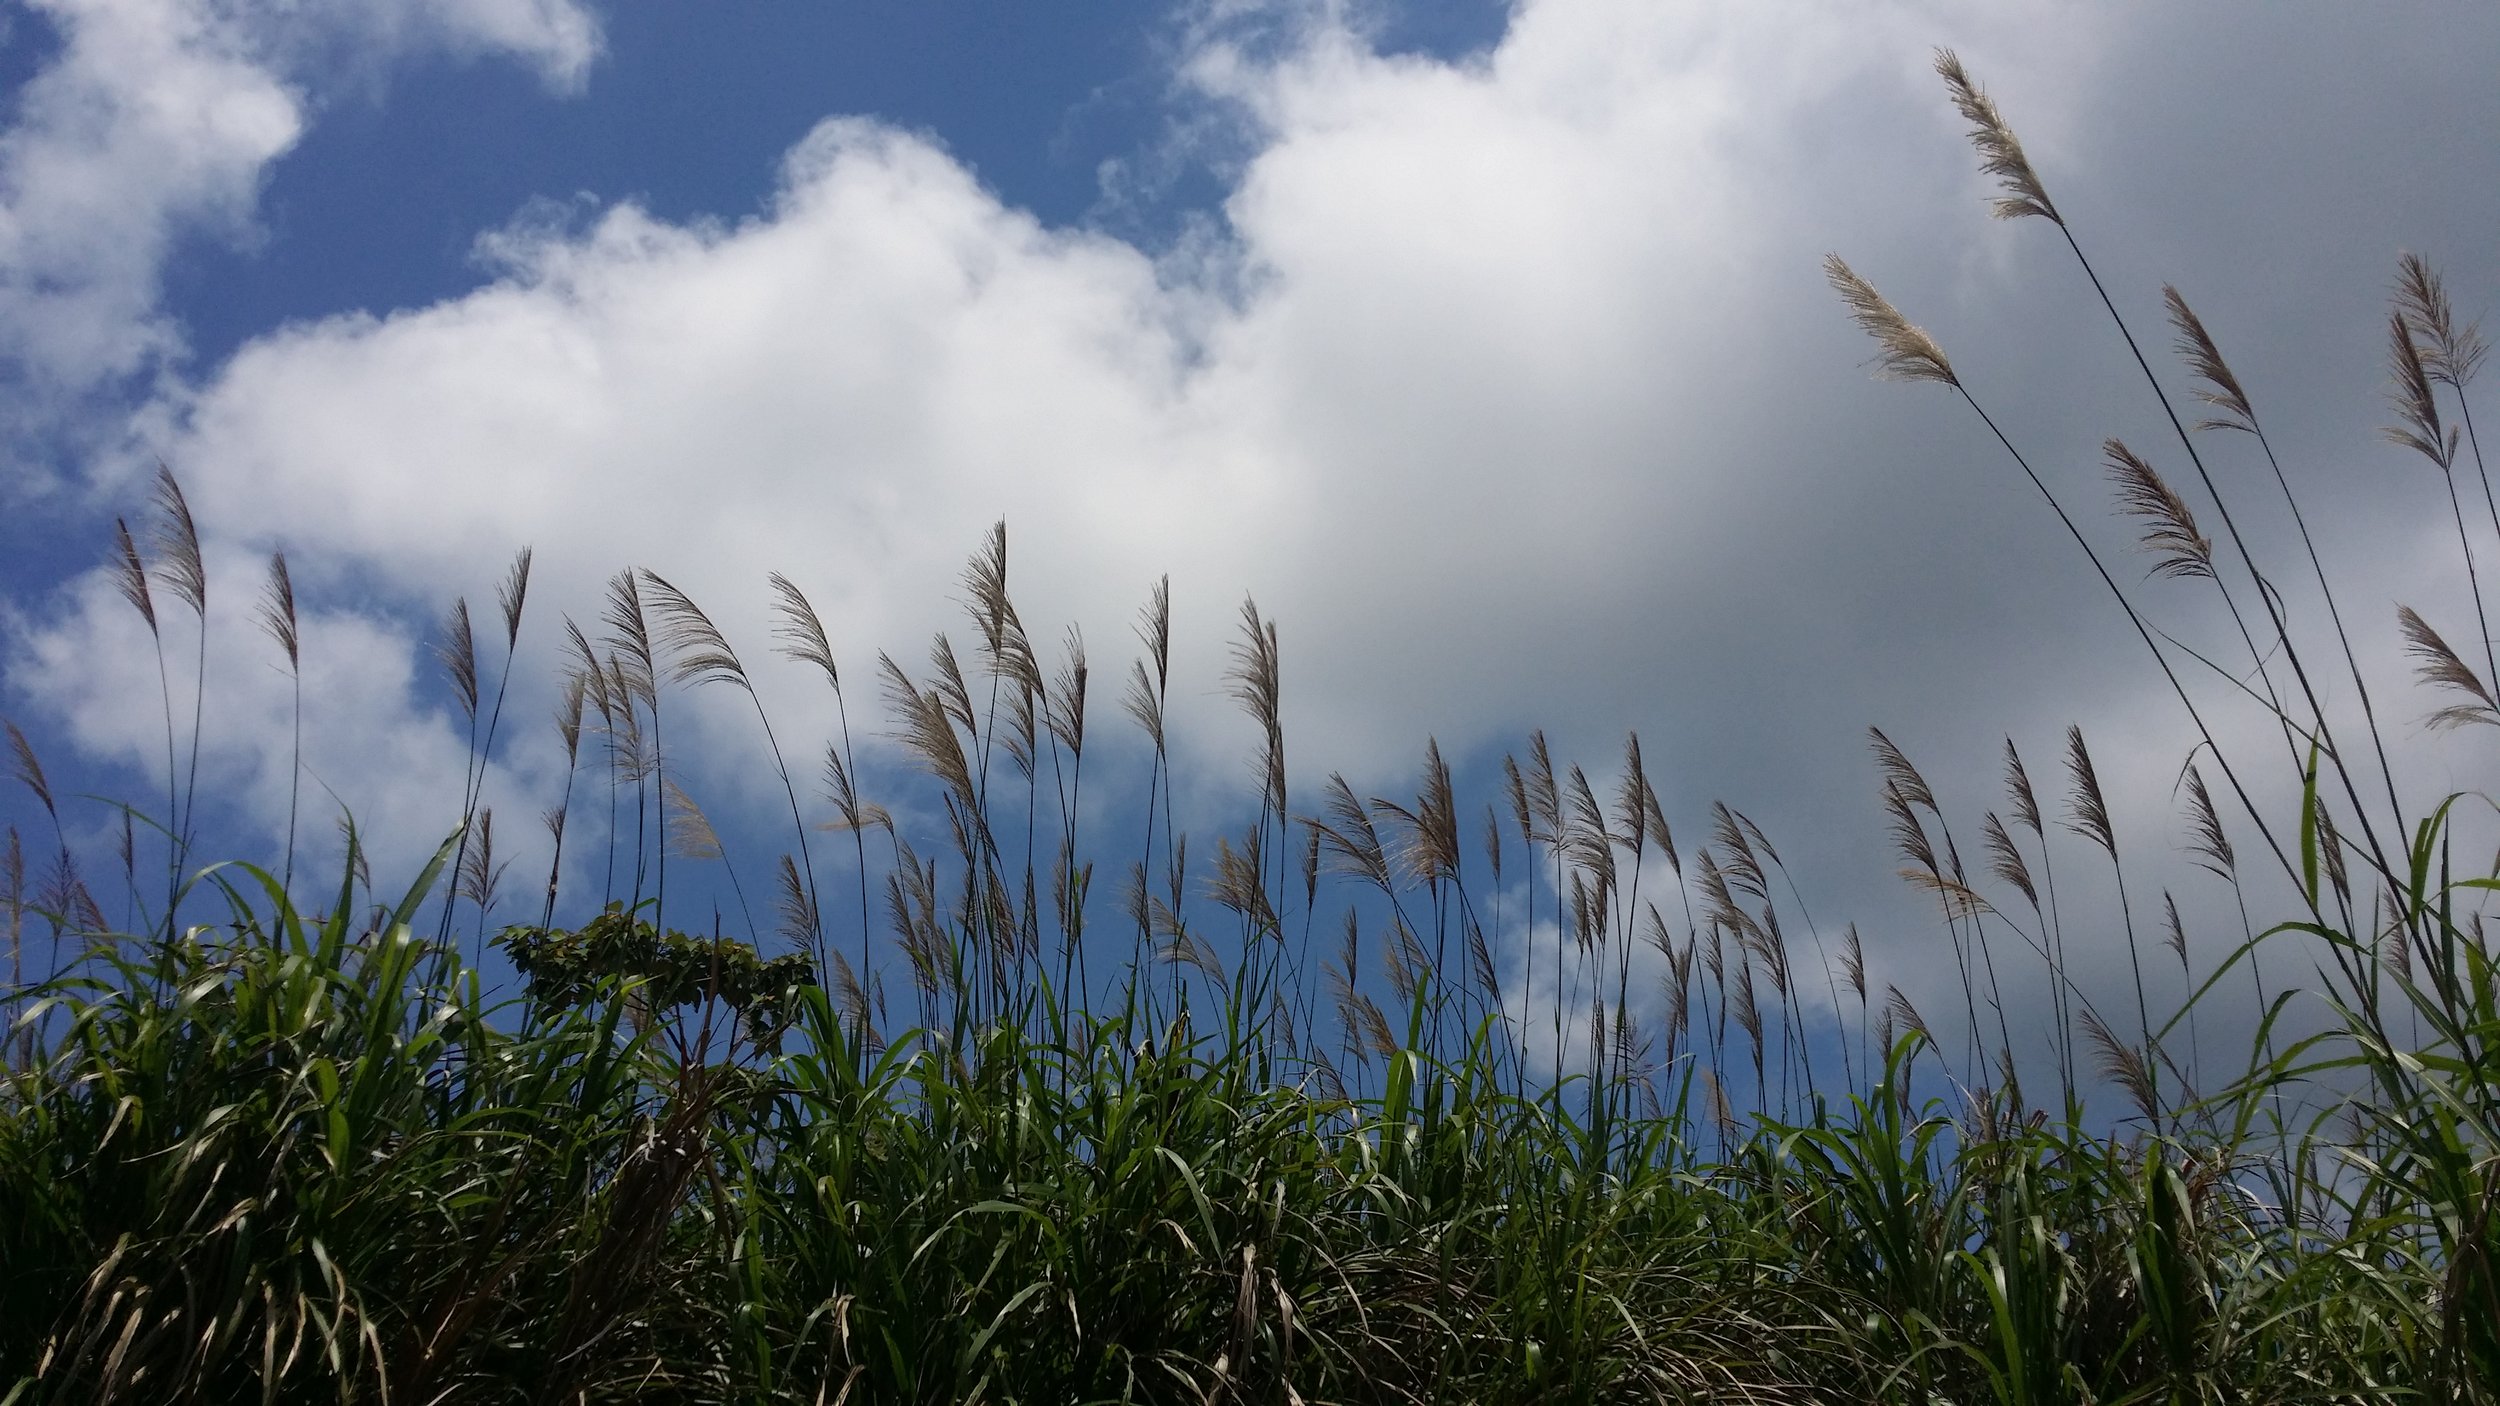
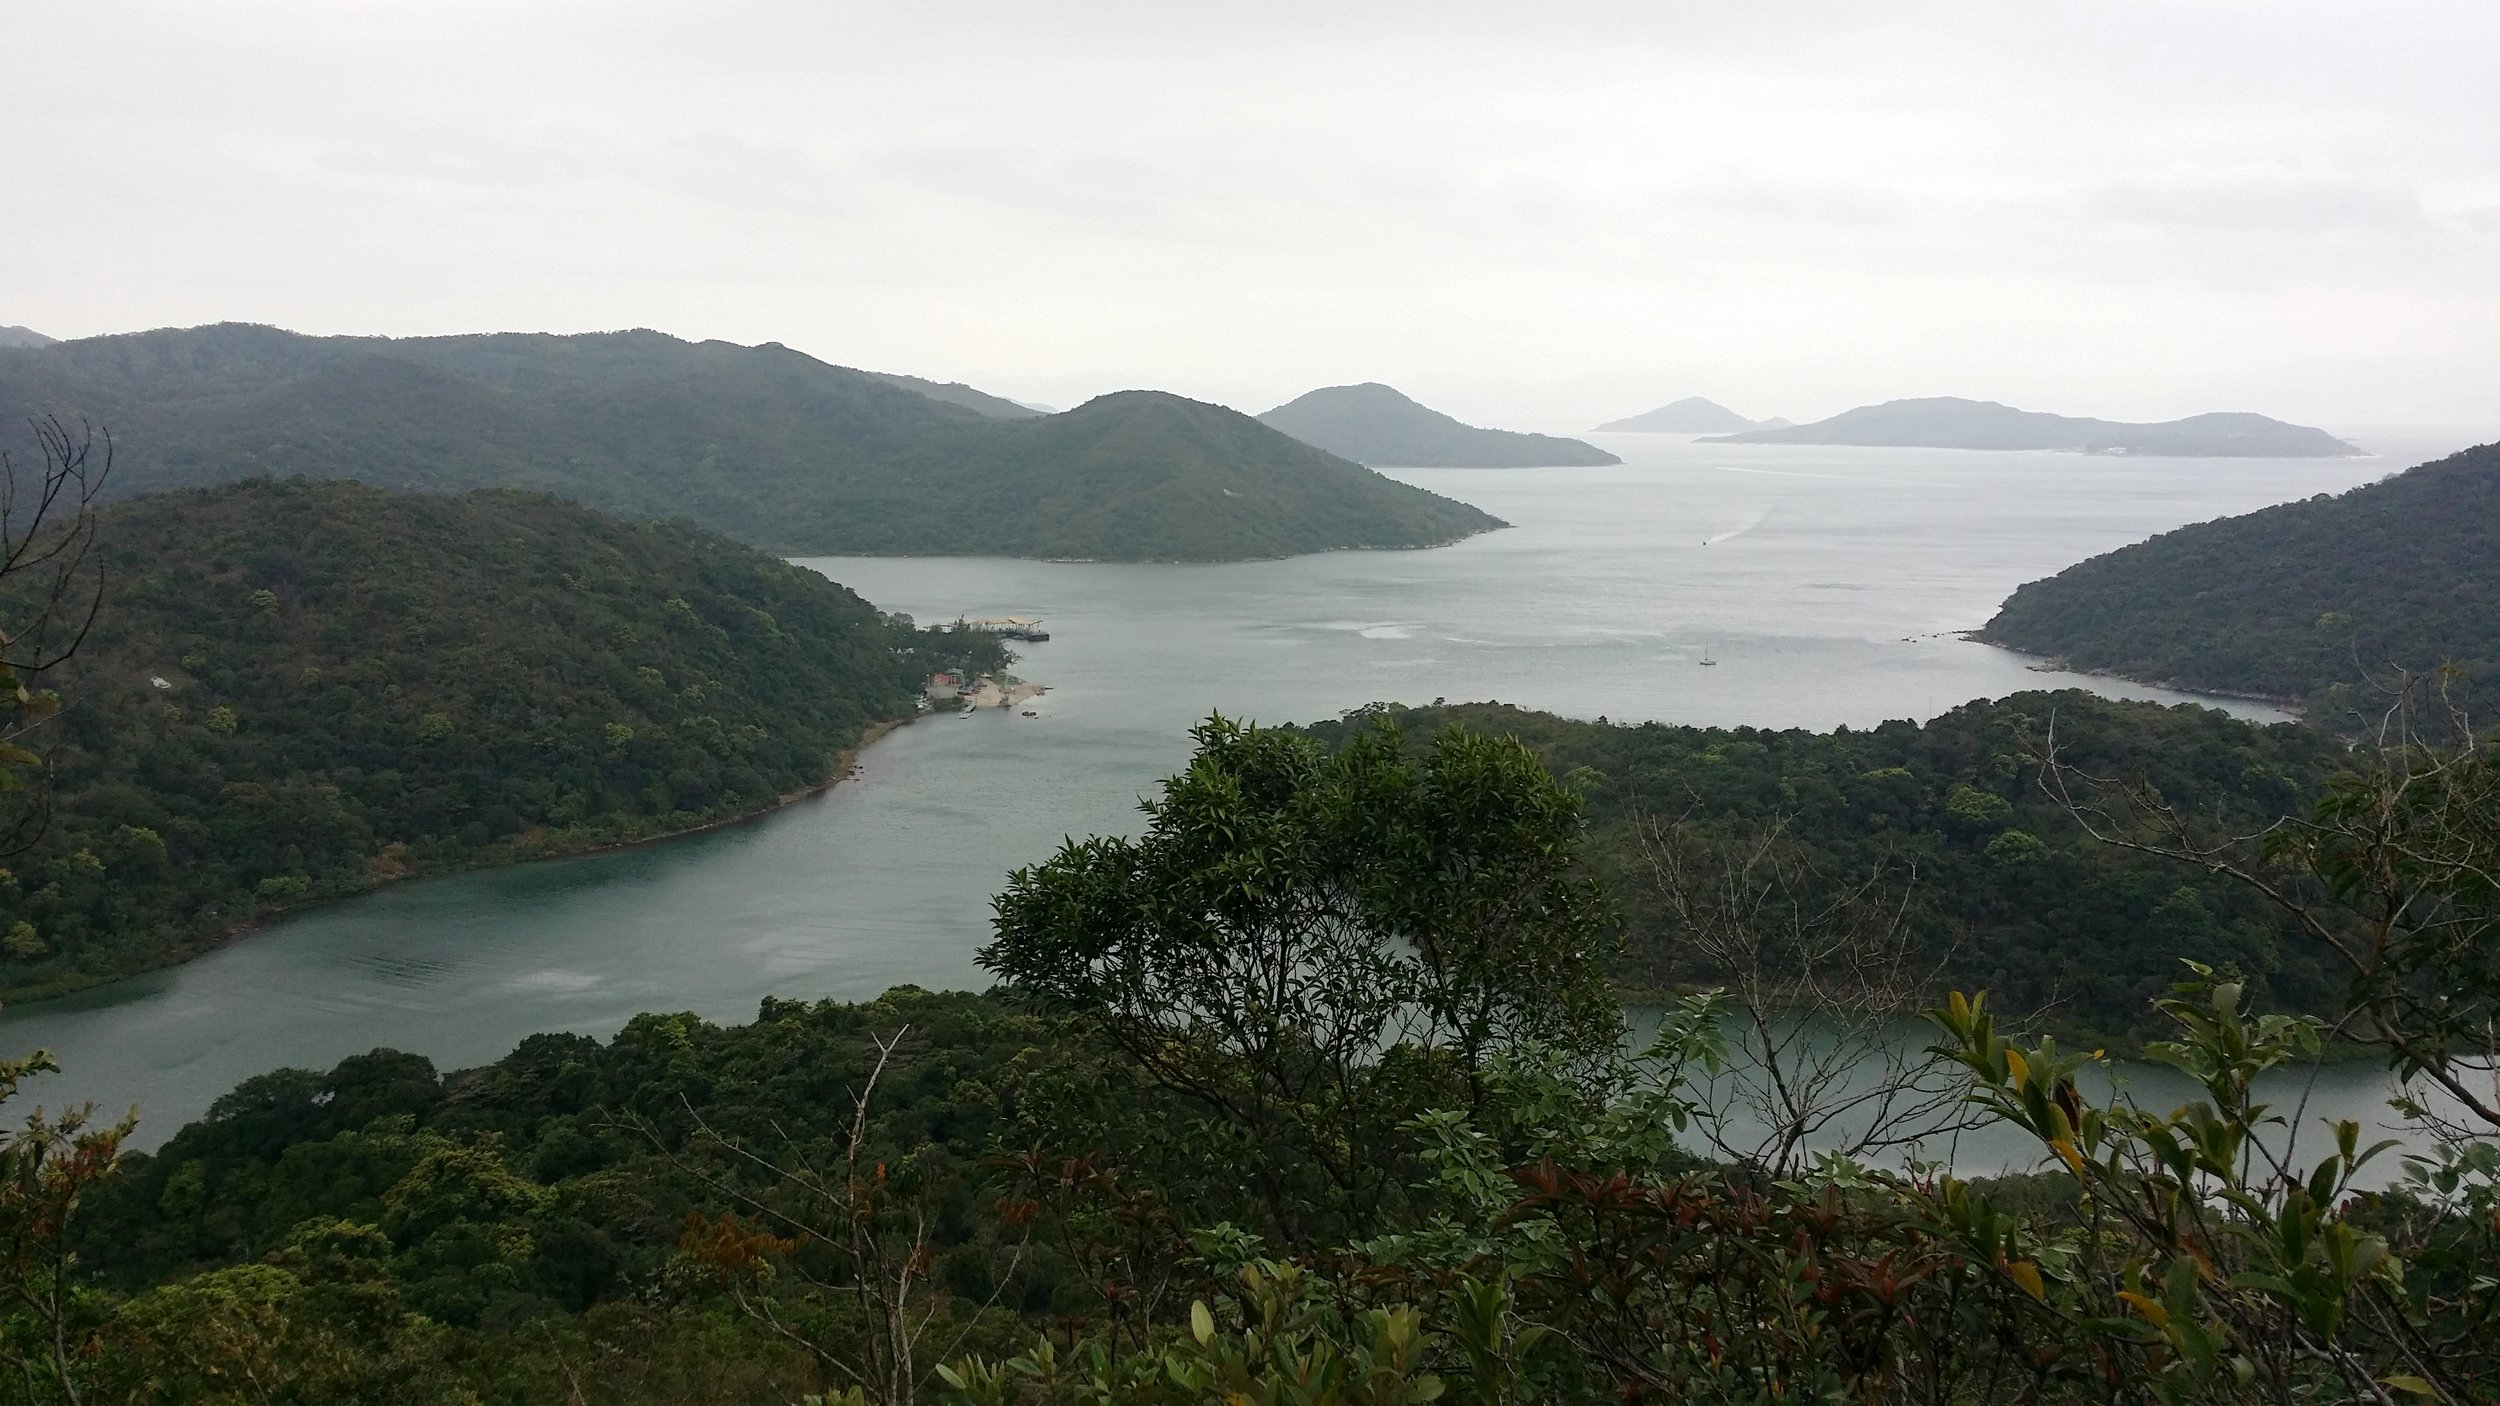
Panglao Island is indeed one of the beautiful islands in the Philippines and the Visayas region. Panglao Island is unusually small. Vacationers can spend a day roaming around the Island. So what's so unique about Panglao? Continue reading this blog to find out more.

HOW TO GET THERE

Getting to Panglao is a lot convenient to travel now. There are two types of transportation to take to reach the island.

OPTION 1 - TAKE A FERRY

Taking the ferry is probably the most convenient and cheapest transportation to the island. I would highly suggest taking “OceanJet”. It only takes two hours to get to Tagbilaran Port from Cebu port with many time slots available every day. It is affordable, seats are assign to every passenger, luggage can be checked-in with some small charges, and it is quite comfortable to check-in your heavy baggage as it gives you more space for the next two hours. You may book your one-way or roundtrip tickets via their website, Klook or buy tickets at the terminal.

Once you reach the Tagbilaran port, you may first claim your luggage if you have checked-in yours. Then, head out to take a tricycle or a car service ride to the island to the hotel you are staying at. There are plenty of services out there even during peak season. Tricycle ride is usually cheaper, and drivers will charge about Php300-400 per trip, and car drivers will usually charge Php300-400 per person. I chose to take the tricycle as it is cheaper and faster to negotiate in terms of the price. I also get to enjoy the fresh air too.

The ride from Tagbilaran port to the island takes about 20-30 minutes.

FERRY 1.jpg

OPTION 2 - TAKE A PLANE

Philippine Airlines and Cebu Pacific Air have flights to Tagbilaran Airport. Taking the plane seems more expensive compared to option 1. The plane ride only takes 45 minutes from Cebu to Tagbilaran, and 1 hour 35 minutes from Manila to Tagbilaran.

From Tagbilaran airport, passengers can take a taxi or tricycle to Panglao Island.

WHEN IS THE BEST TIME TO VISIT PANGLAO ISLAND

Since the Philippines is an all-year-round summer season, the best time to pay a visit to the island is during summertime which is from March to May. However, bear in mind that it will be crowded and more touristy vibe during these times as it is the peak period.

Avoid going there during rainy and monsoon season around June to September. Lots of rainbands and possible storms can happen during this period.

Visiting during festive periods such as Christmas, New Years, Easter or any public holidays in the Philippines is an ideal time too. Just be prepared with the vast crowd.

THINGS TO DO IN PANGLAO ISLAND

There are plenty of things to do on the island. If you are up for some diving adventure, this is the right place for you.

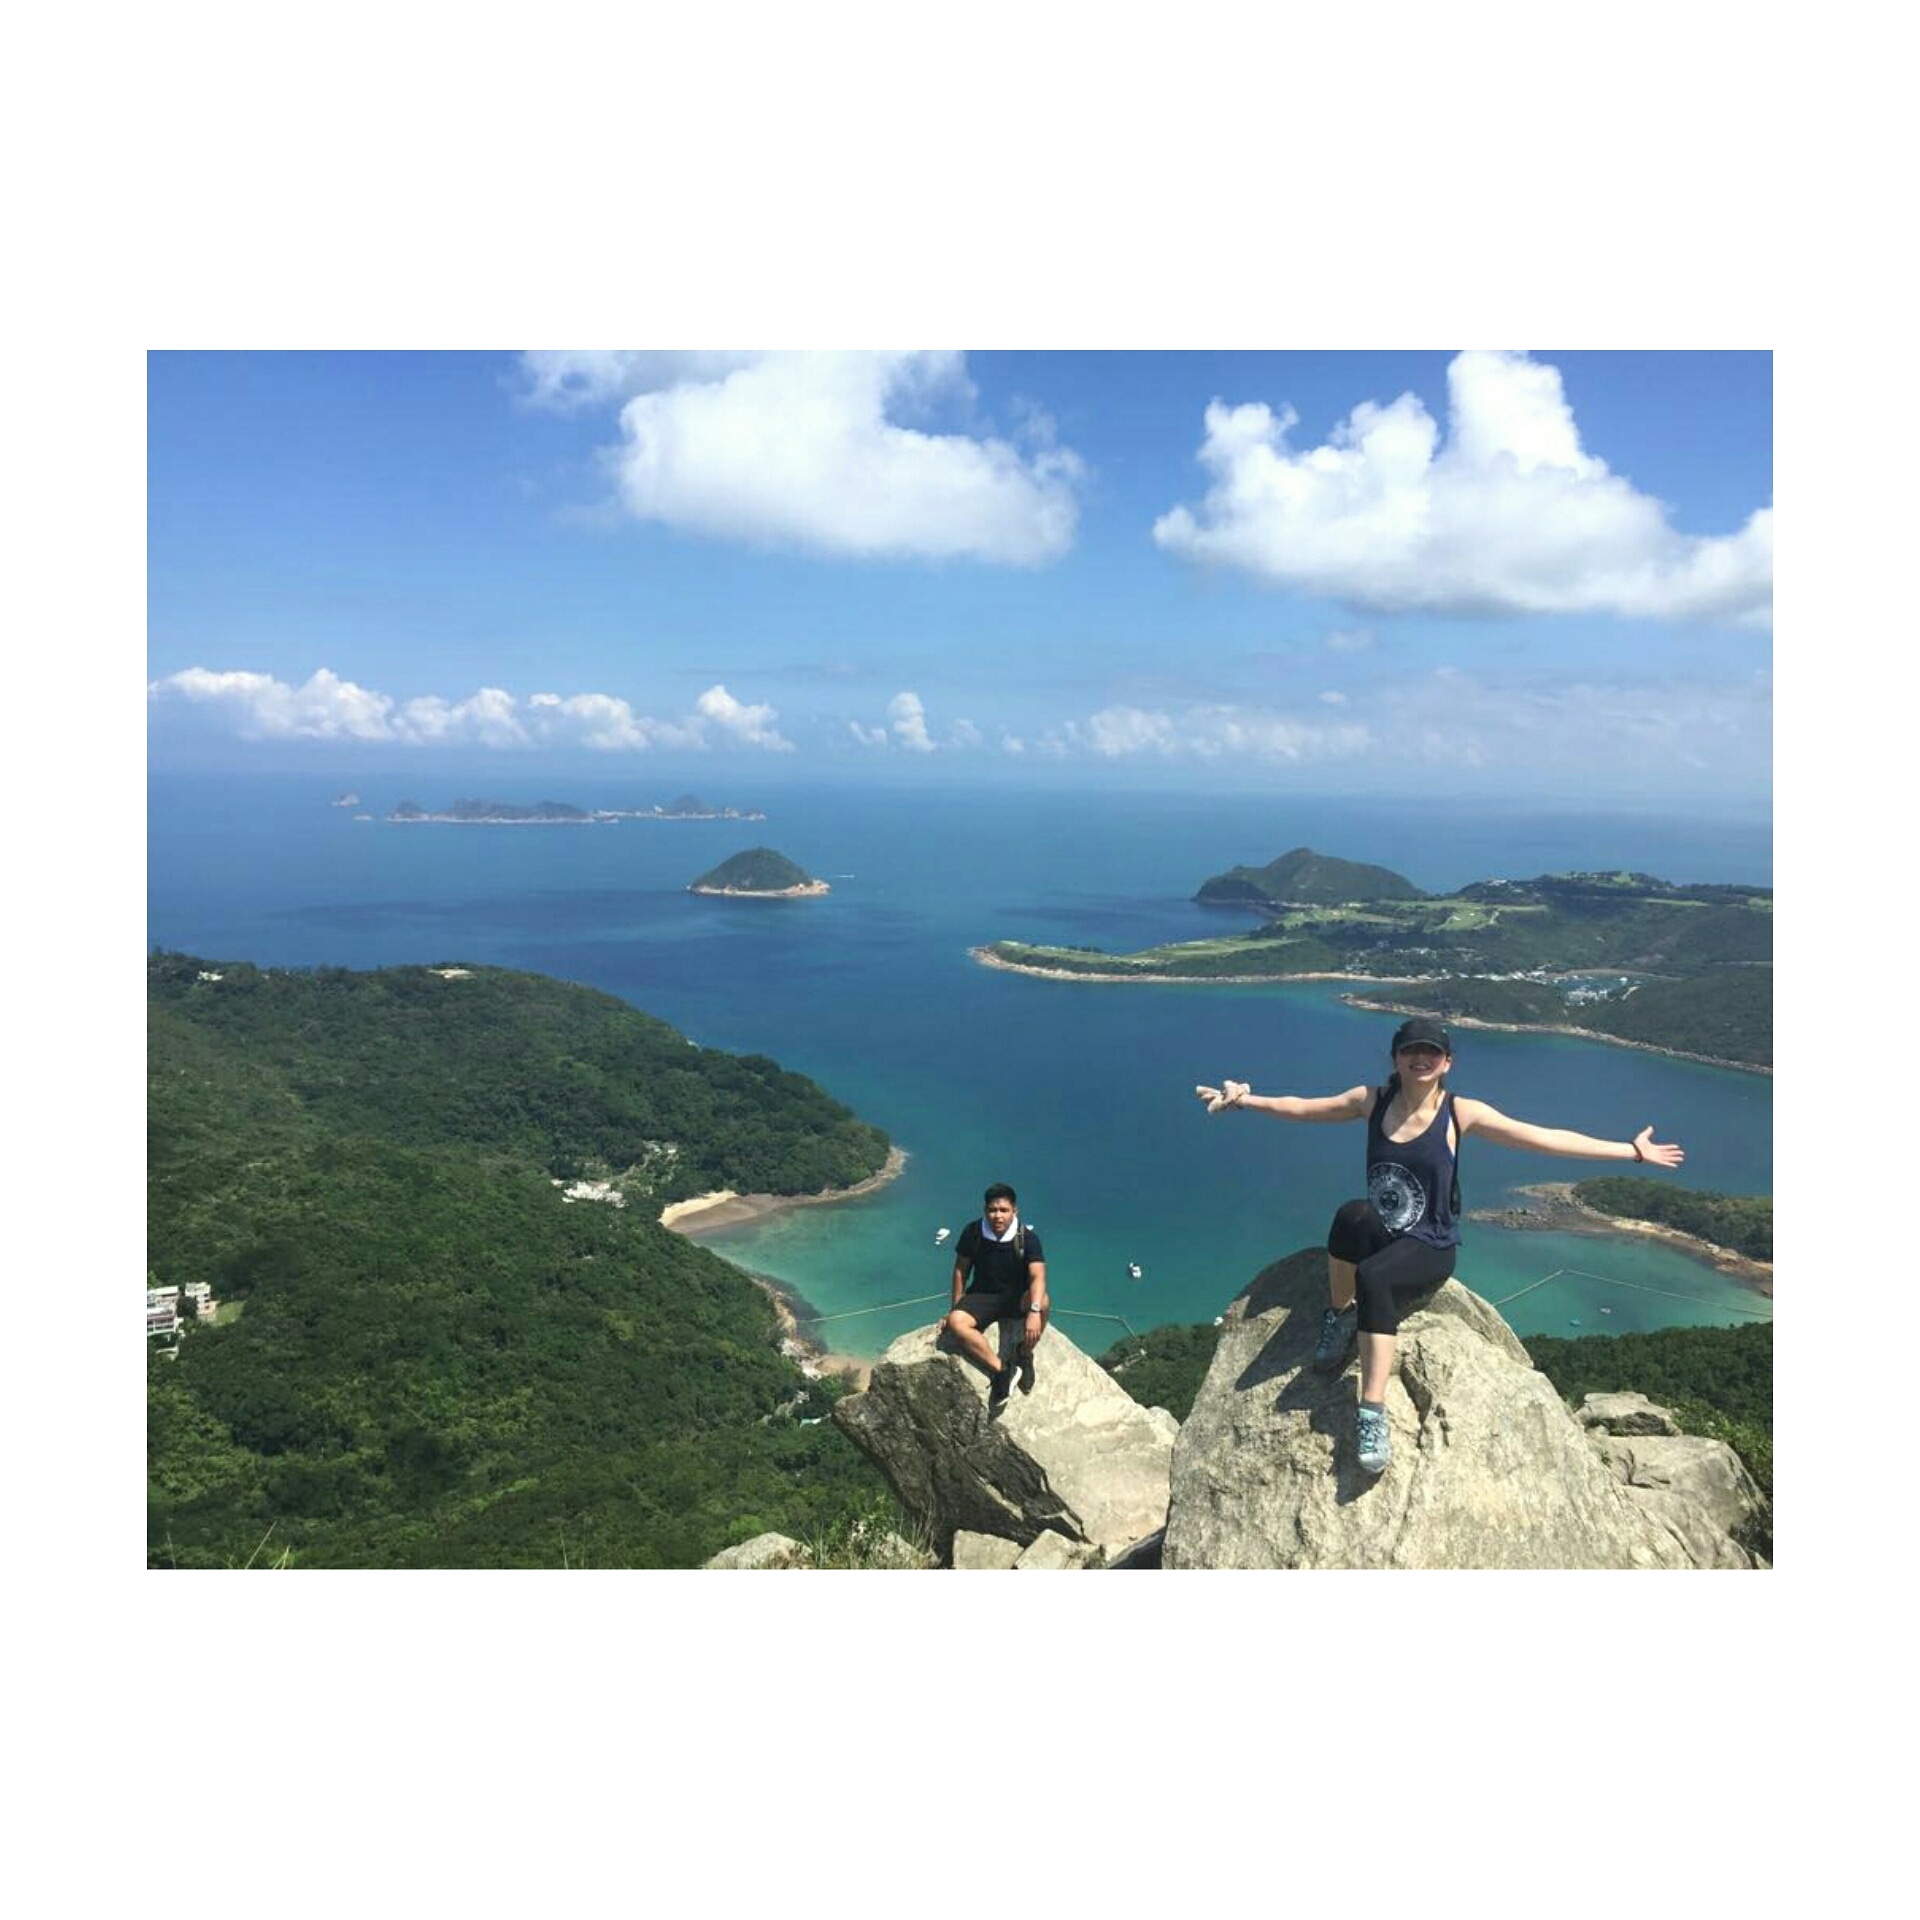
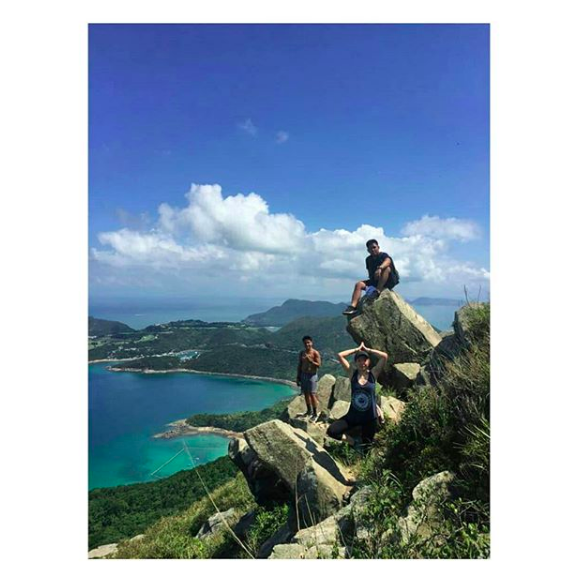
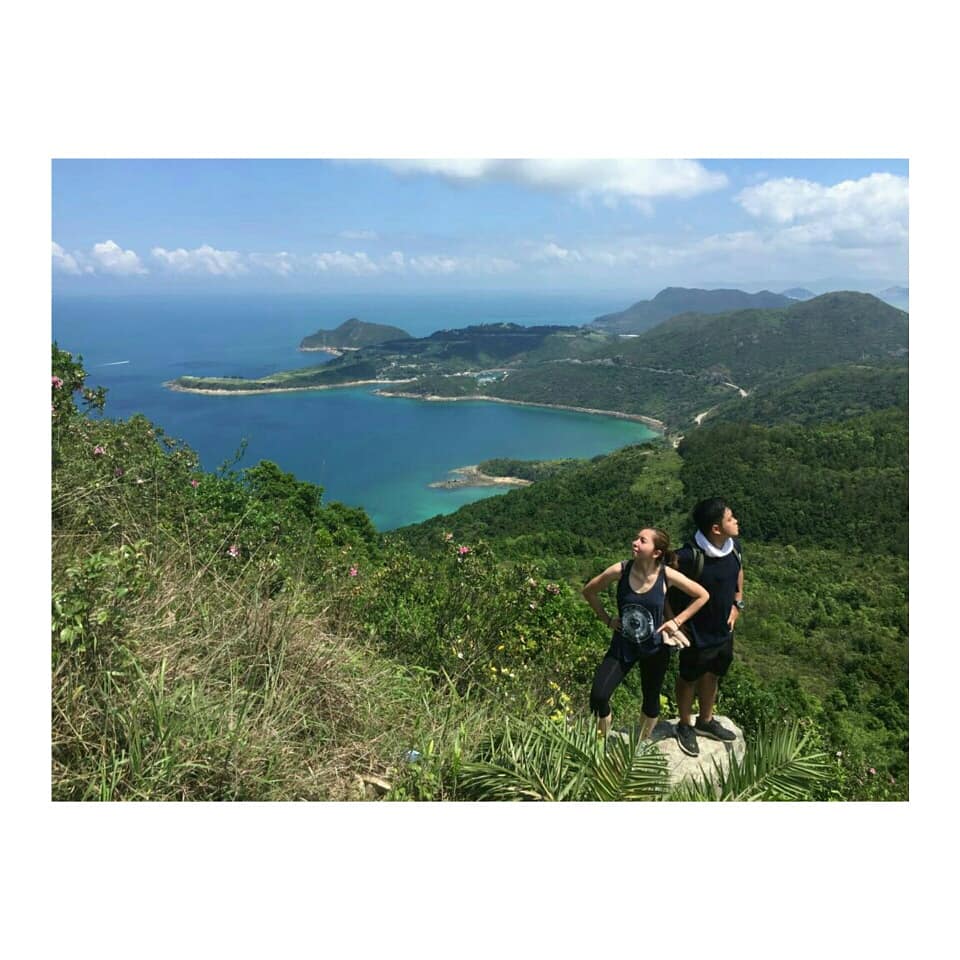
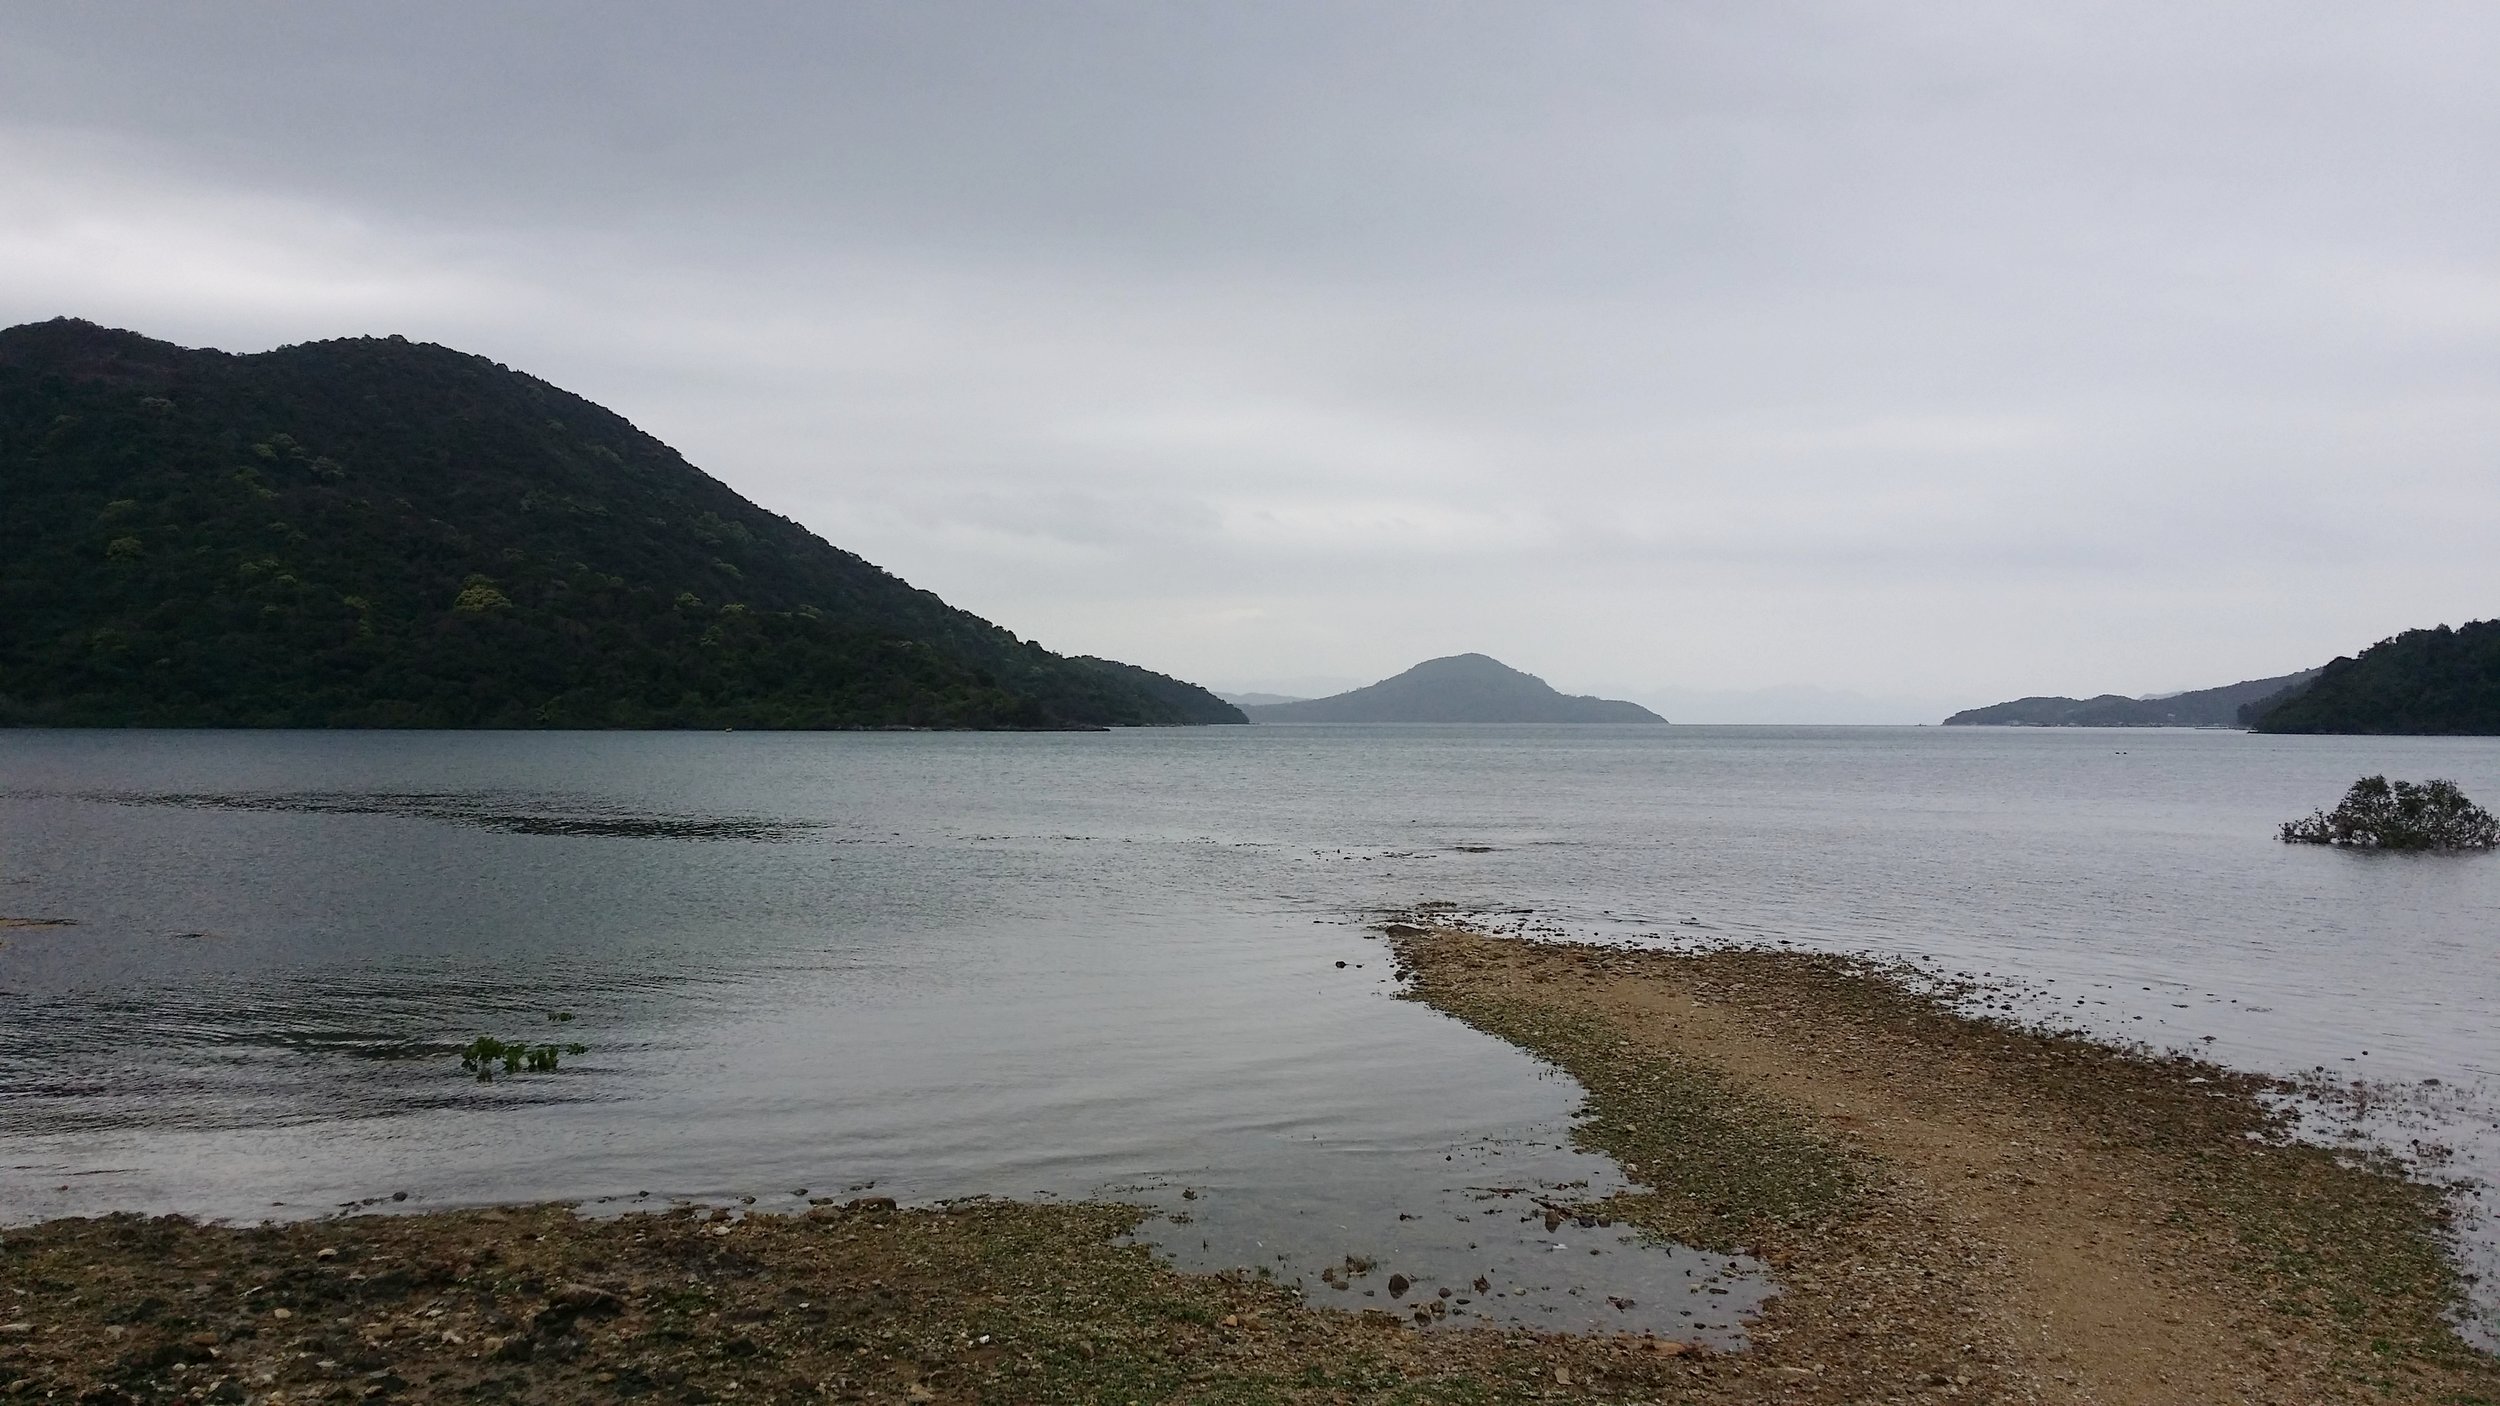
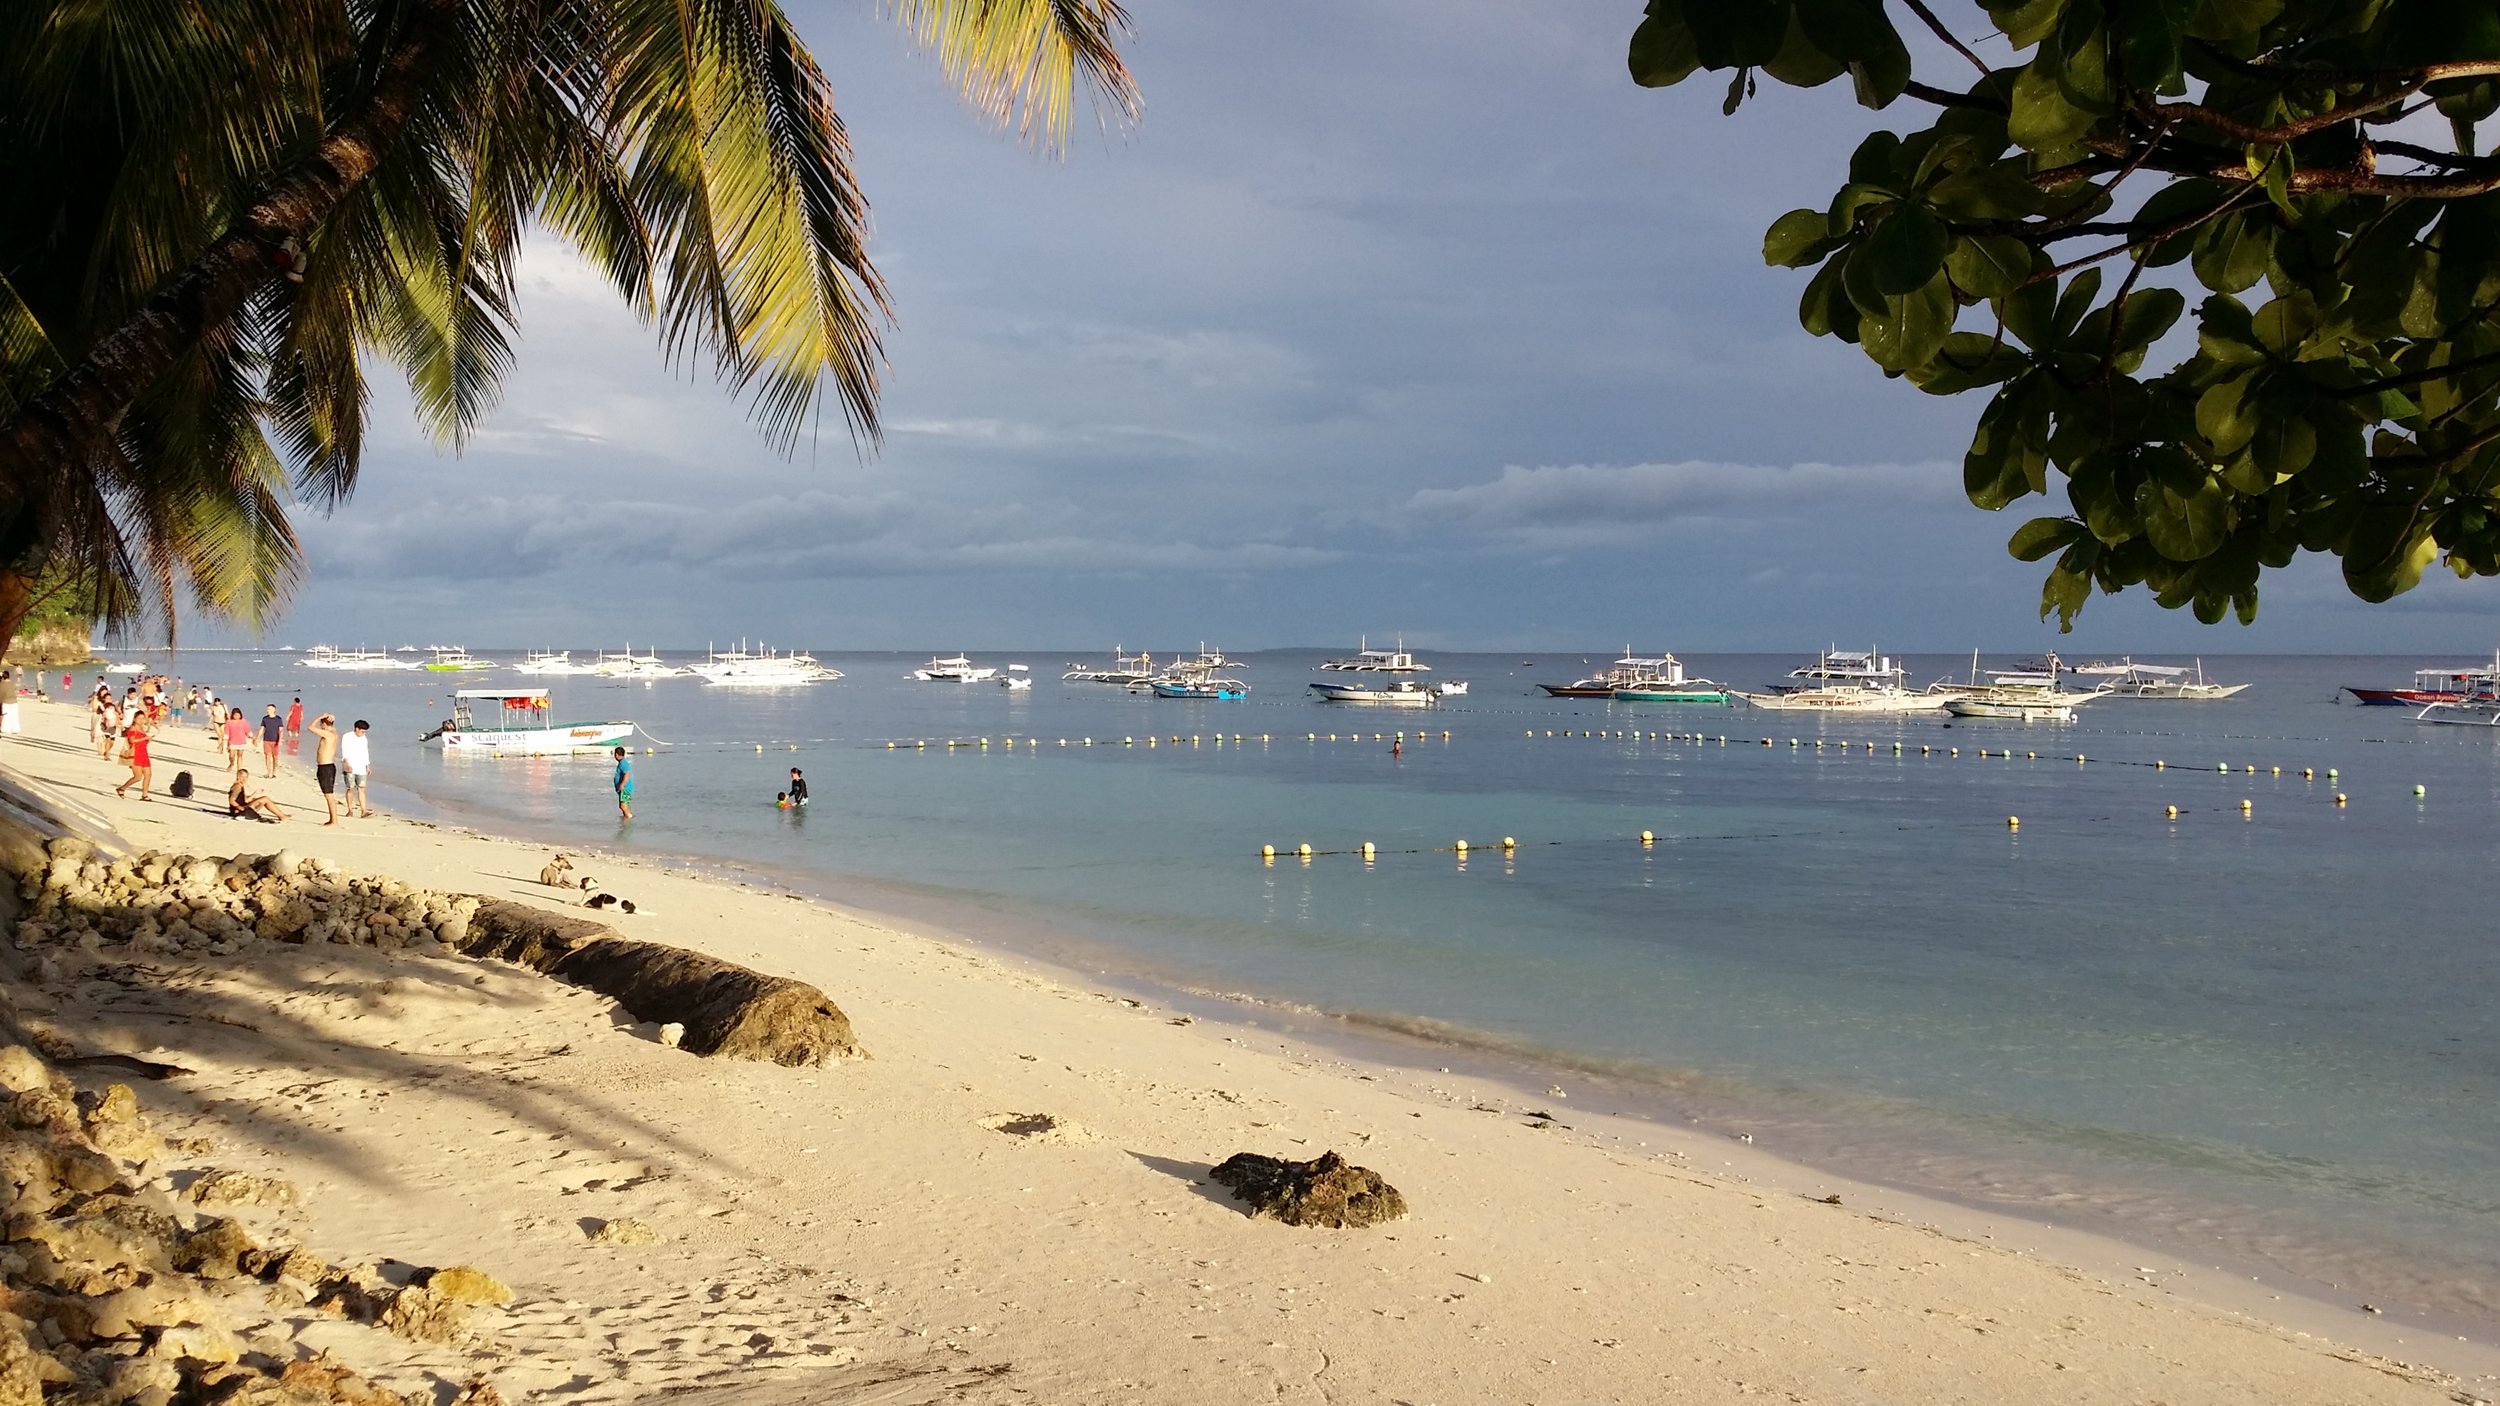
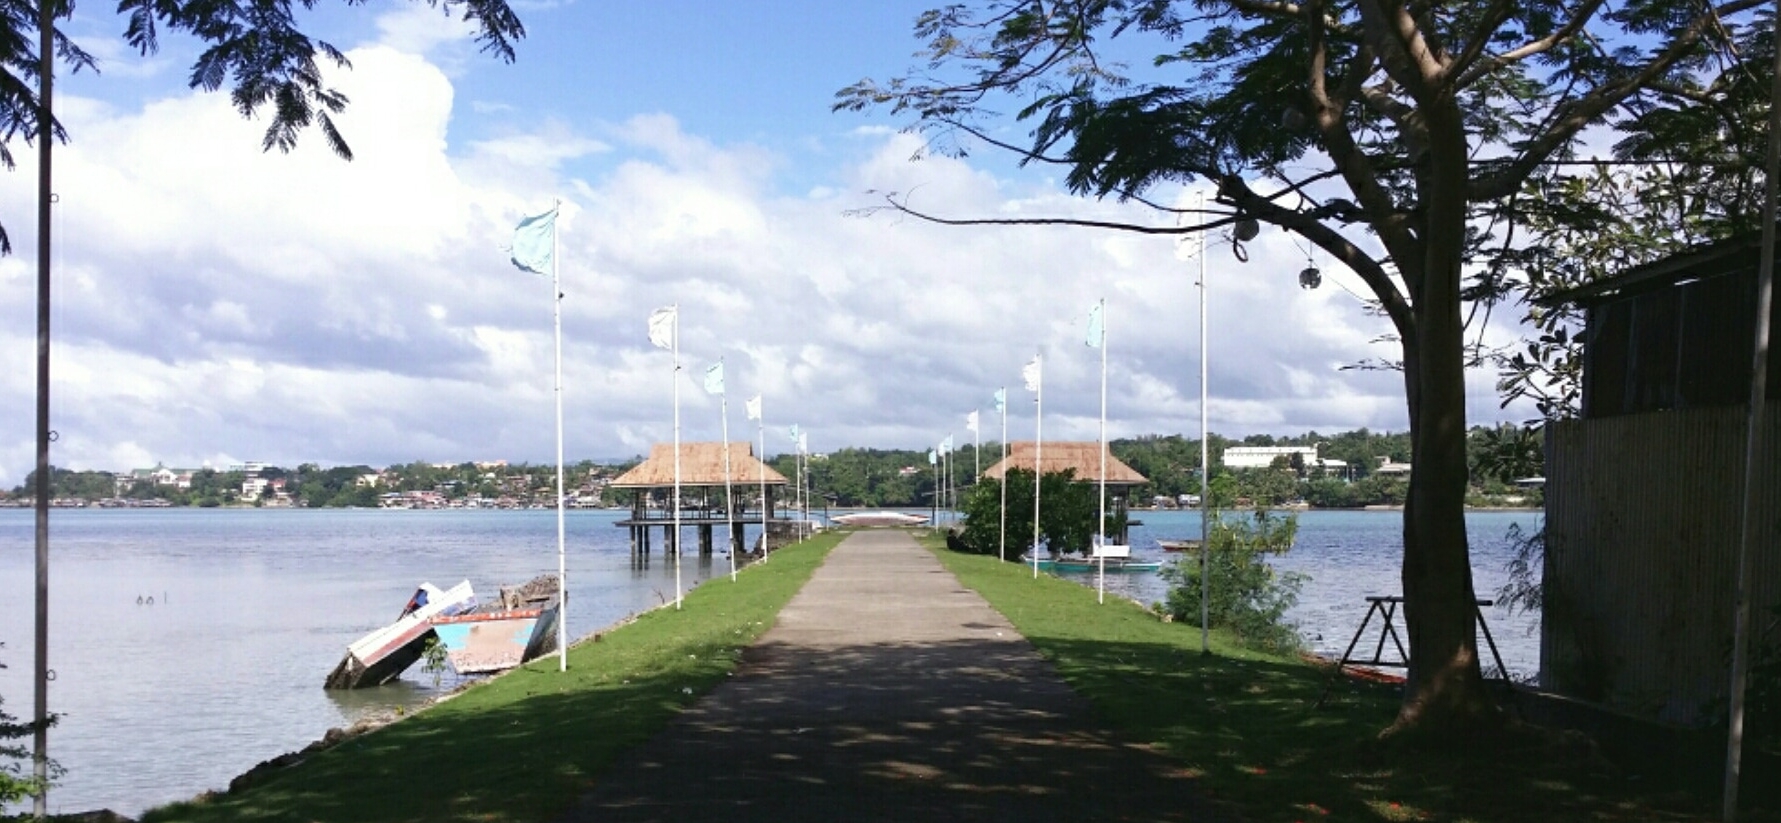
ISLAND AND BEACH TOUR

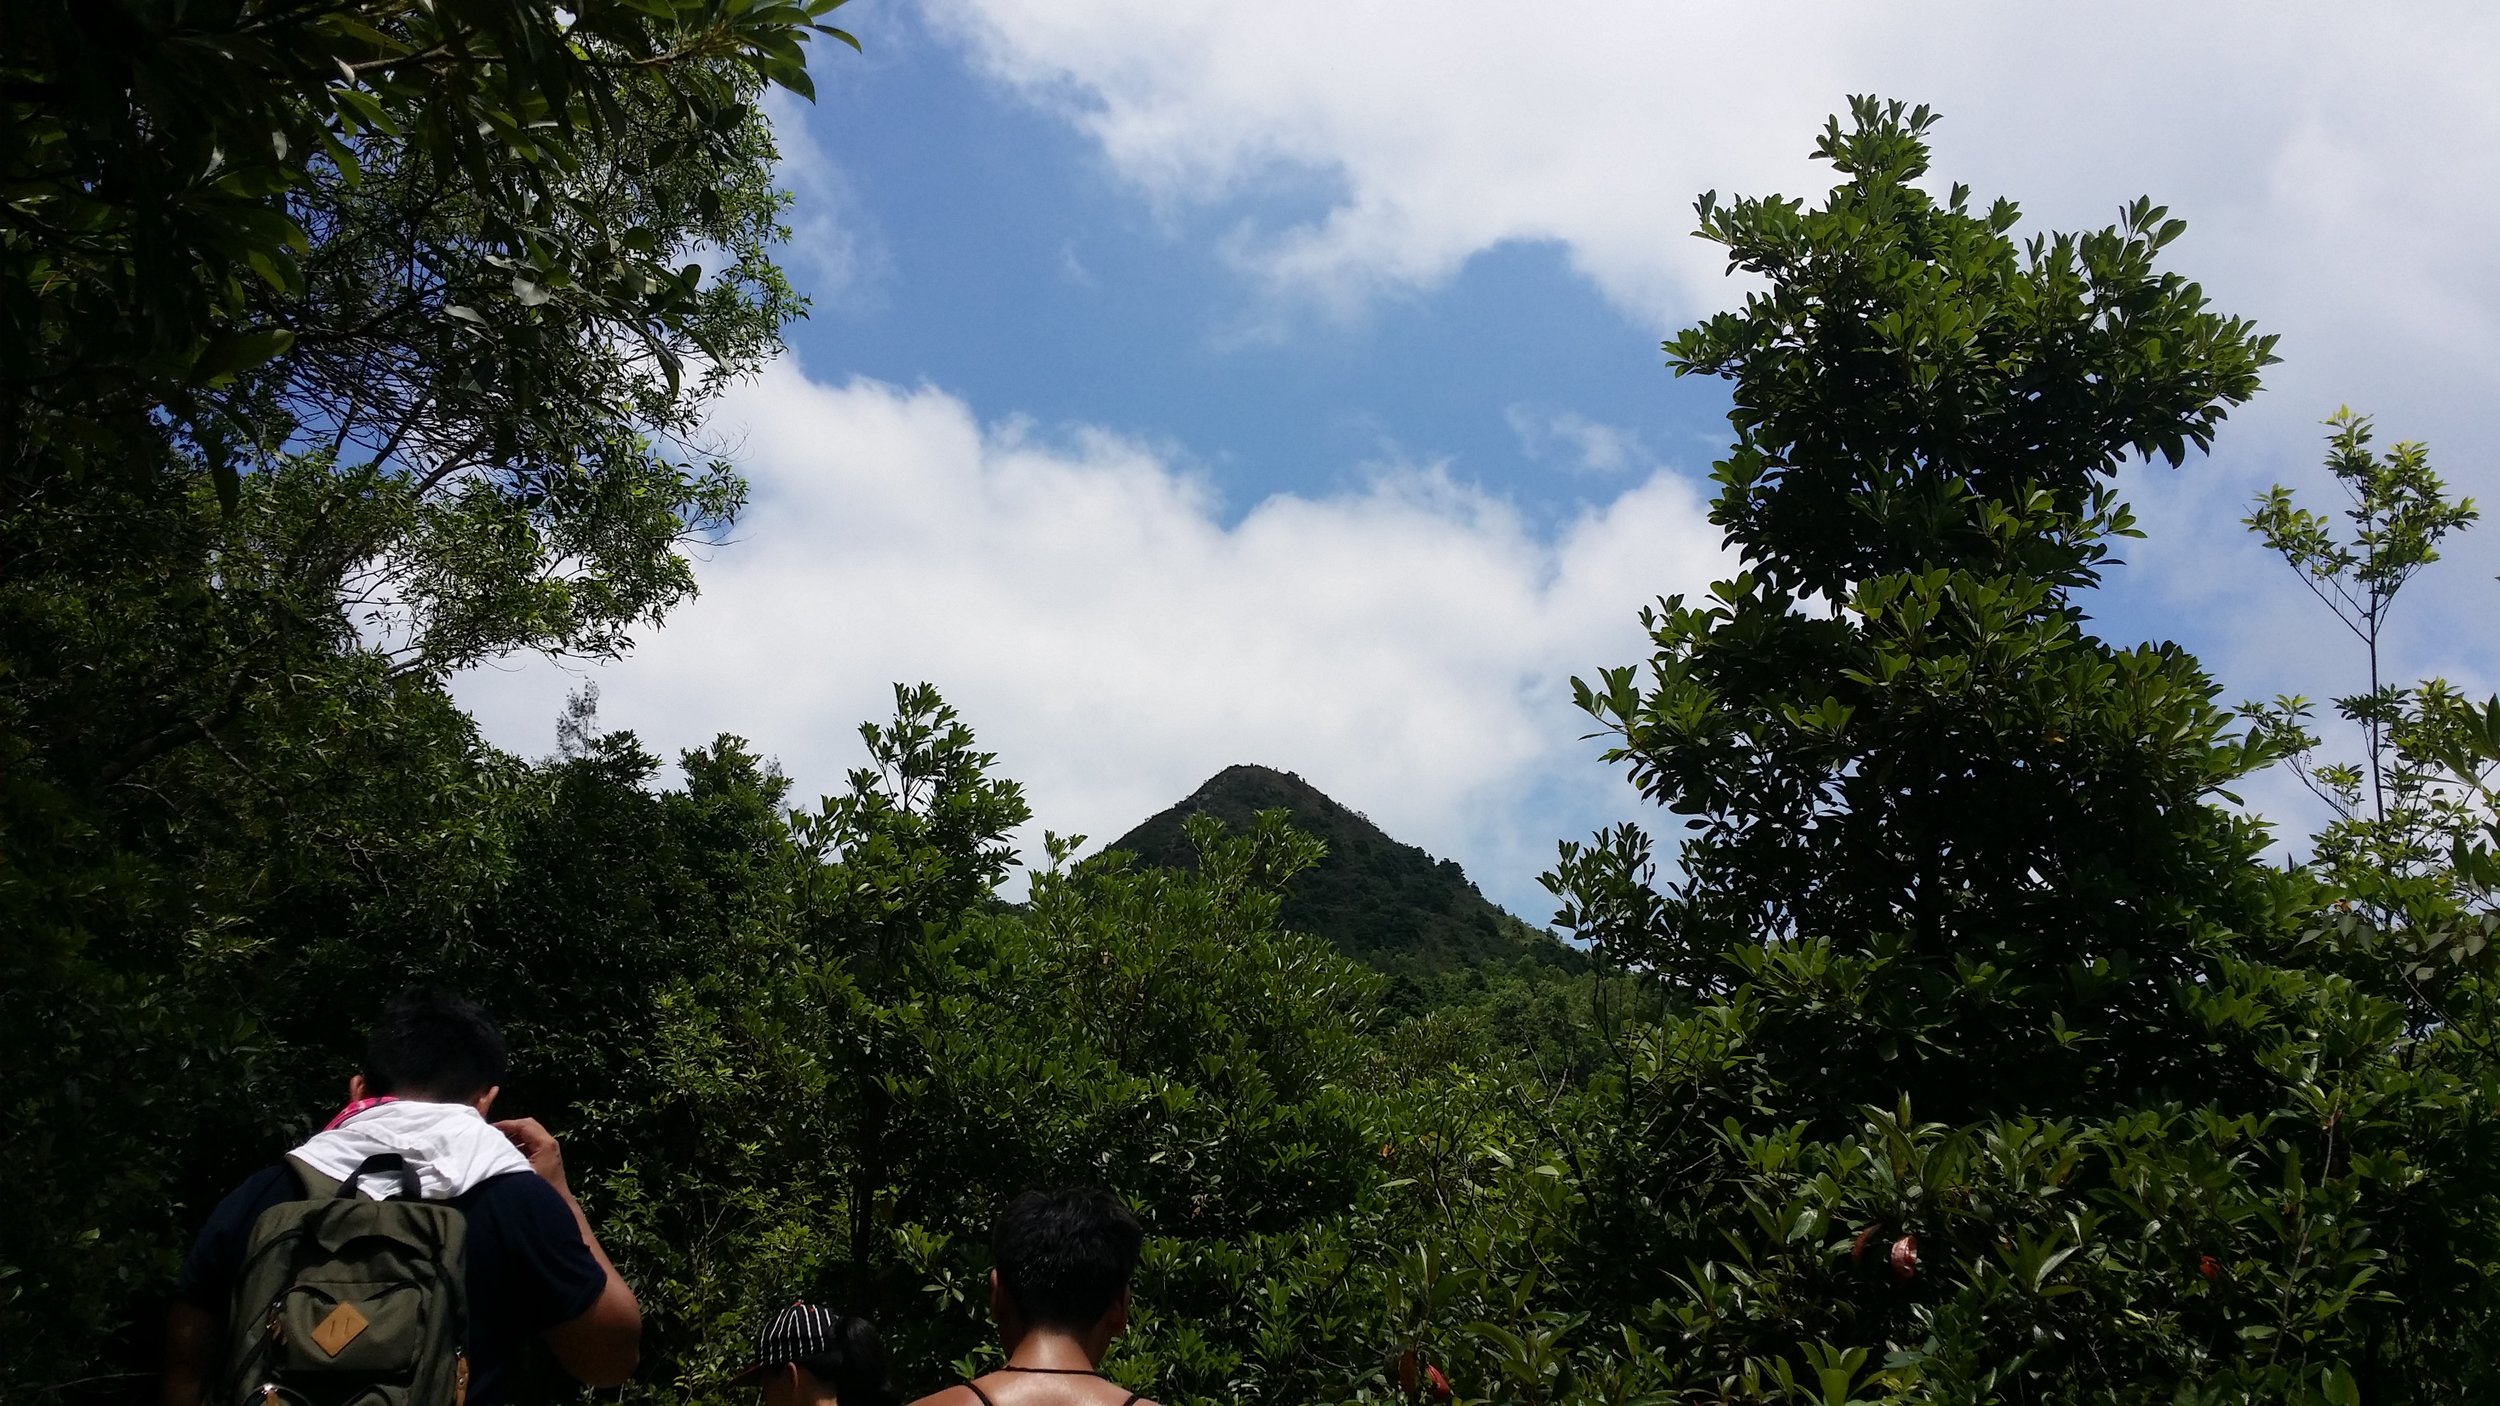
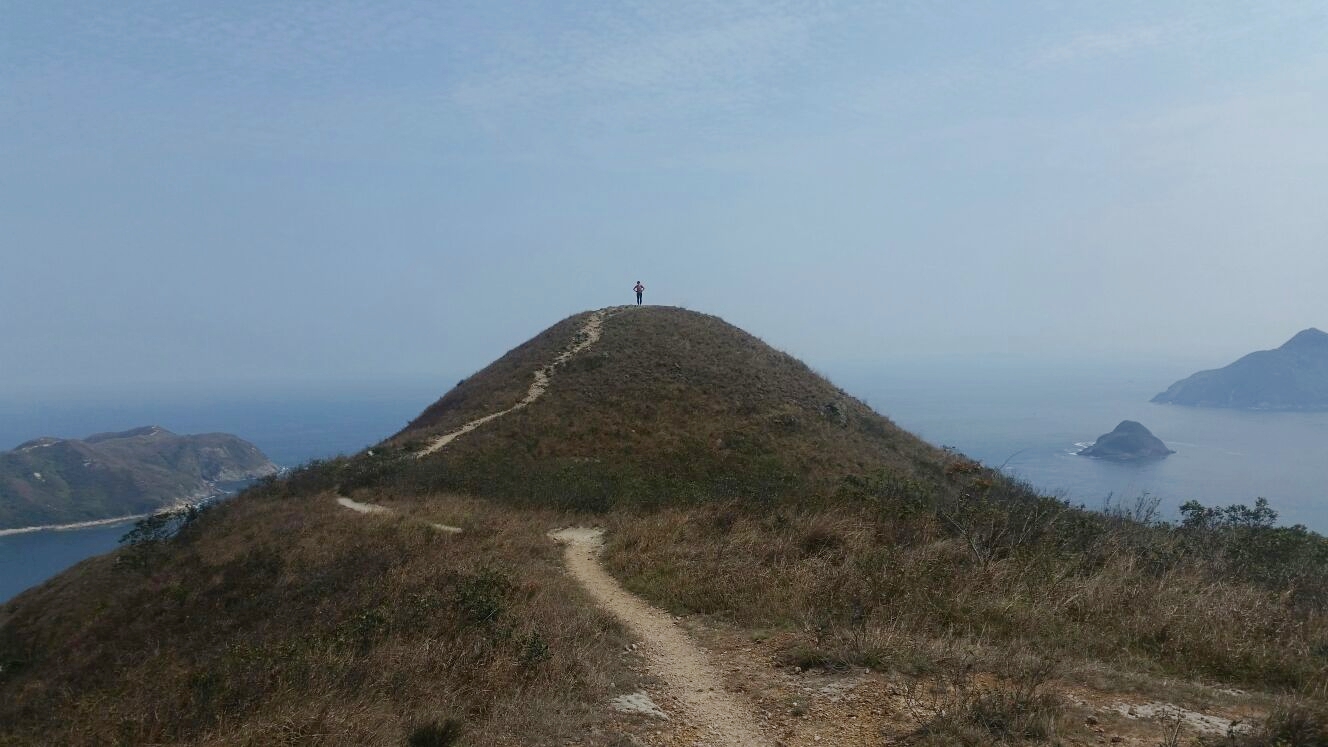
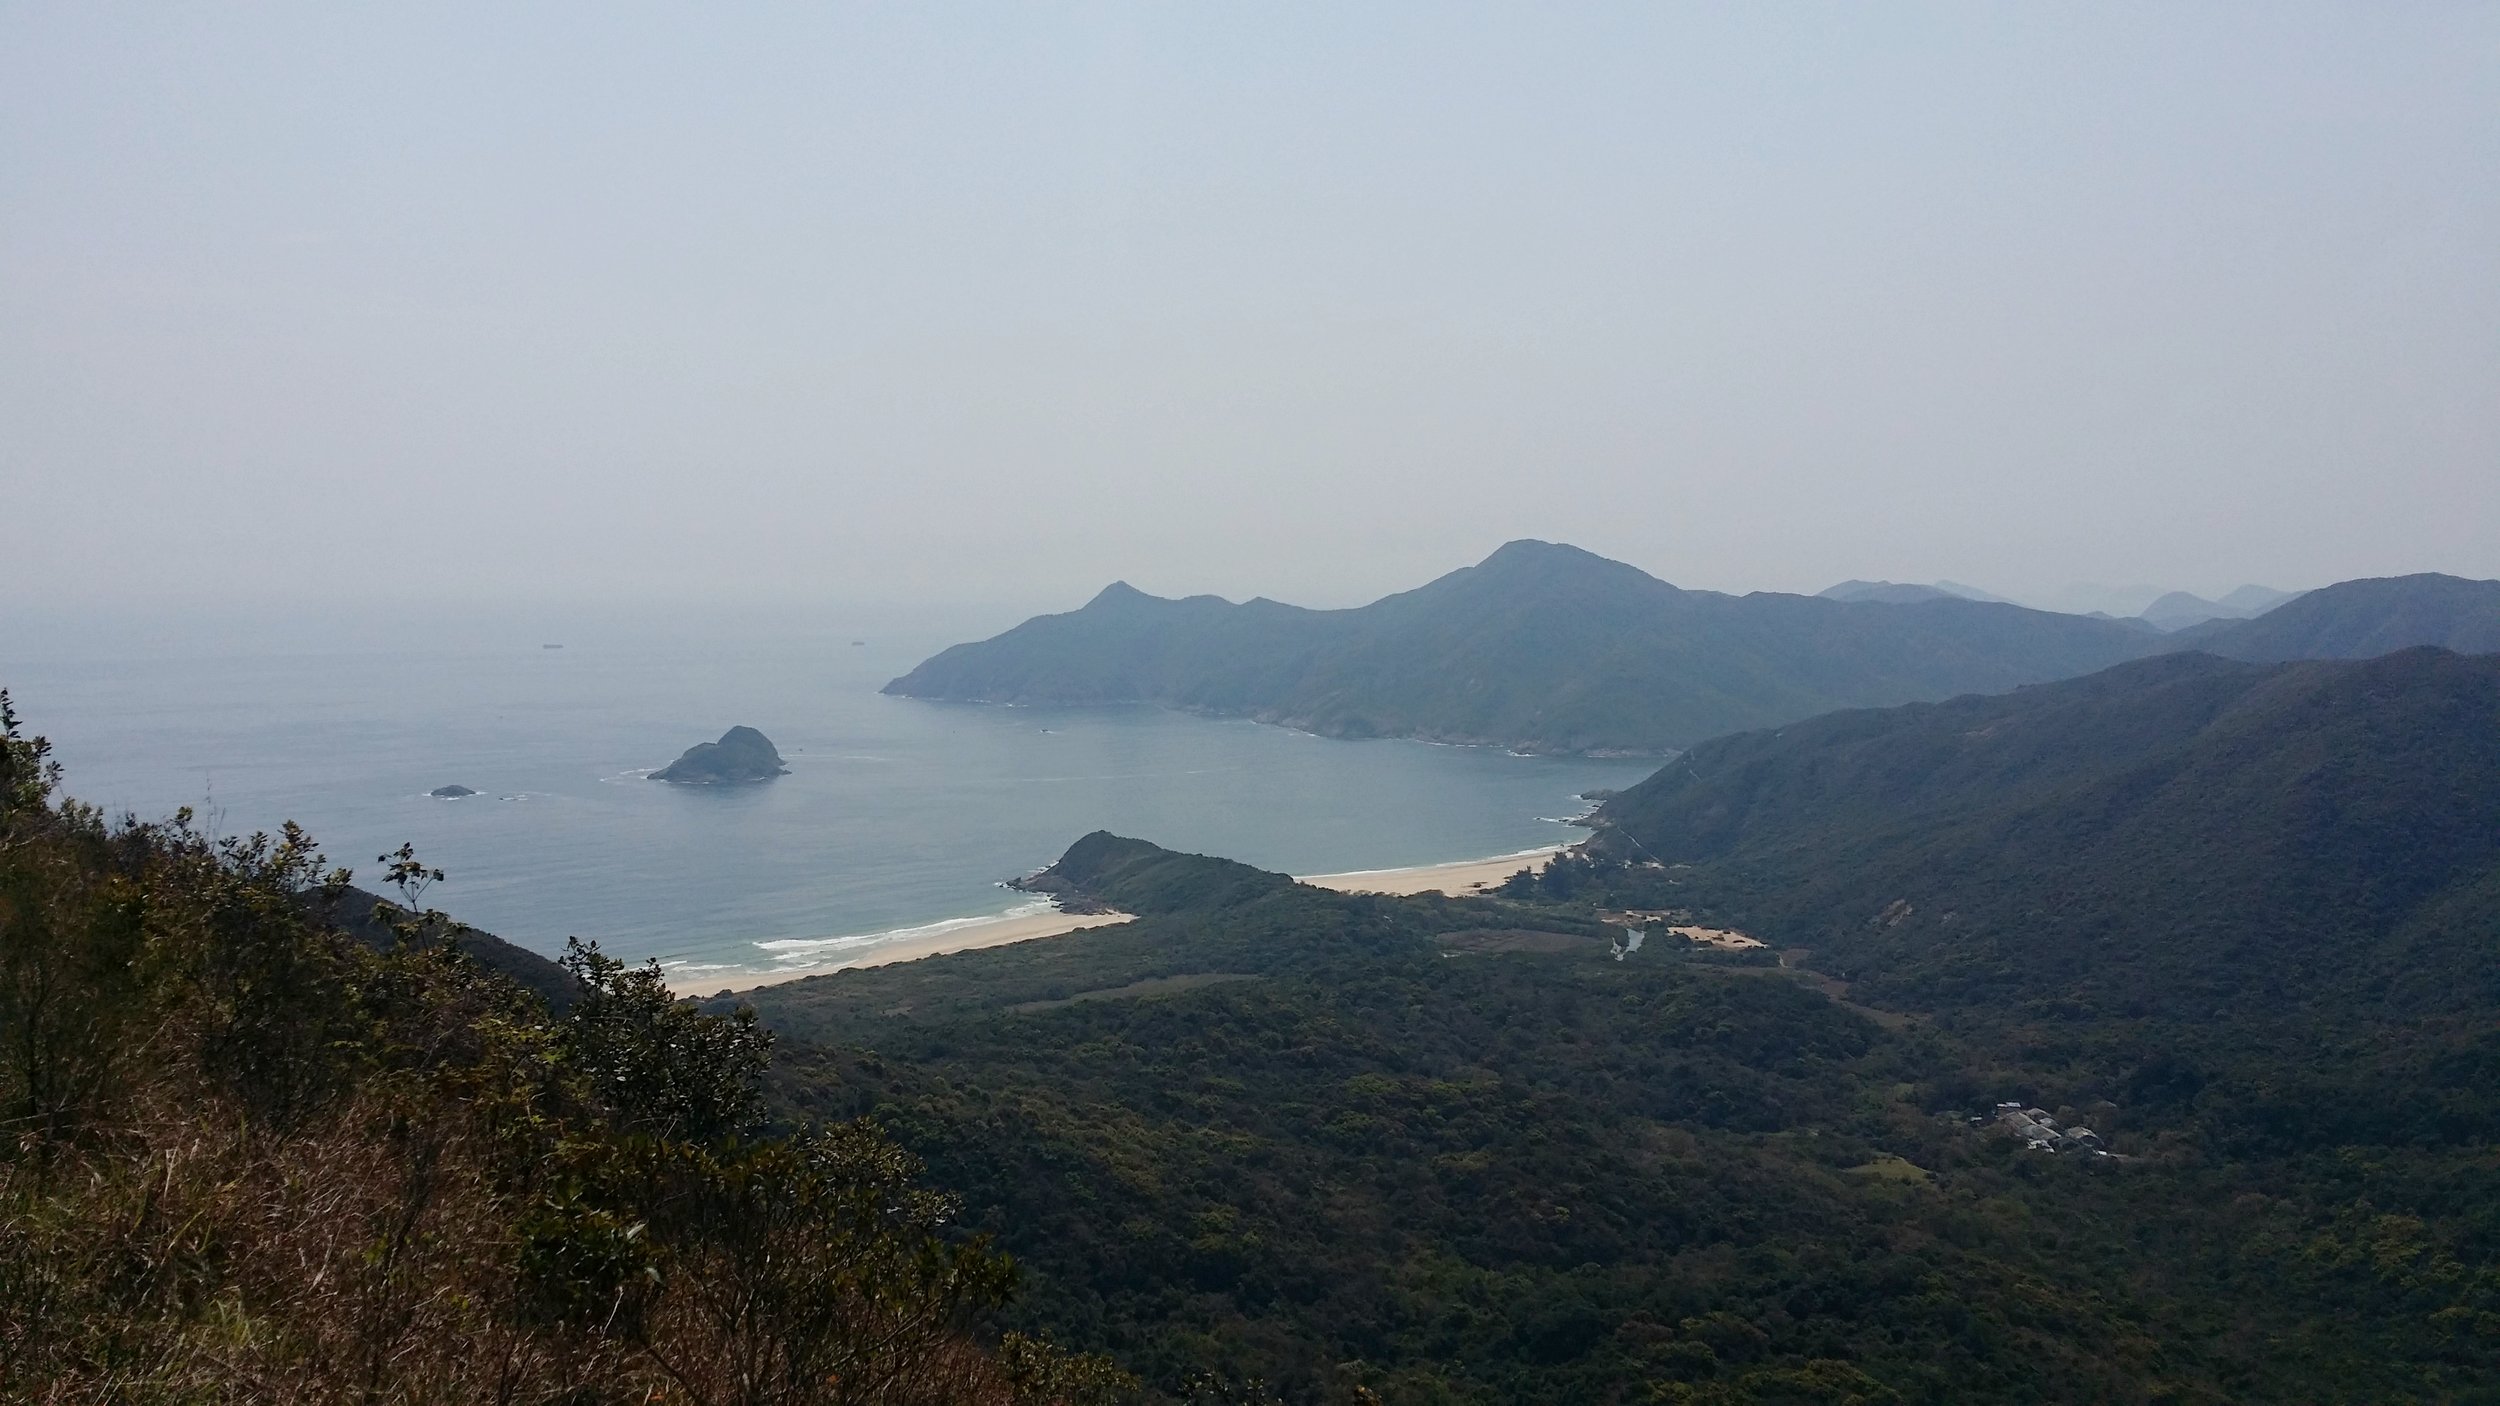
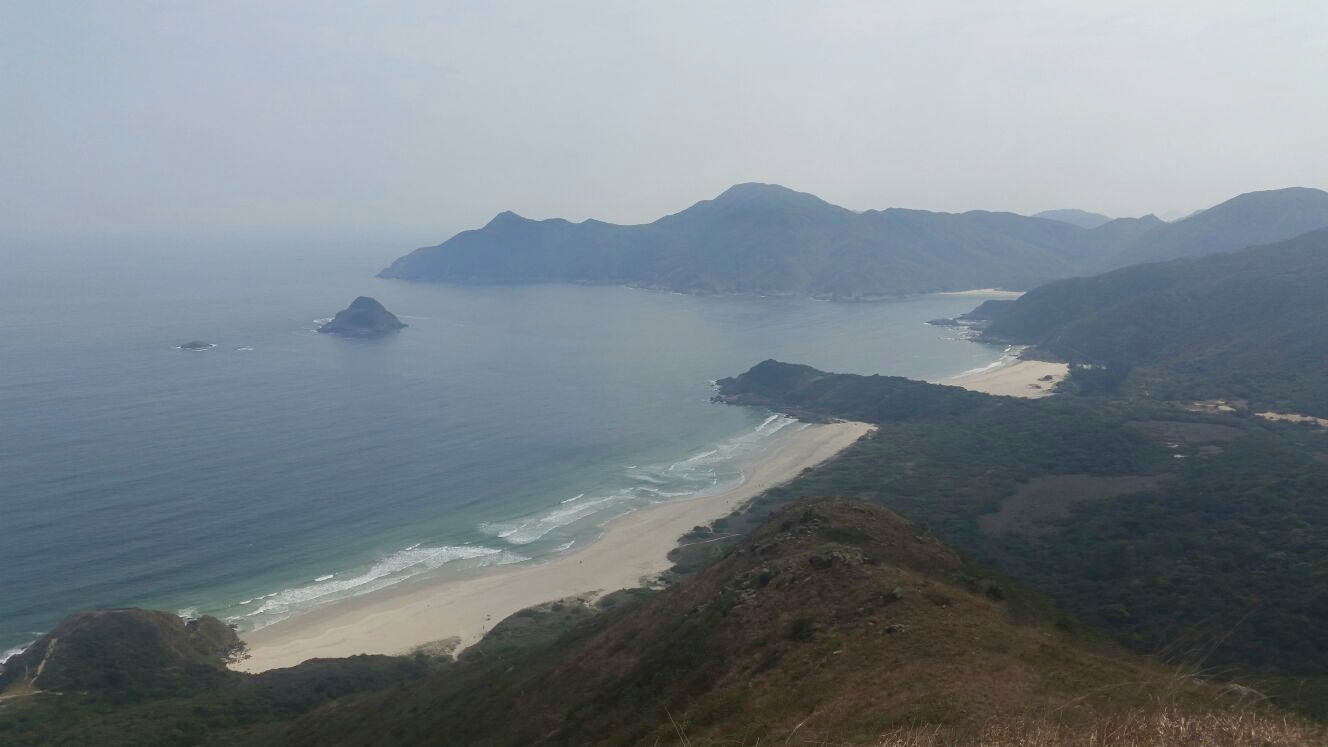
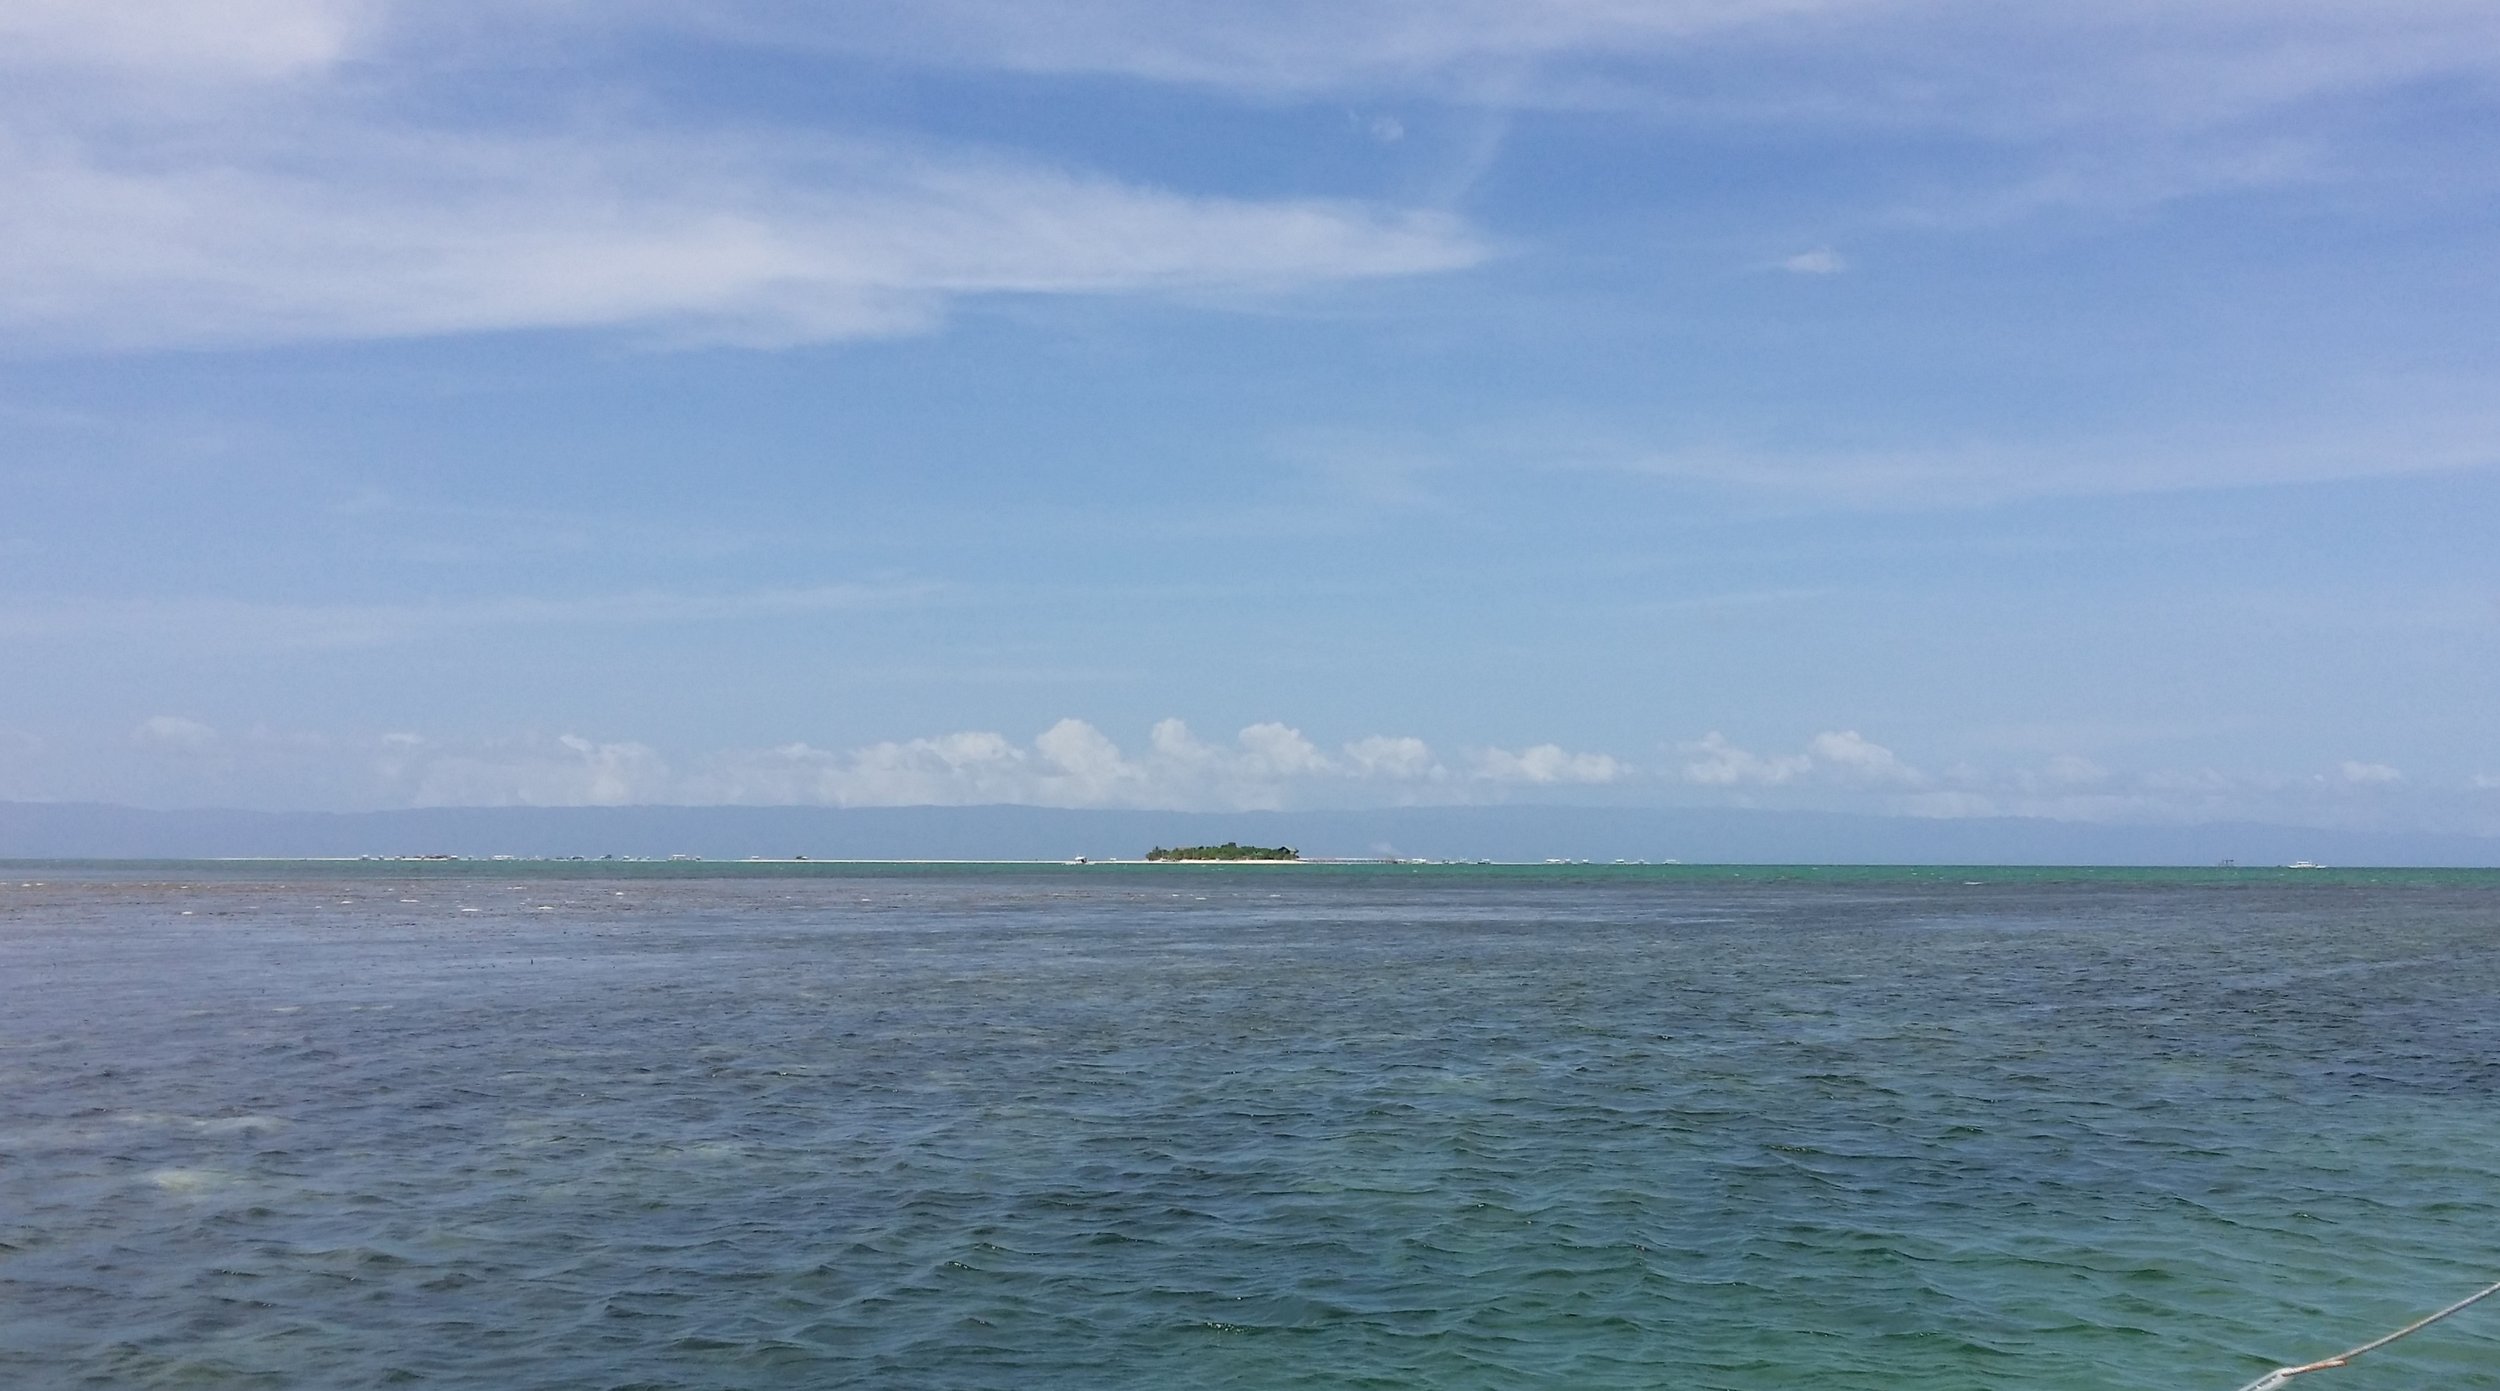
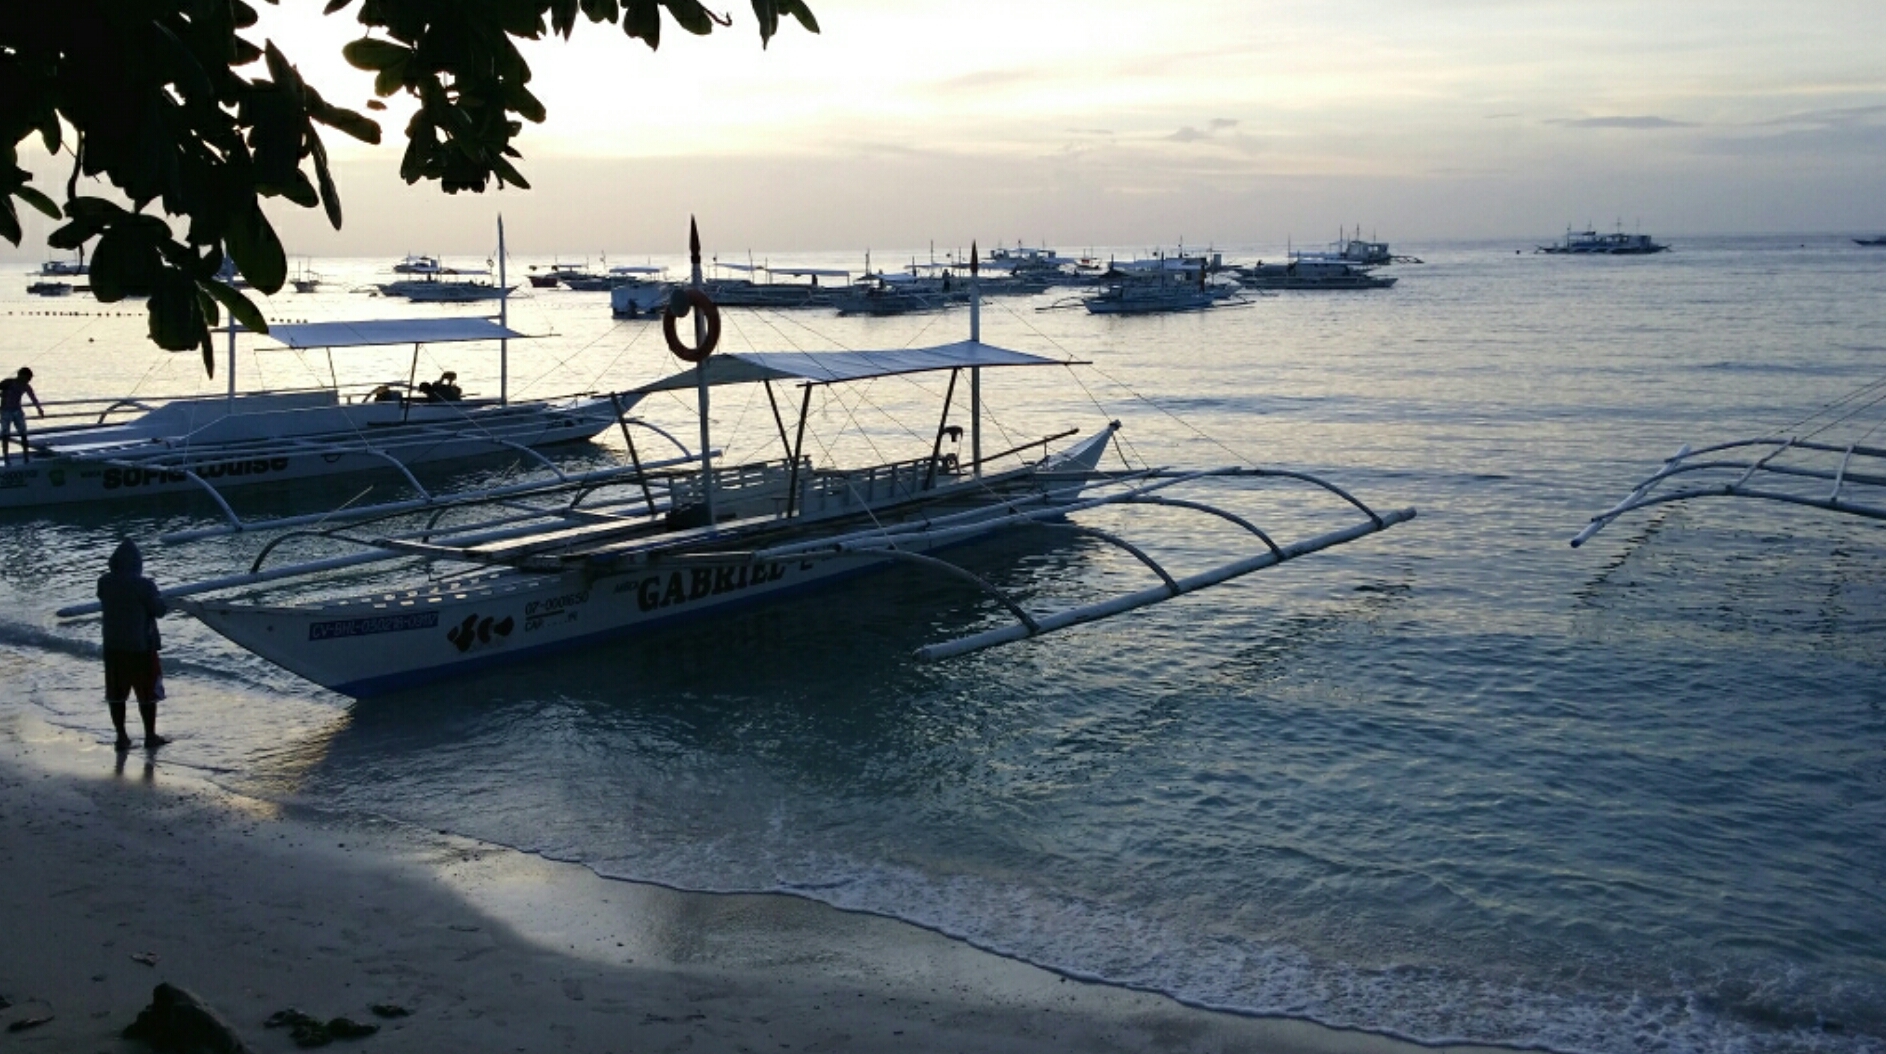
Island hopping is a must-do during your trip to Panglao. There are plenty of other islands around Panglao for you to dive, swim and stroll around as well as enjoy a hot sunny day by the beach with some coconut.

It is effortless to book your island hopping as tour agents are everywhere around the island, and it is recommended to book your trip a day or two in advance especially in the peak season as it can get fully-booked. The boats usually leave early in the morning between six to seven in the morning.

You may ask your boatman to bring you to the area where you can enjoy a few minutes to watch the dolphins leap around the ocean. If you are in luck, you may catch them jumping around the water.

Here is a list of Islands or beaches you can visit in Panglao:

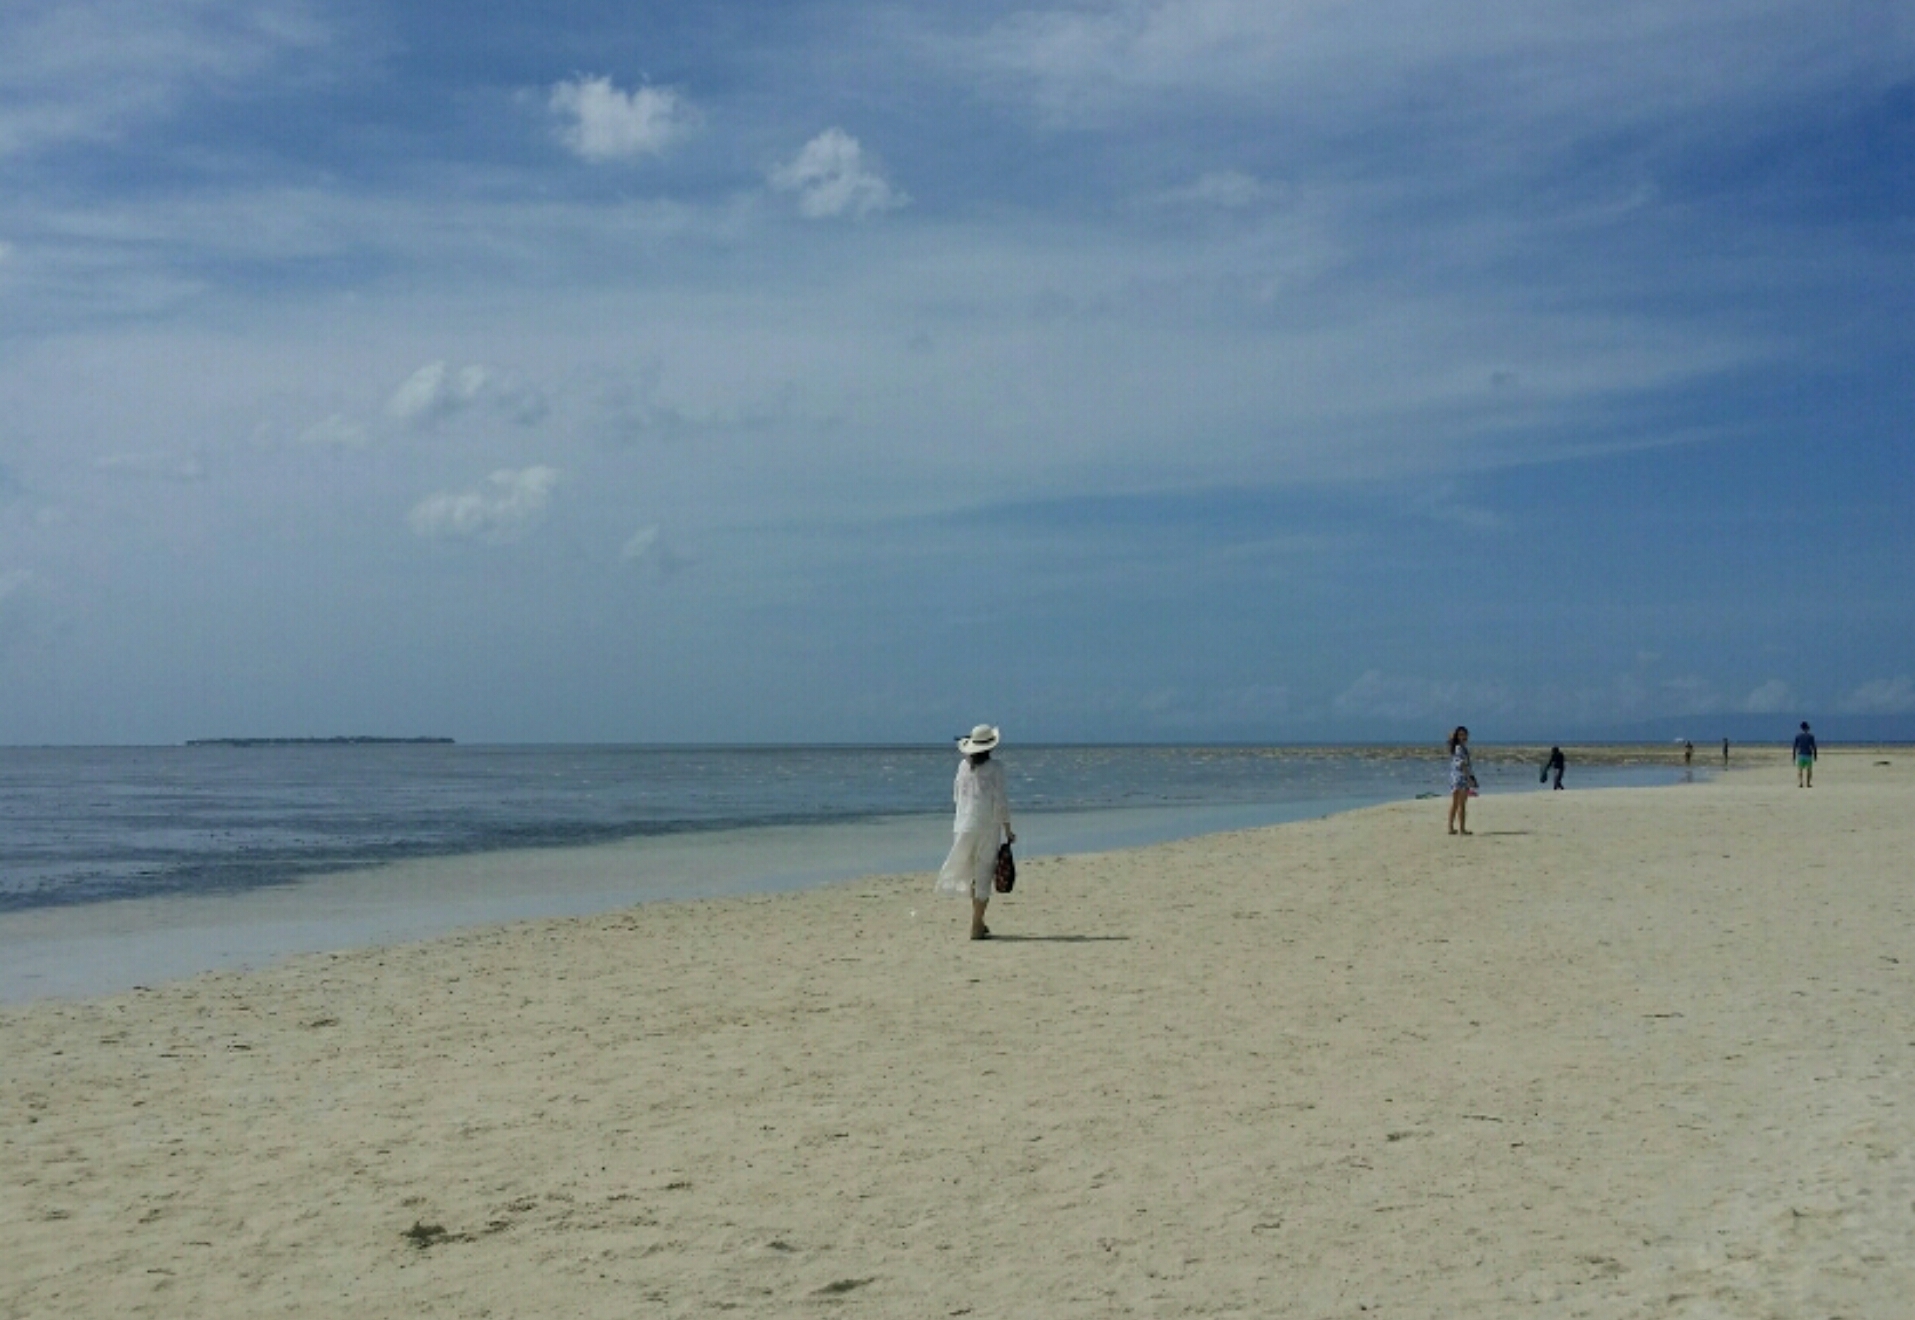
  • Virgin Island - Watch out for starfish while you walk around the sand beach, they’re everywhere.

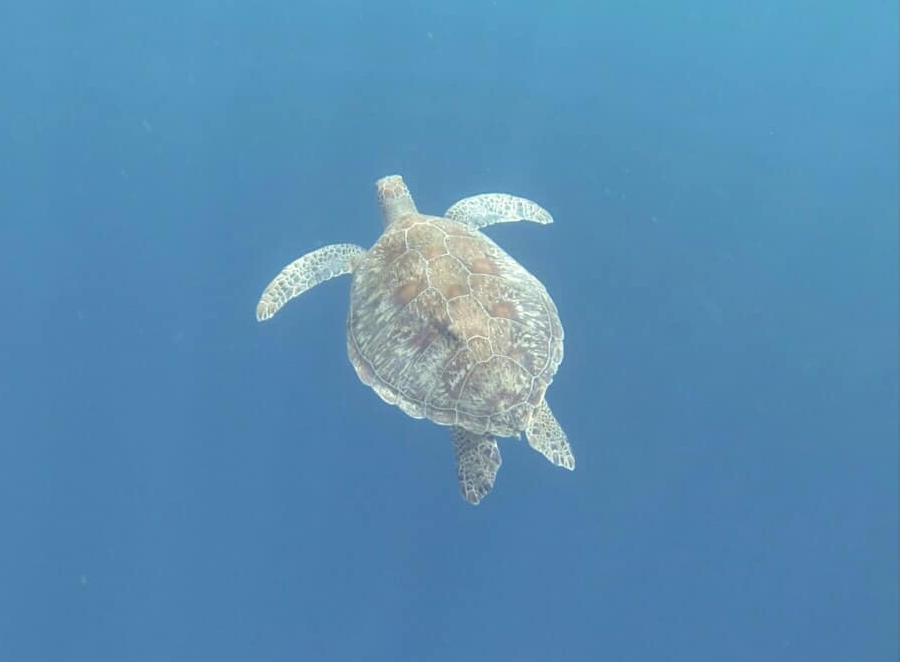
  • Balicasag Island - The home of the Pawikan (Sea Turtles). Try to catch them if you can!

  • Doljo Beach - Beautiful and crystal clear water.

  • Bogobo Beach - This beach has a very unique chalk-like sand.

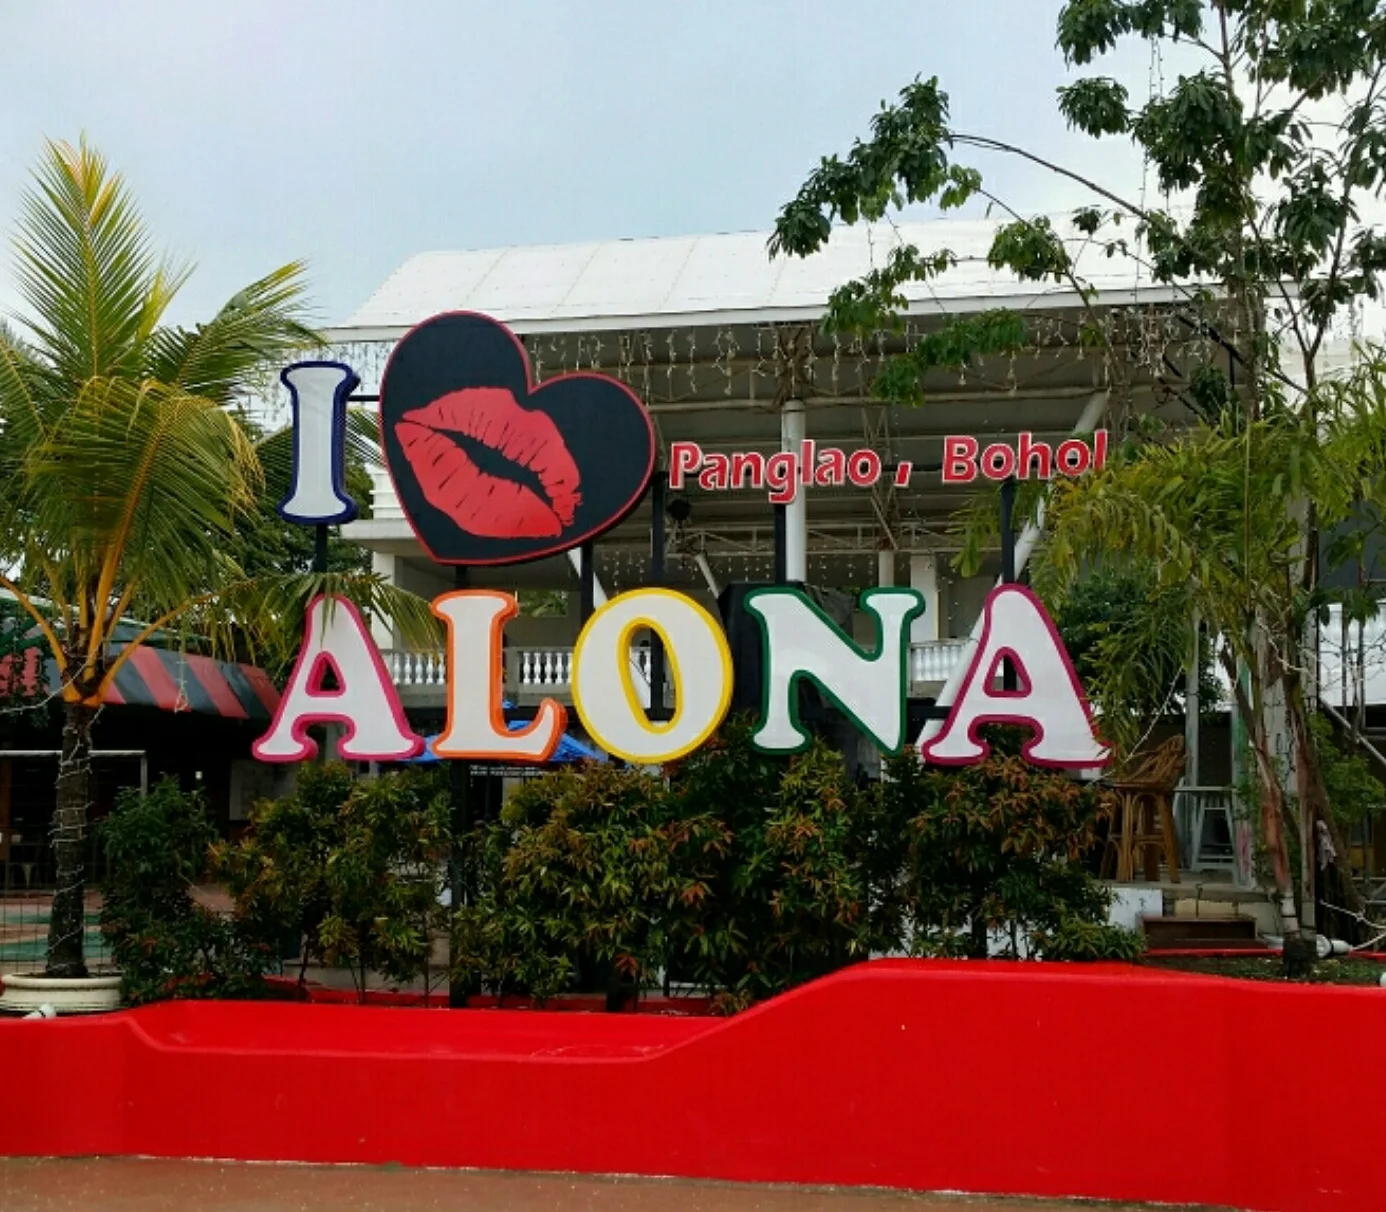
  • Alona Beach - The main beach and probably the most developed beach in Panglao.

  • Danao Beach - Standing next to Alona Beach. There are a number of resort situated there.
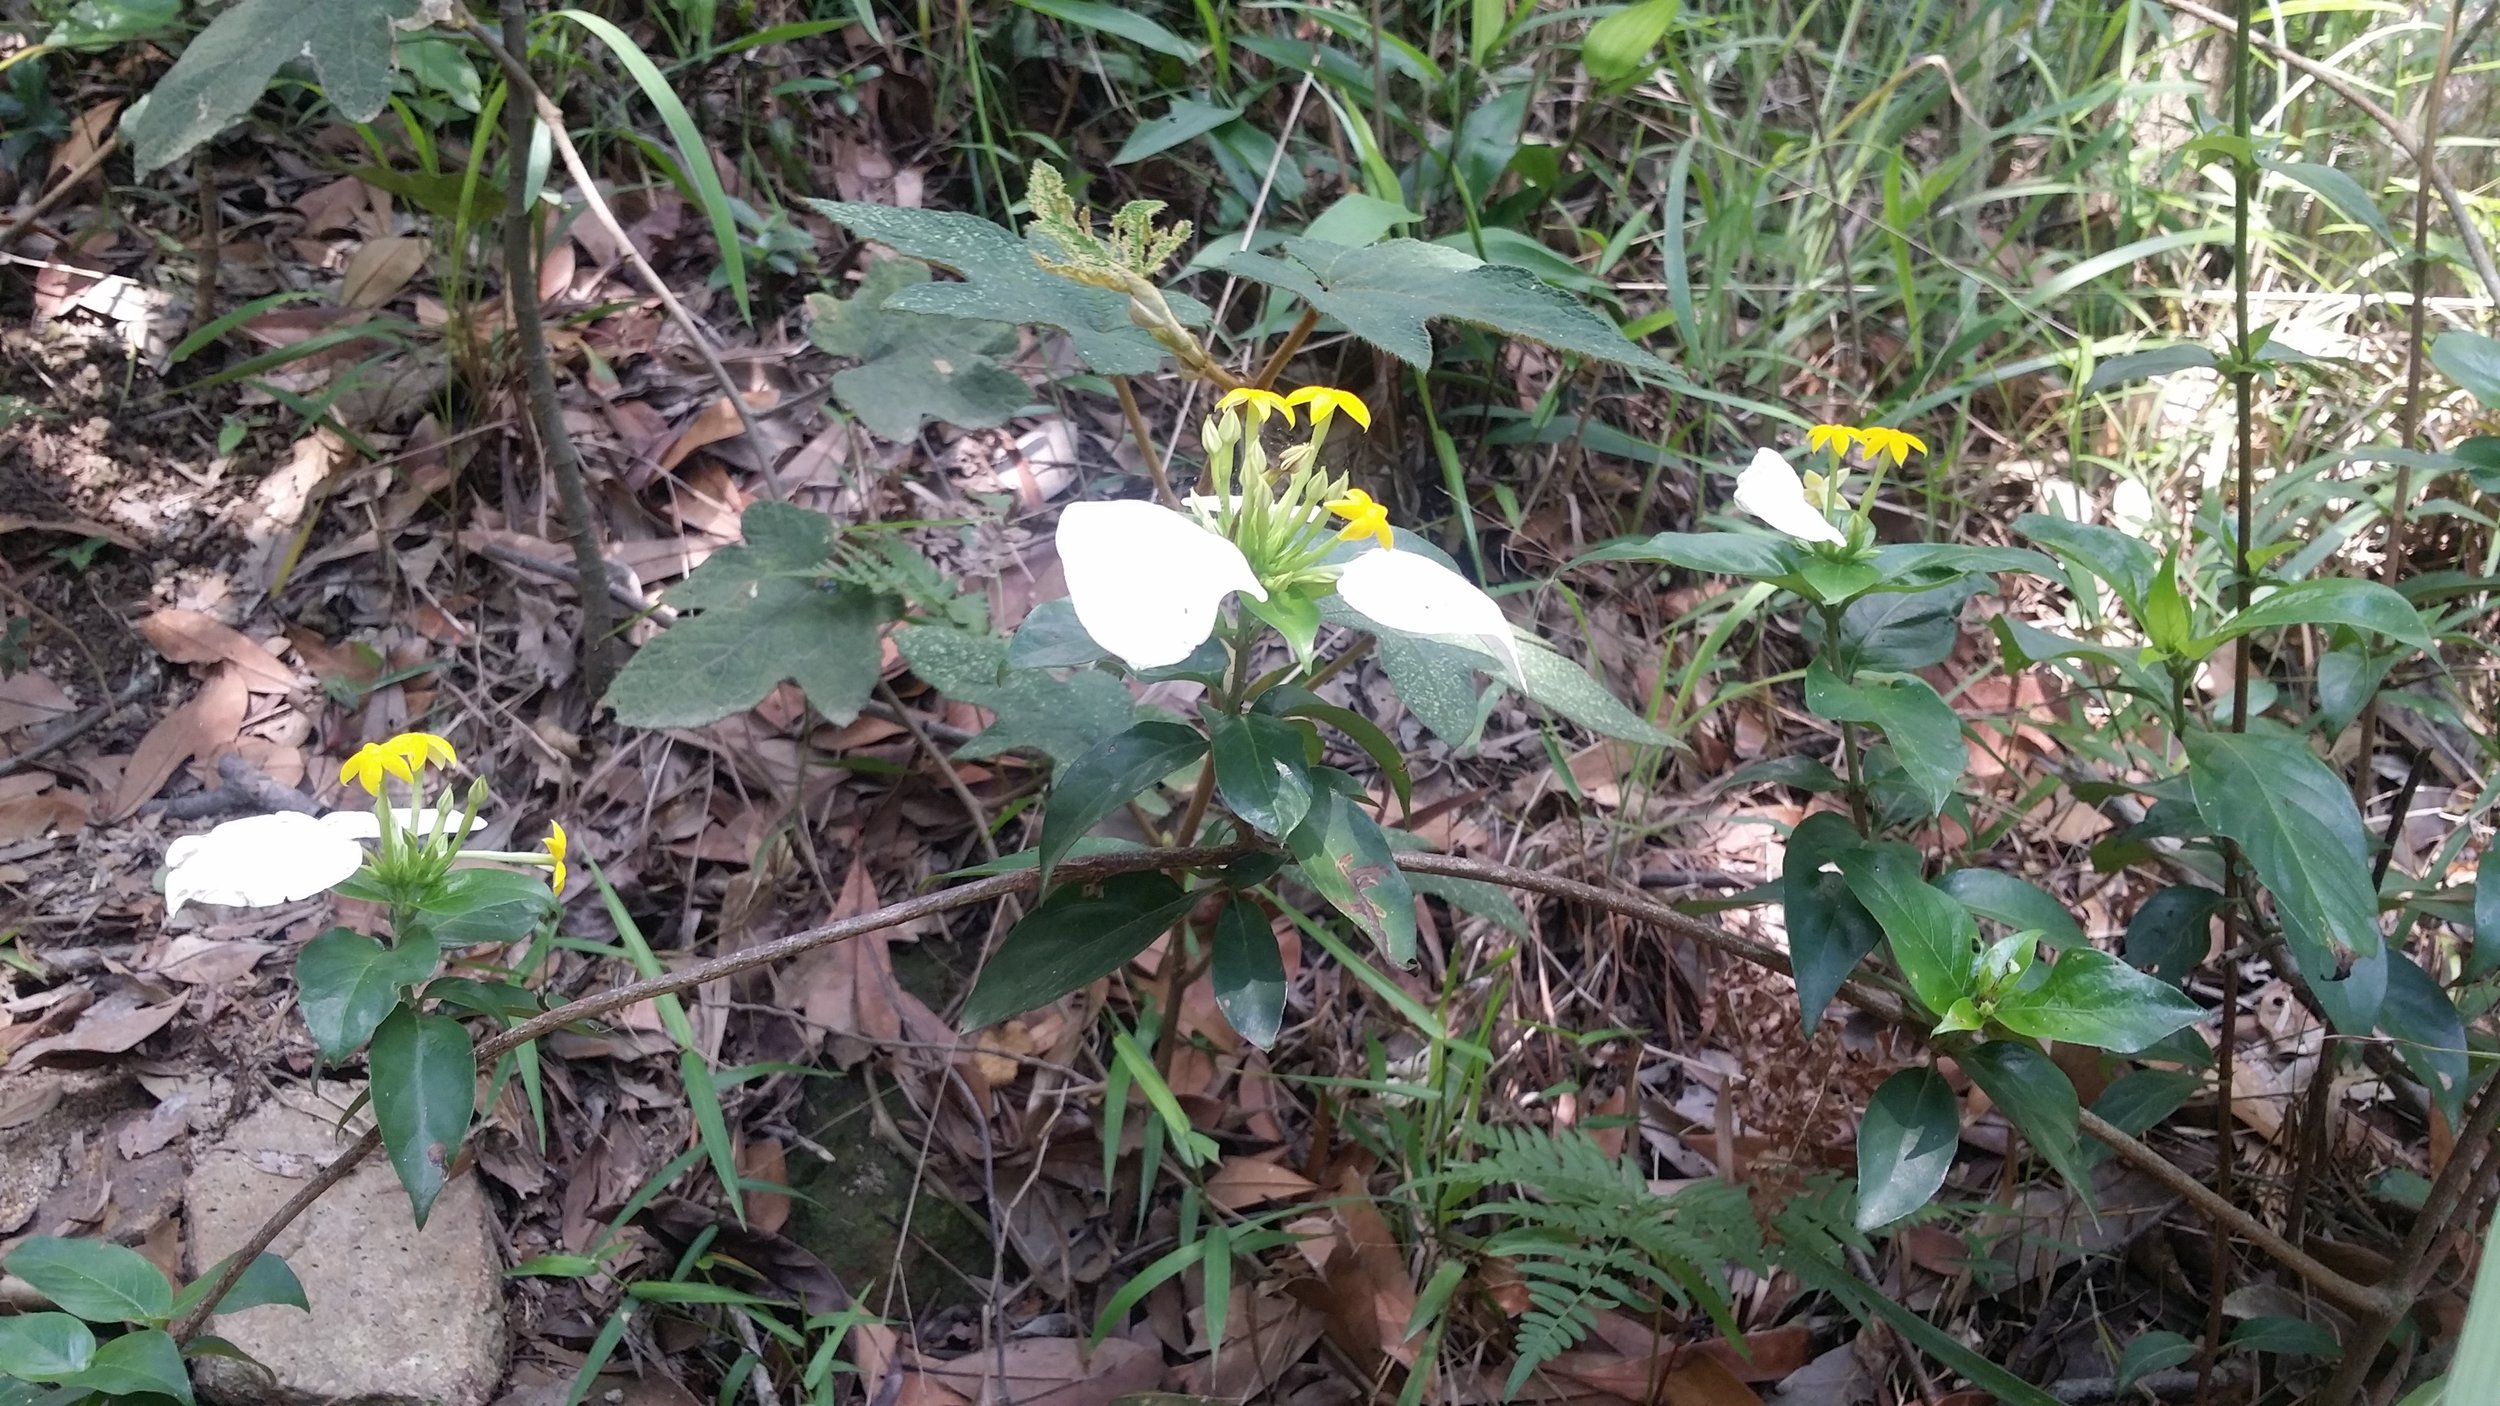
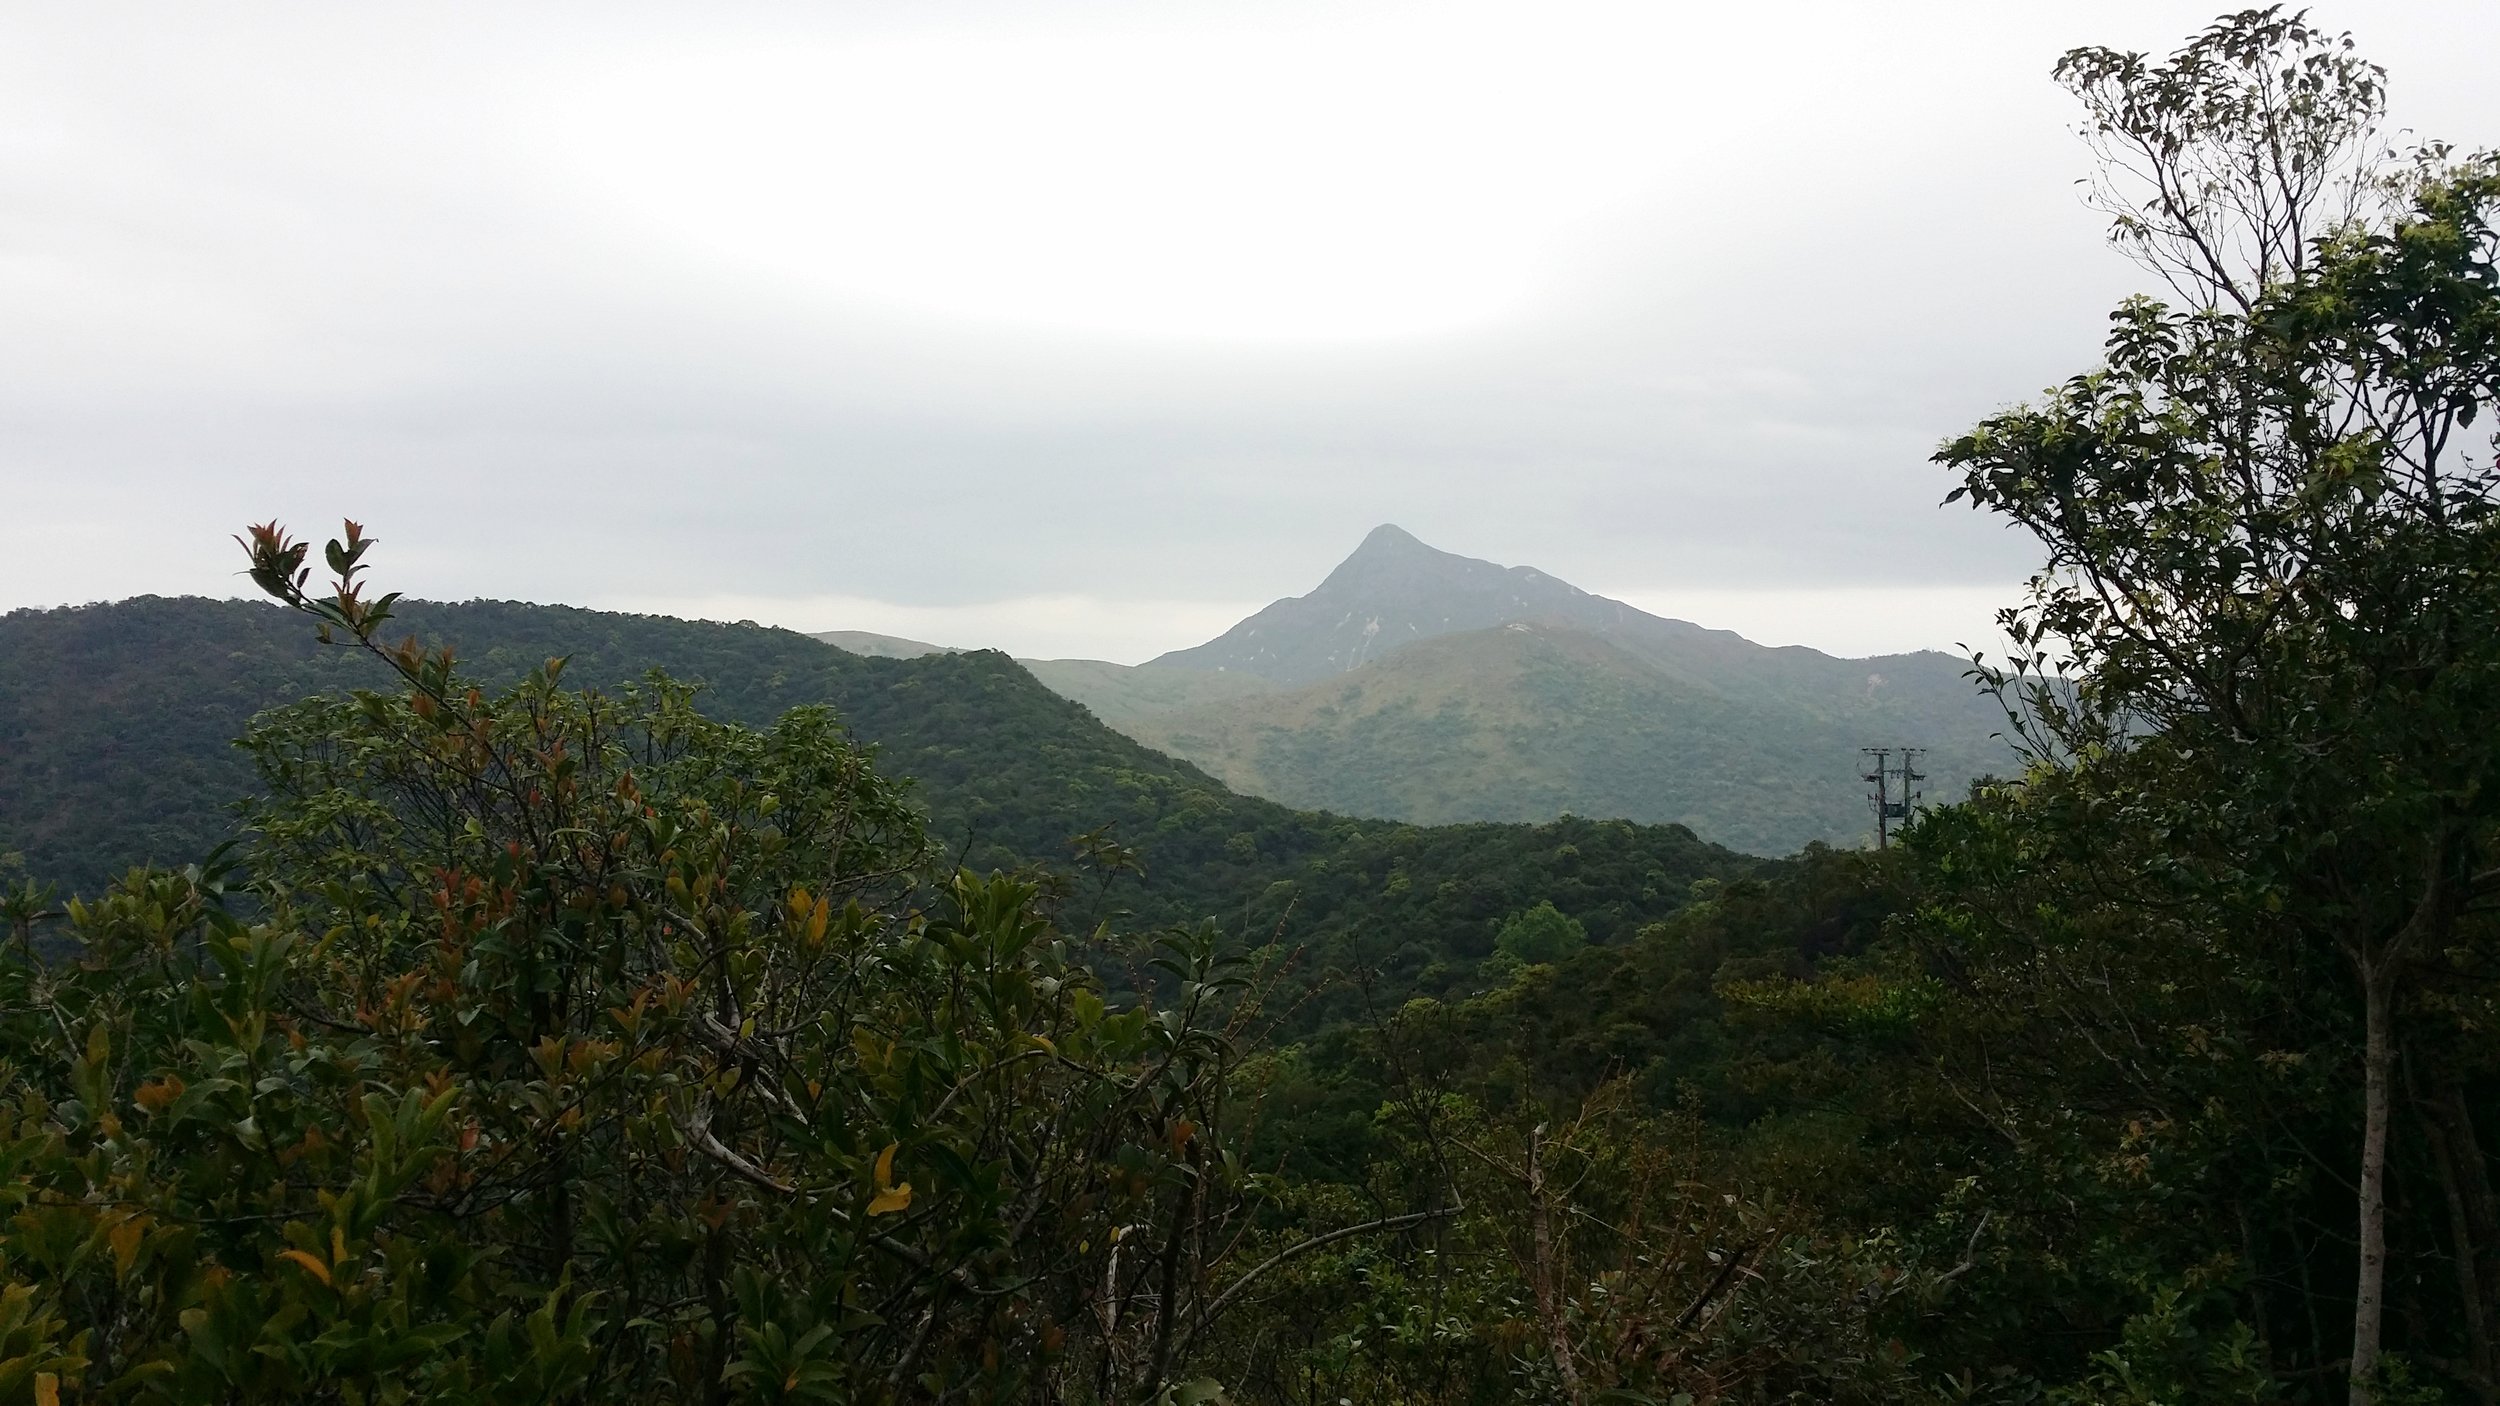
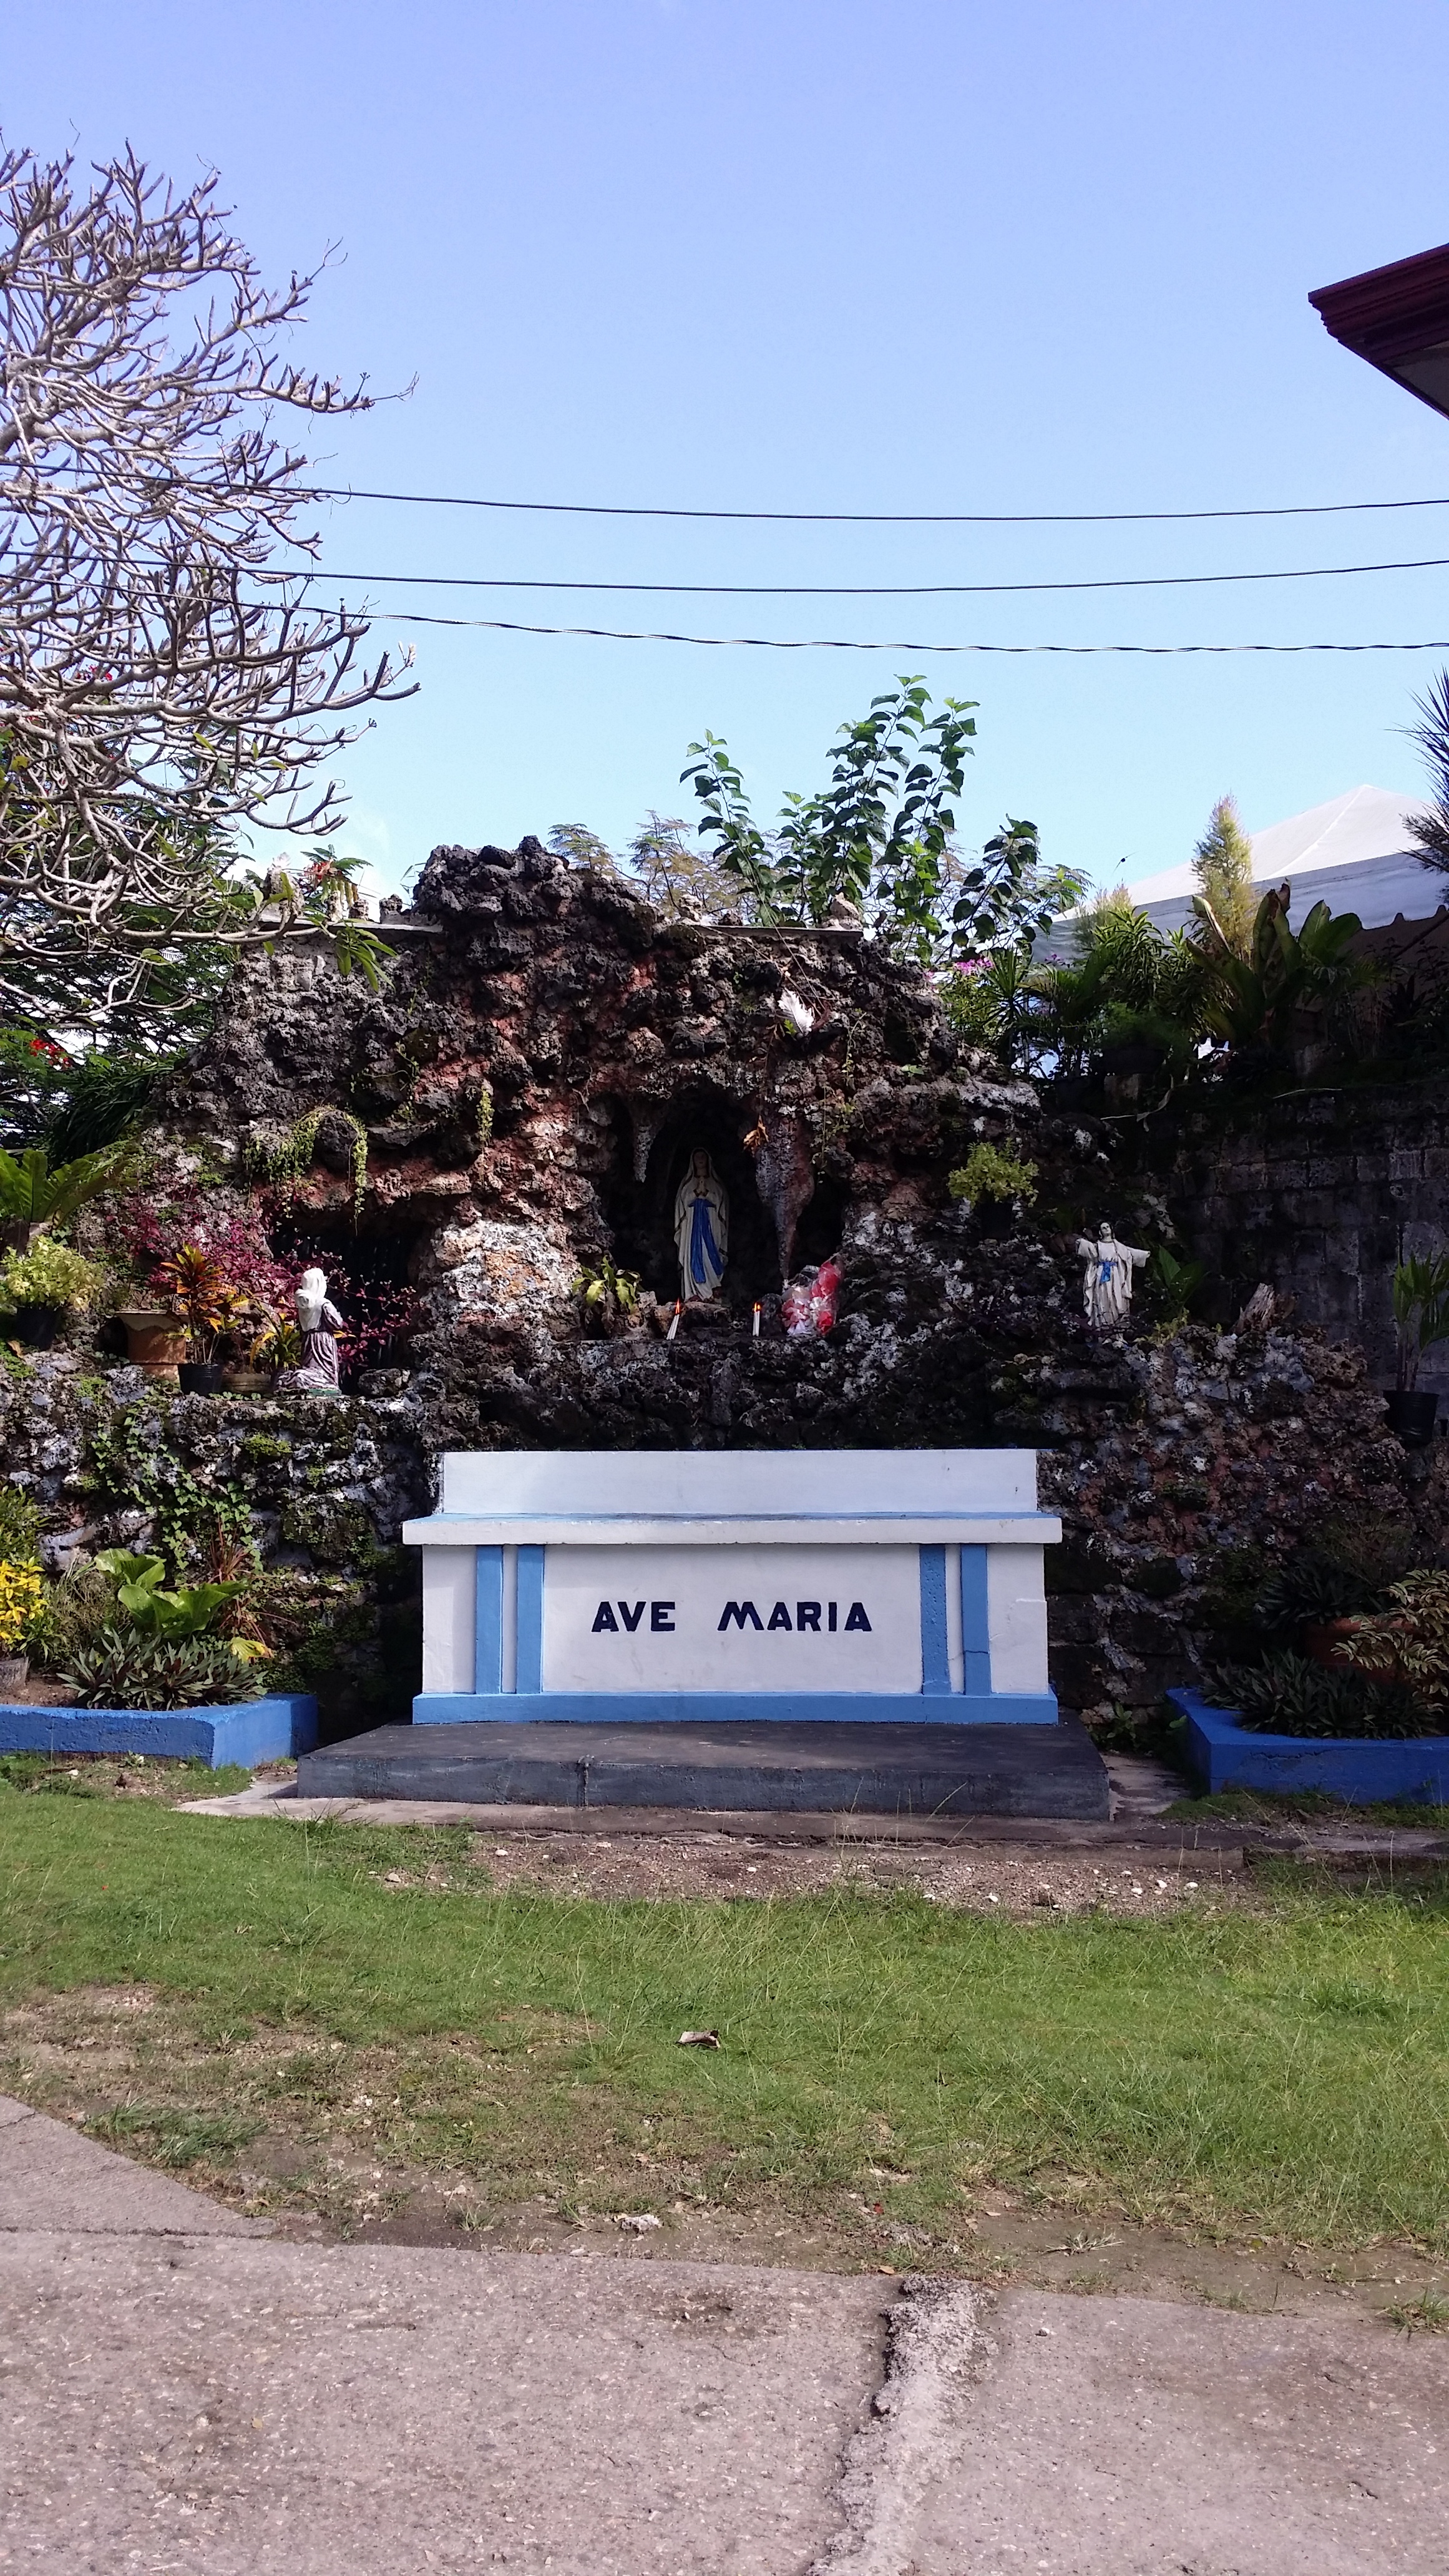
LAND TOUR

If you are looking to have a less tiring yet still enjoyable trip then, strolling around Panglao by car or tricycle is a great idea. There are plenty of places to book your land tour, or you may also hire a car or tricycle to bring you to places. Panglao is a small place, and you can stroll around almost the whole area within just a day if you start very early.

Here is a list of places to visit in Panglao:

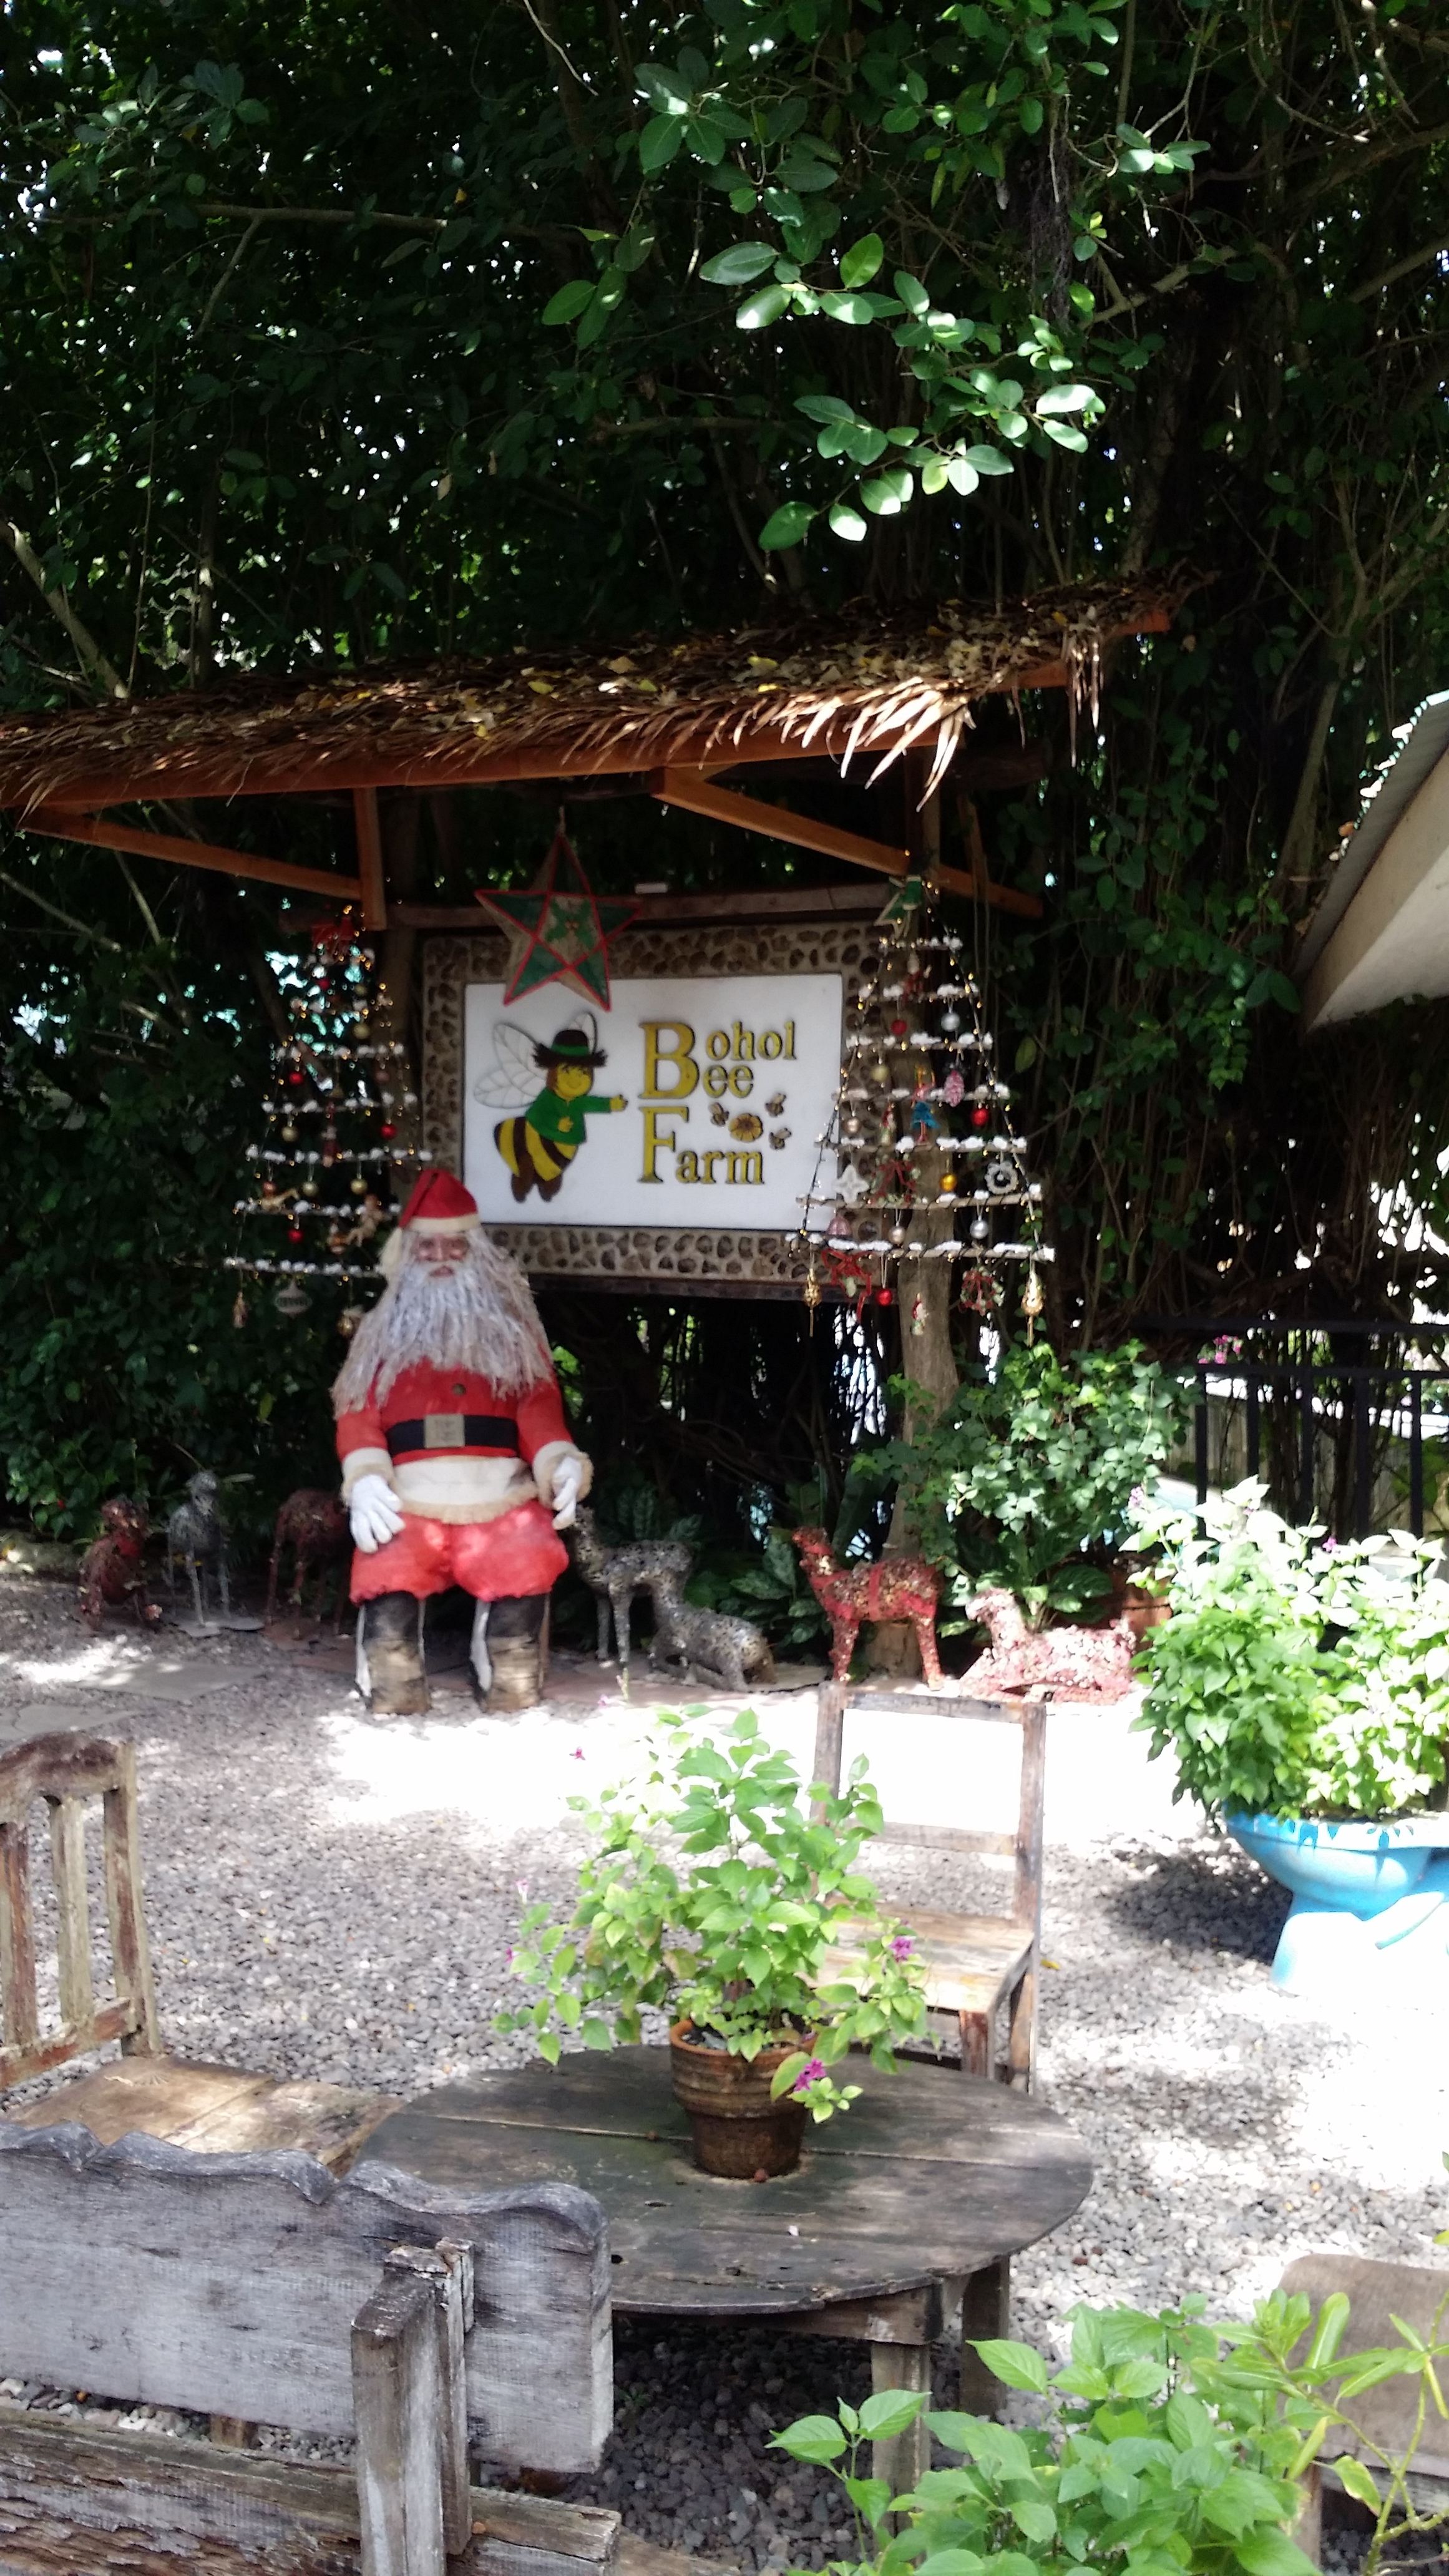
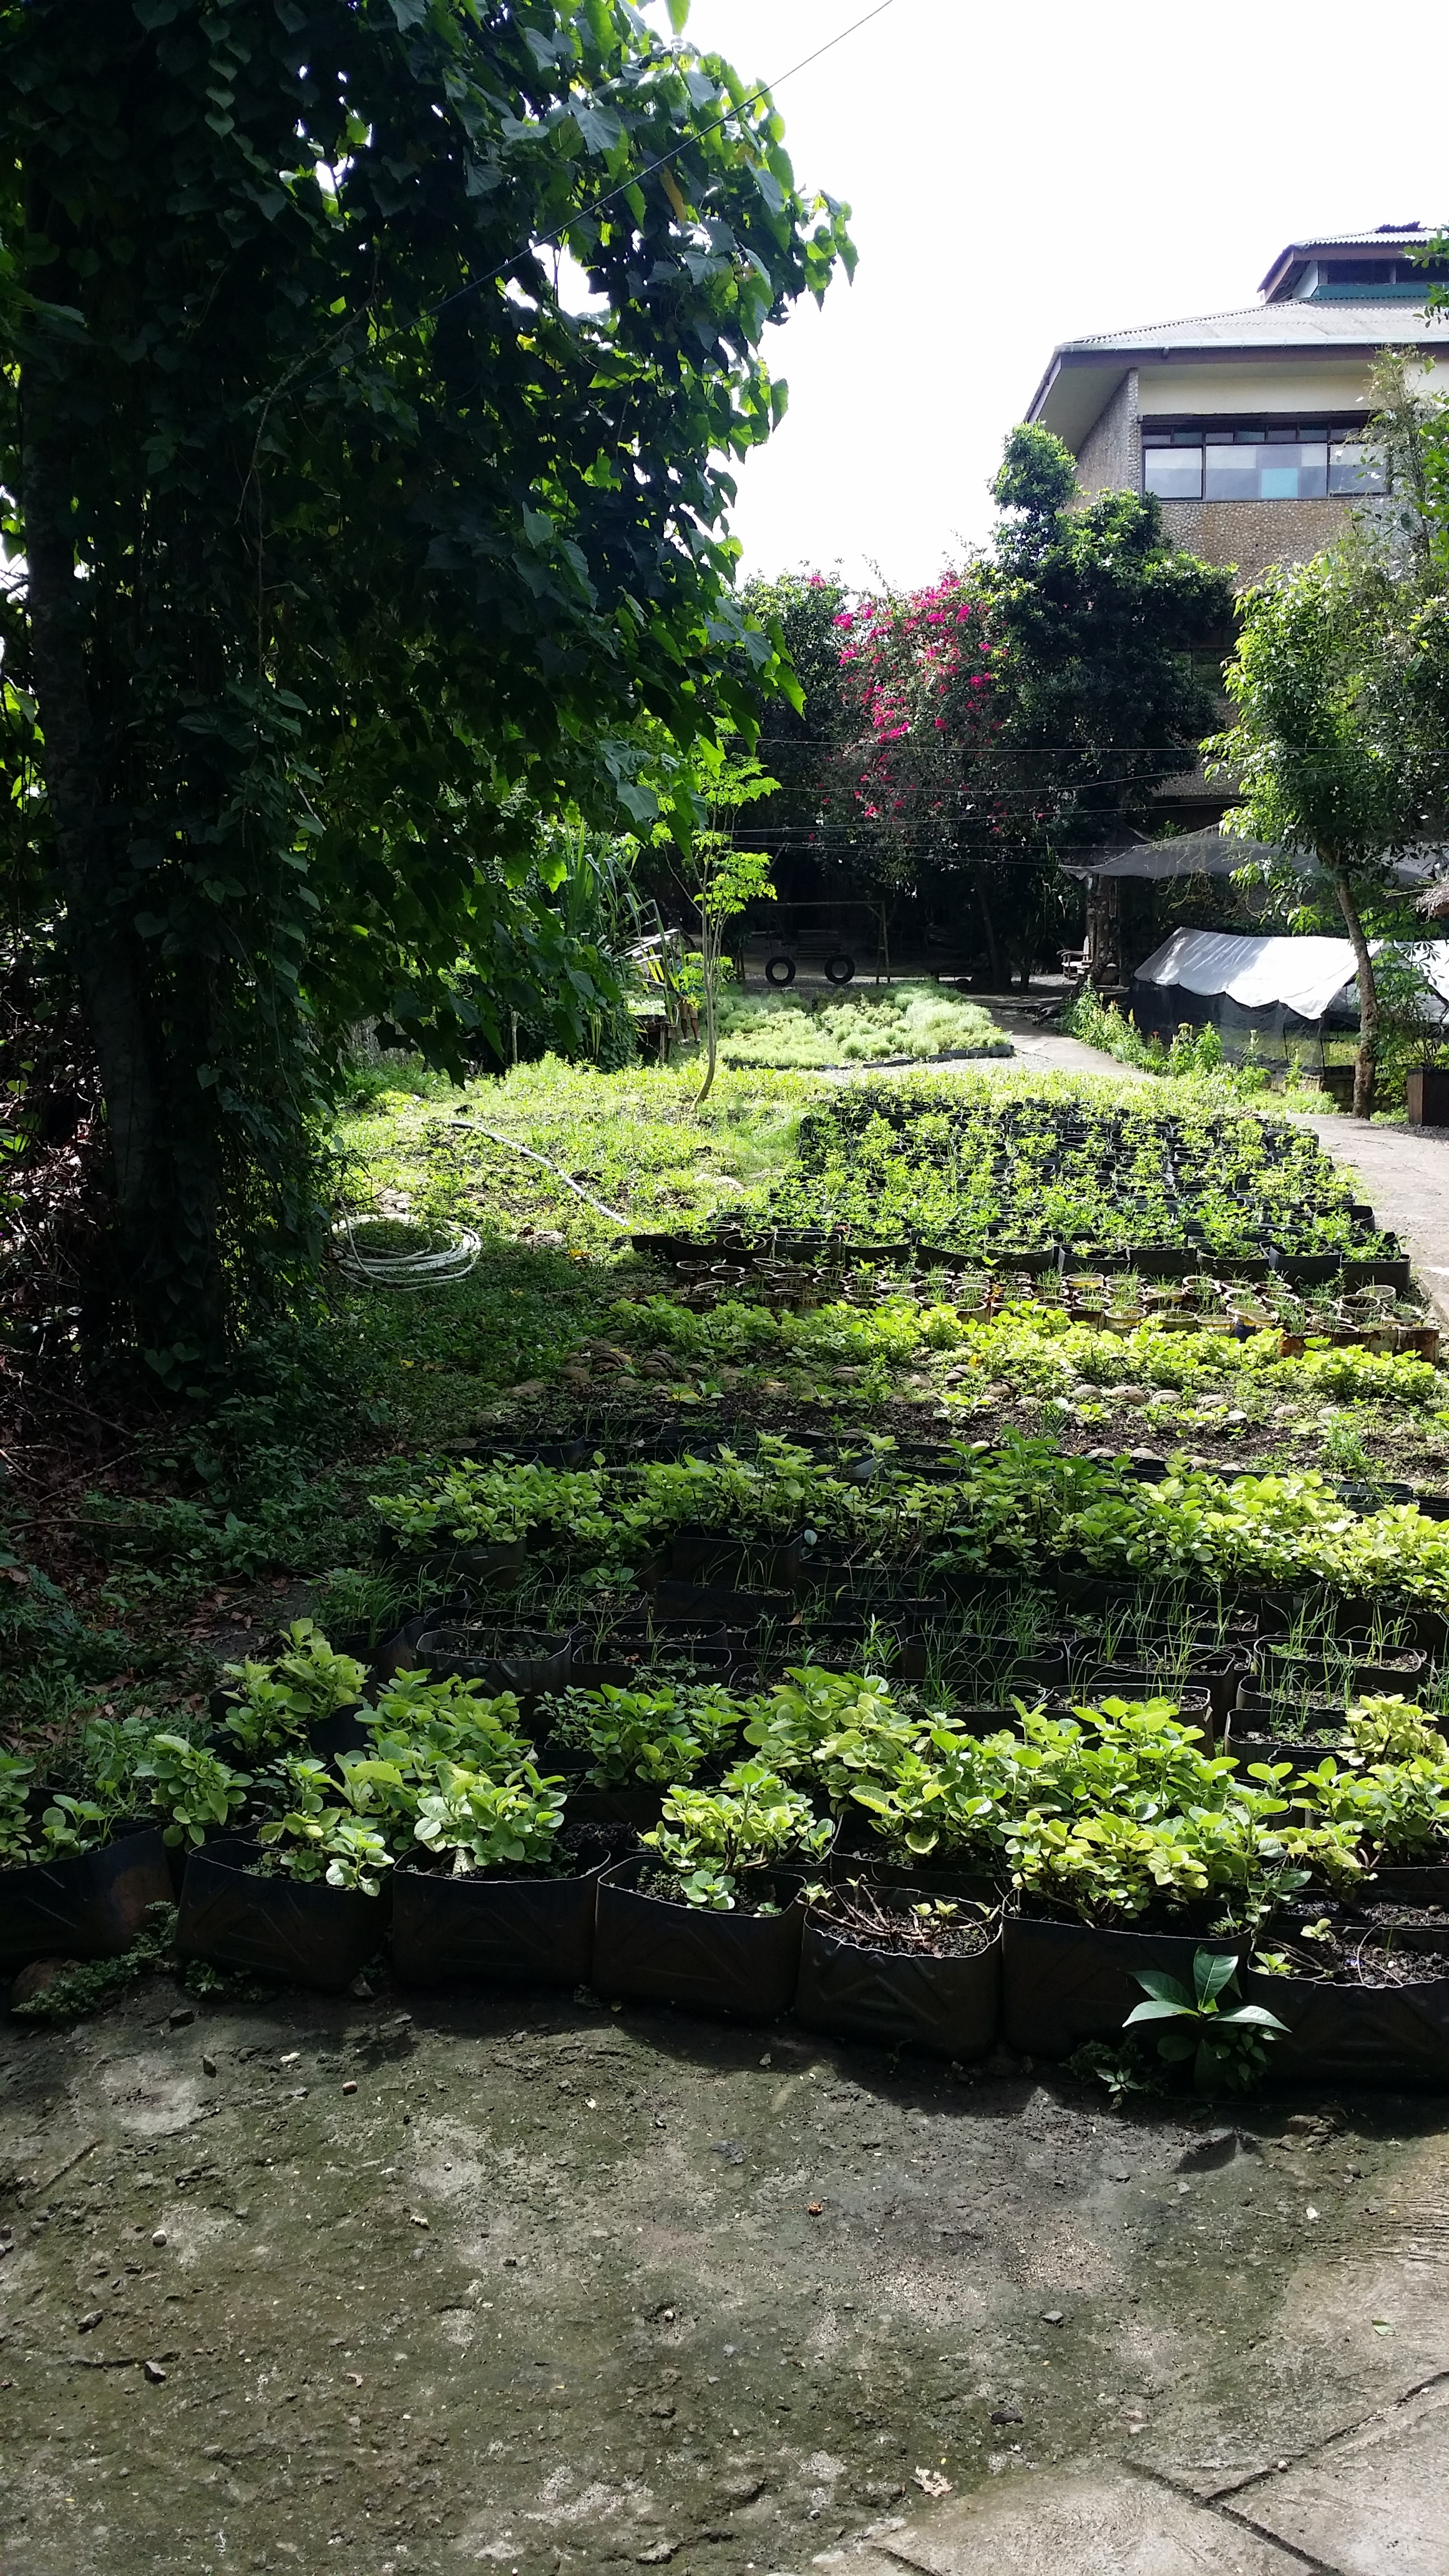
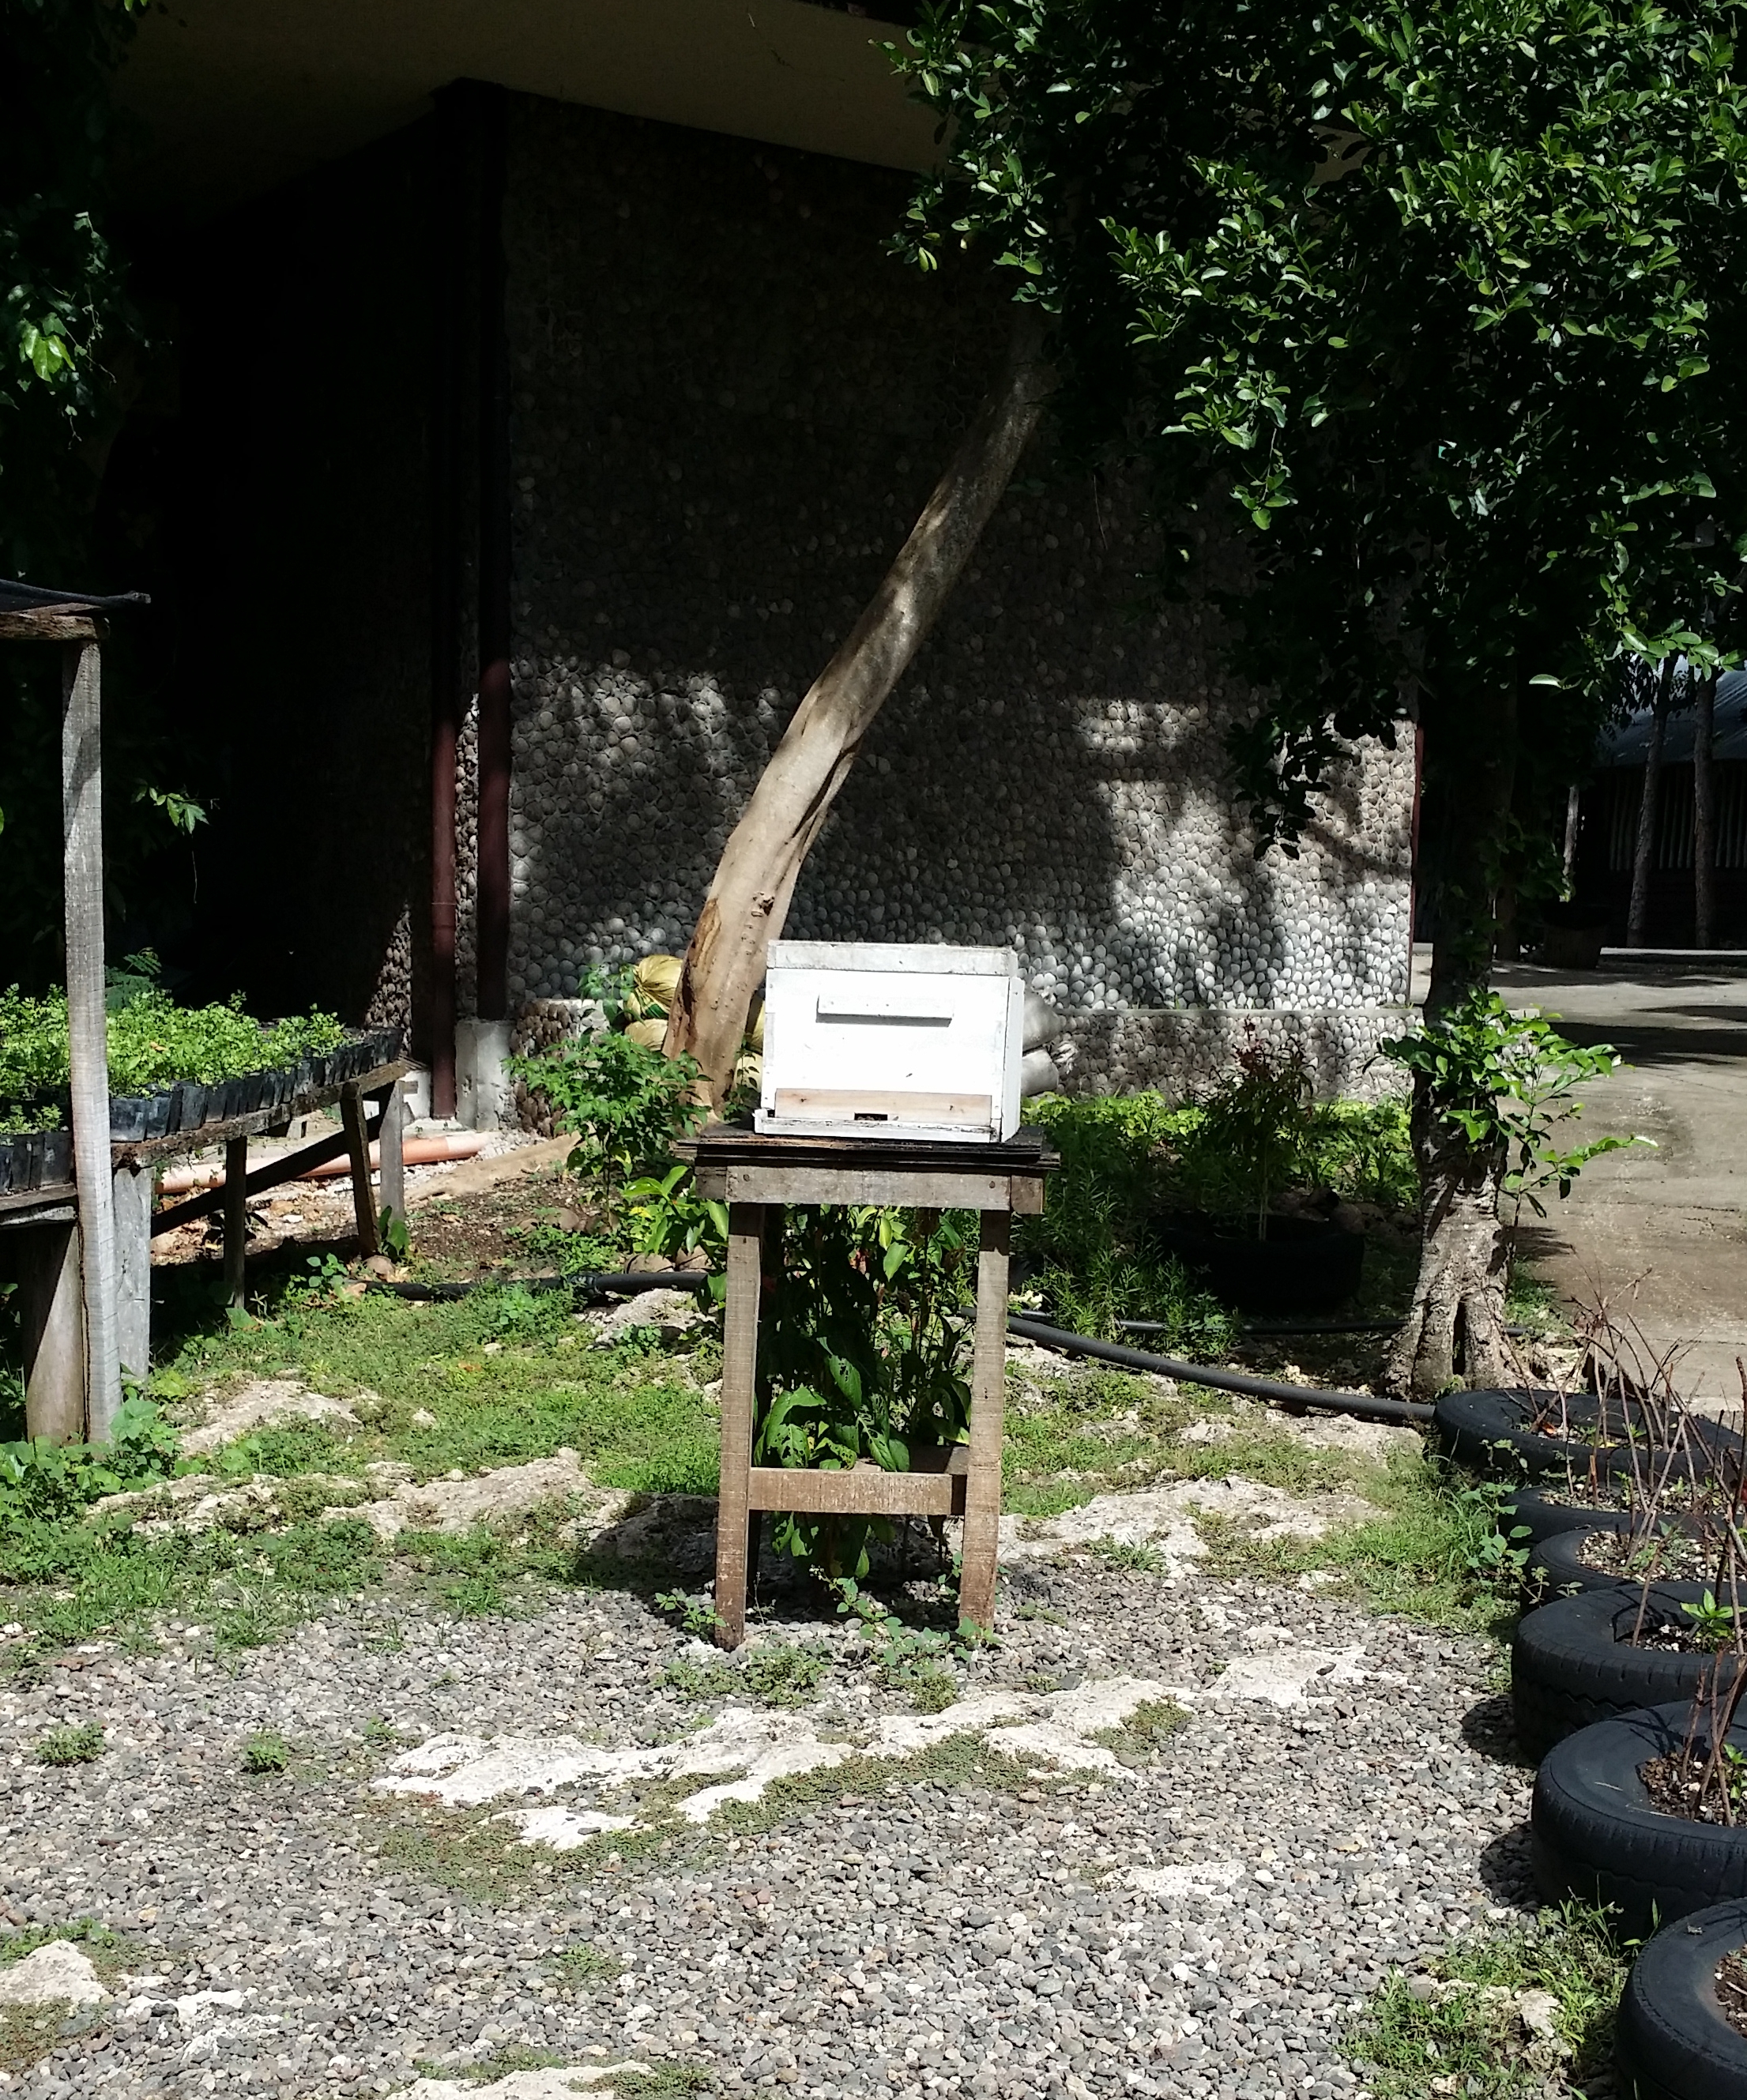
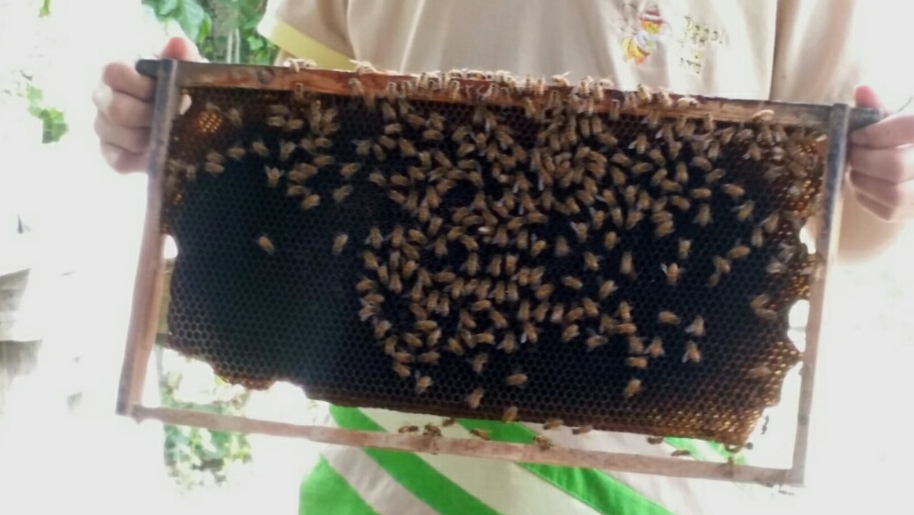
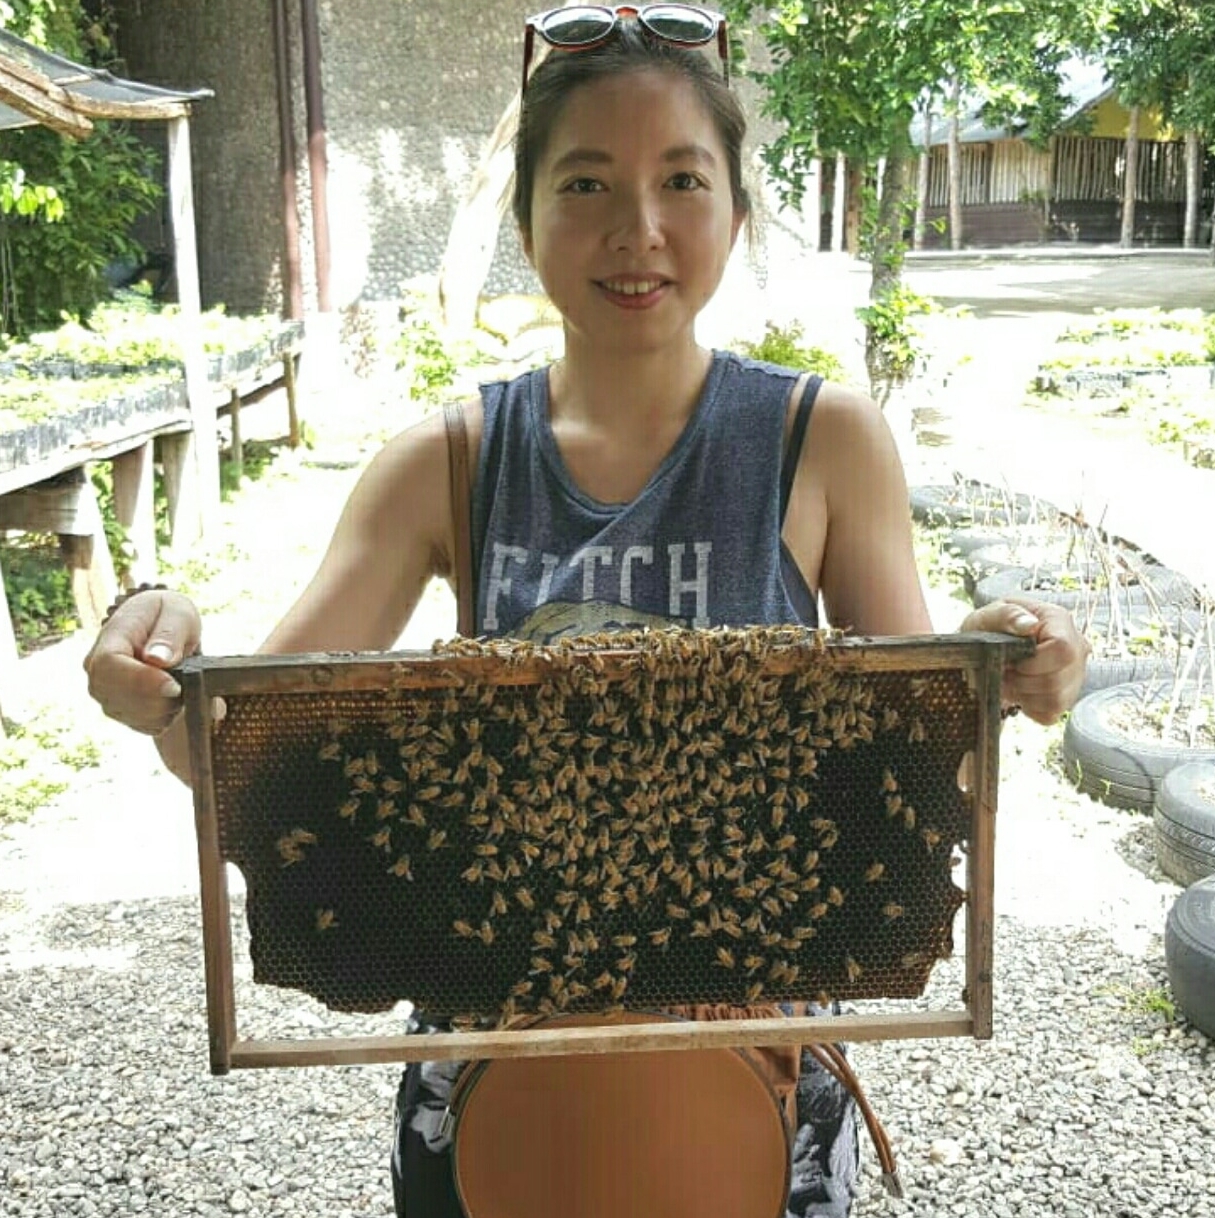
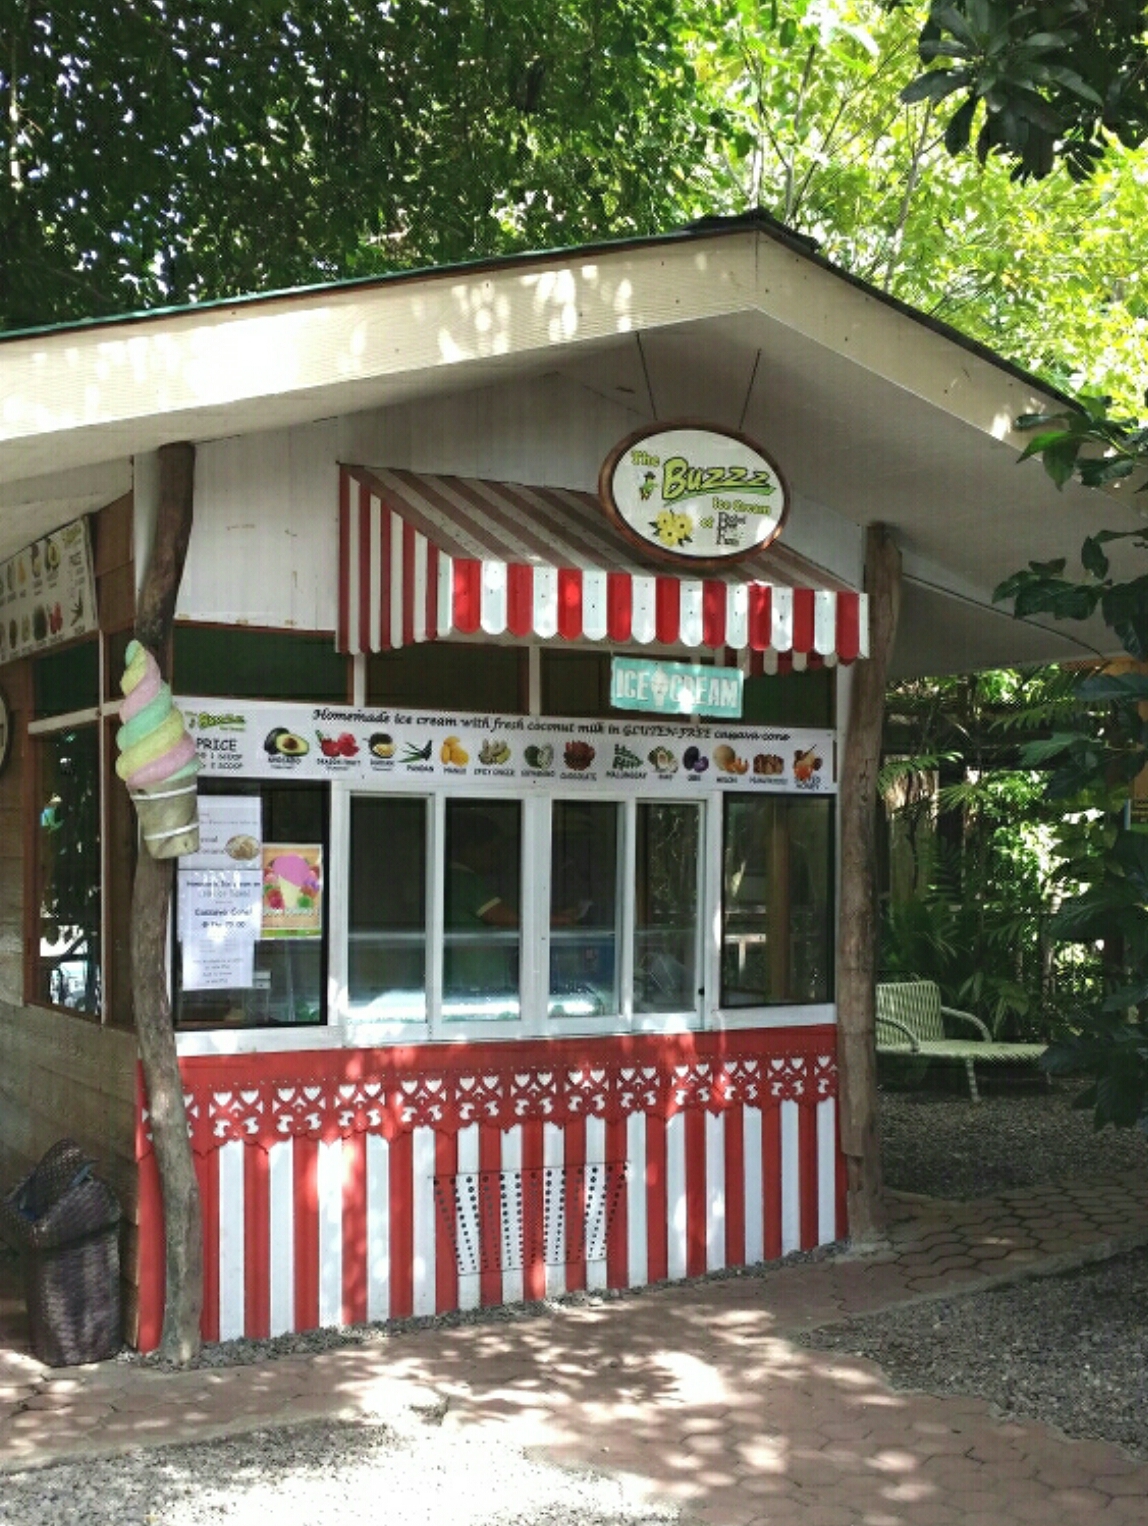
  • Bohol Bee Farm - Watch the working bees how they make honey and hear out the fascinating story about bees. Drop by the ice cream shop before you leave the farm. This is a gluten-free ice cream shop.

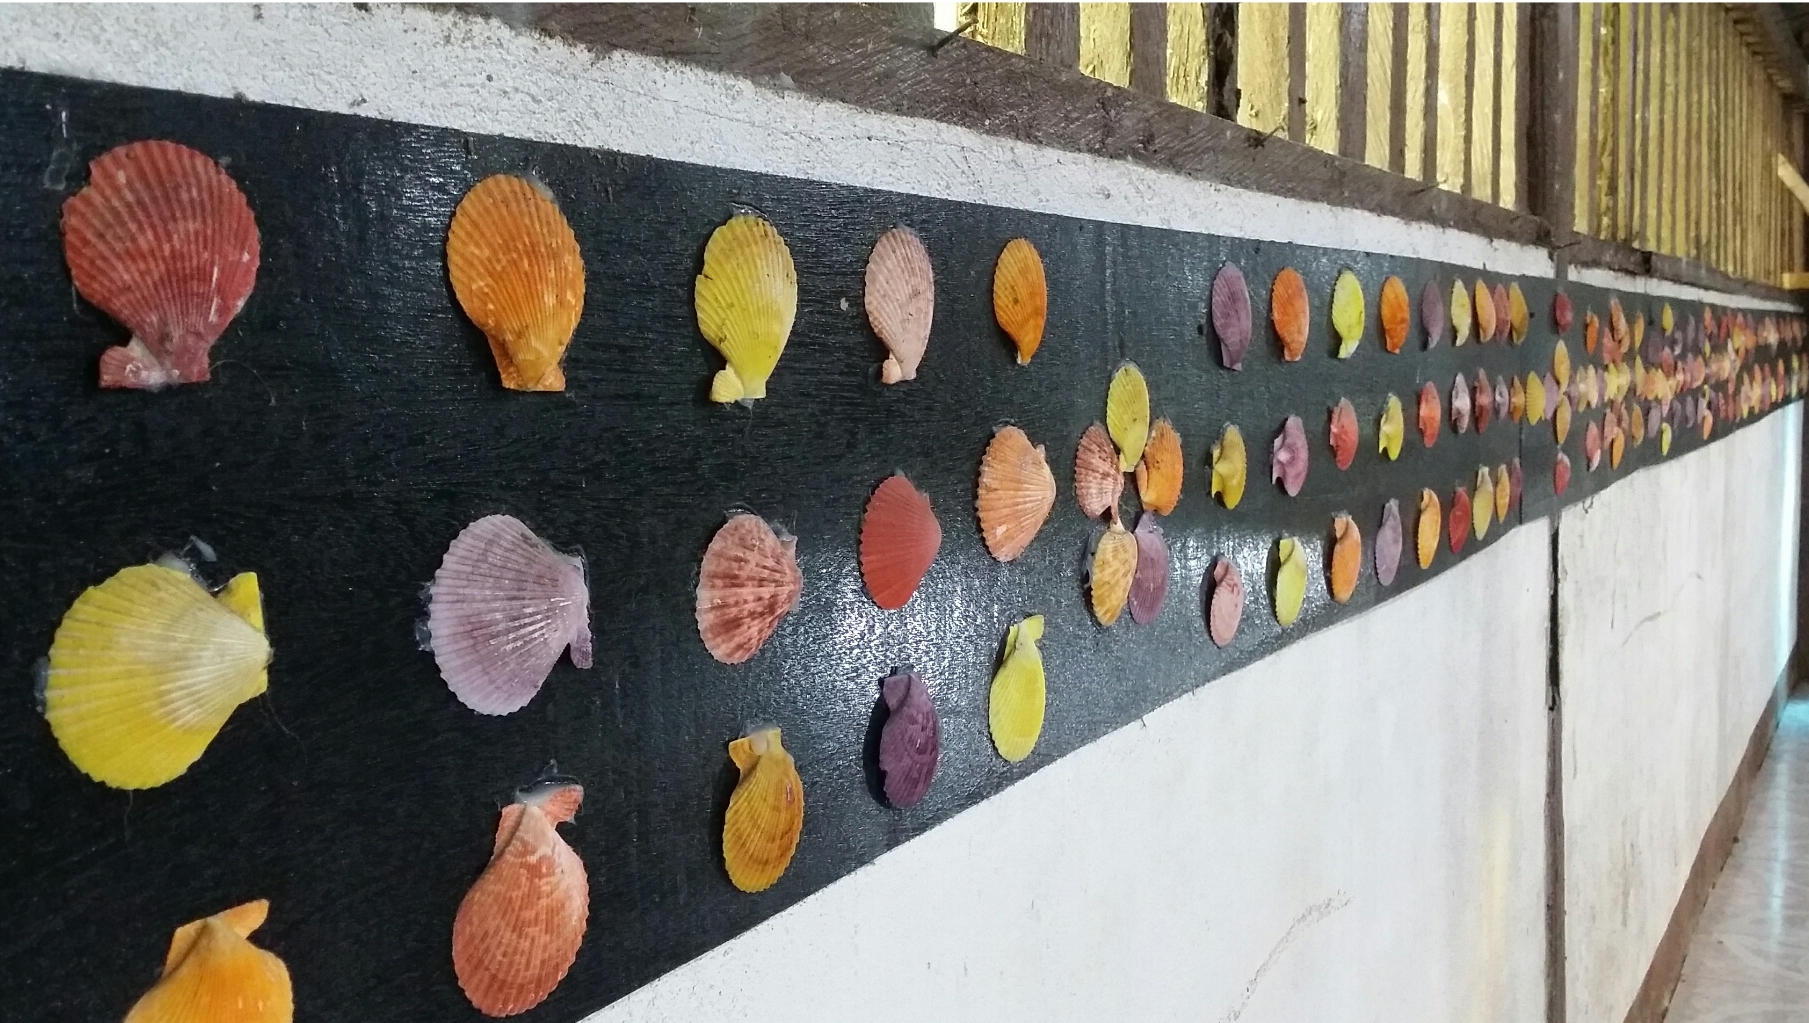
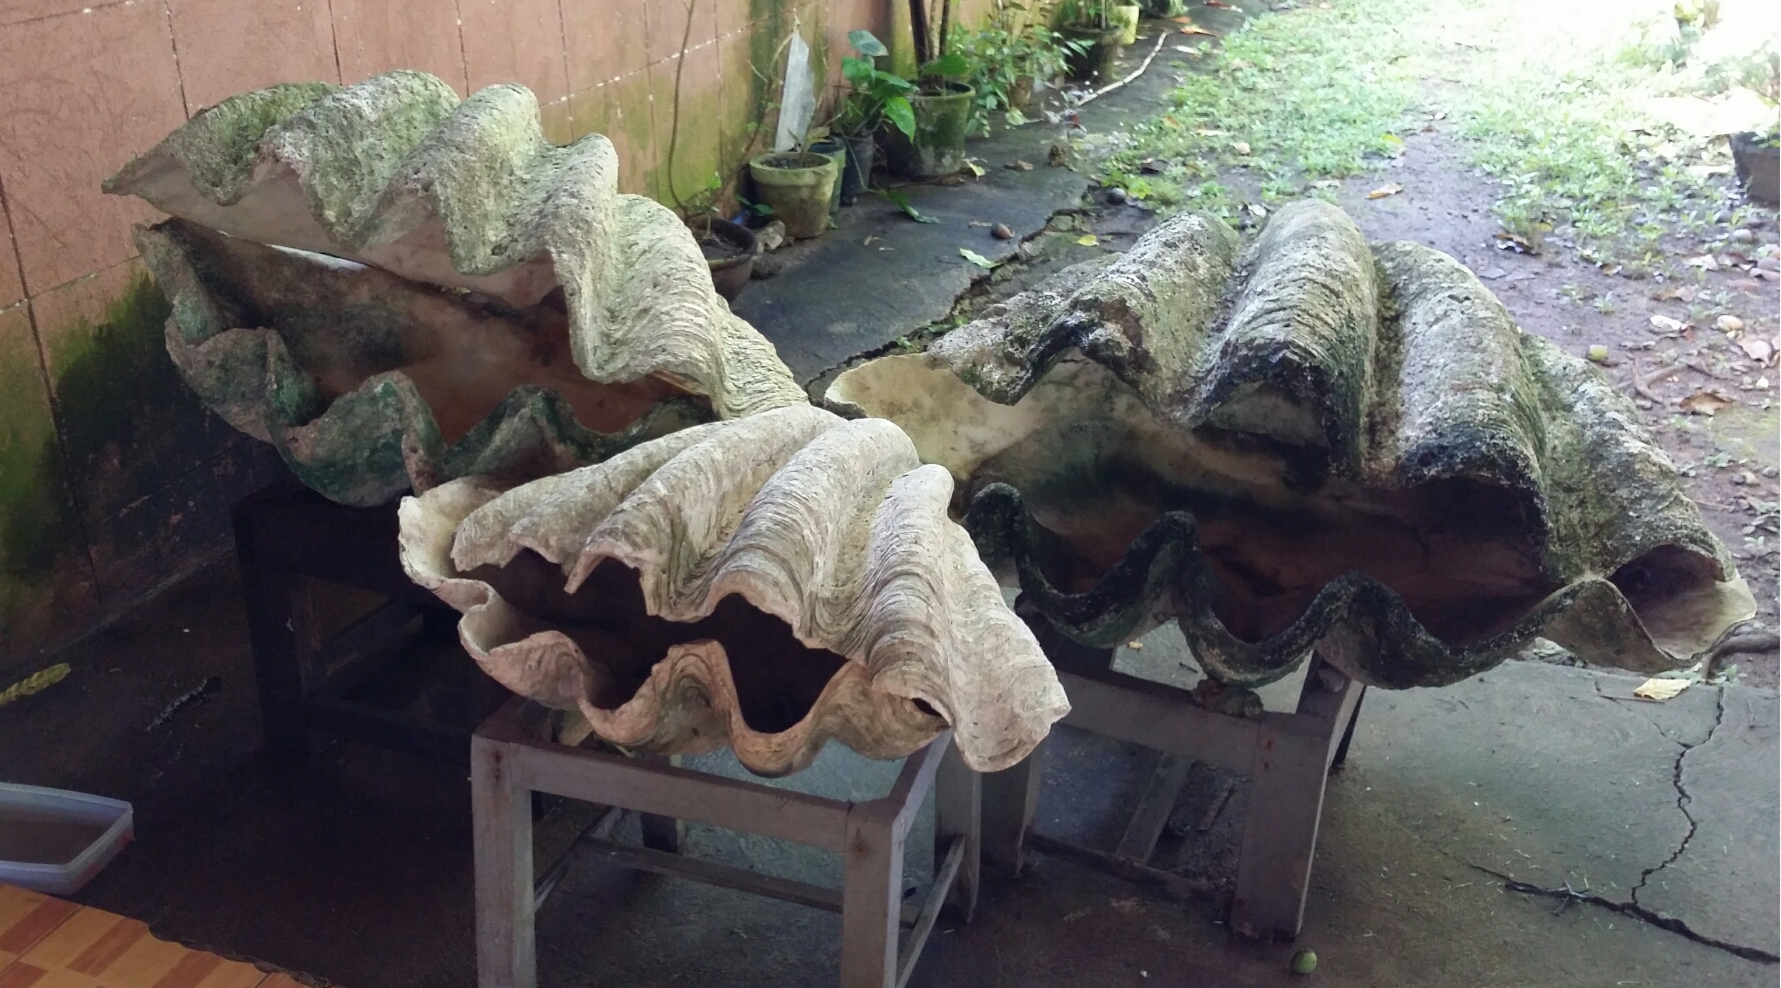
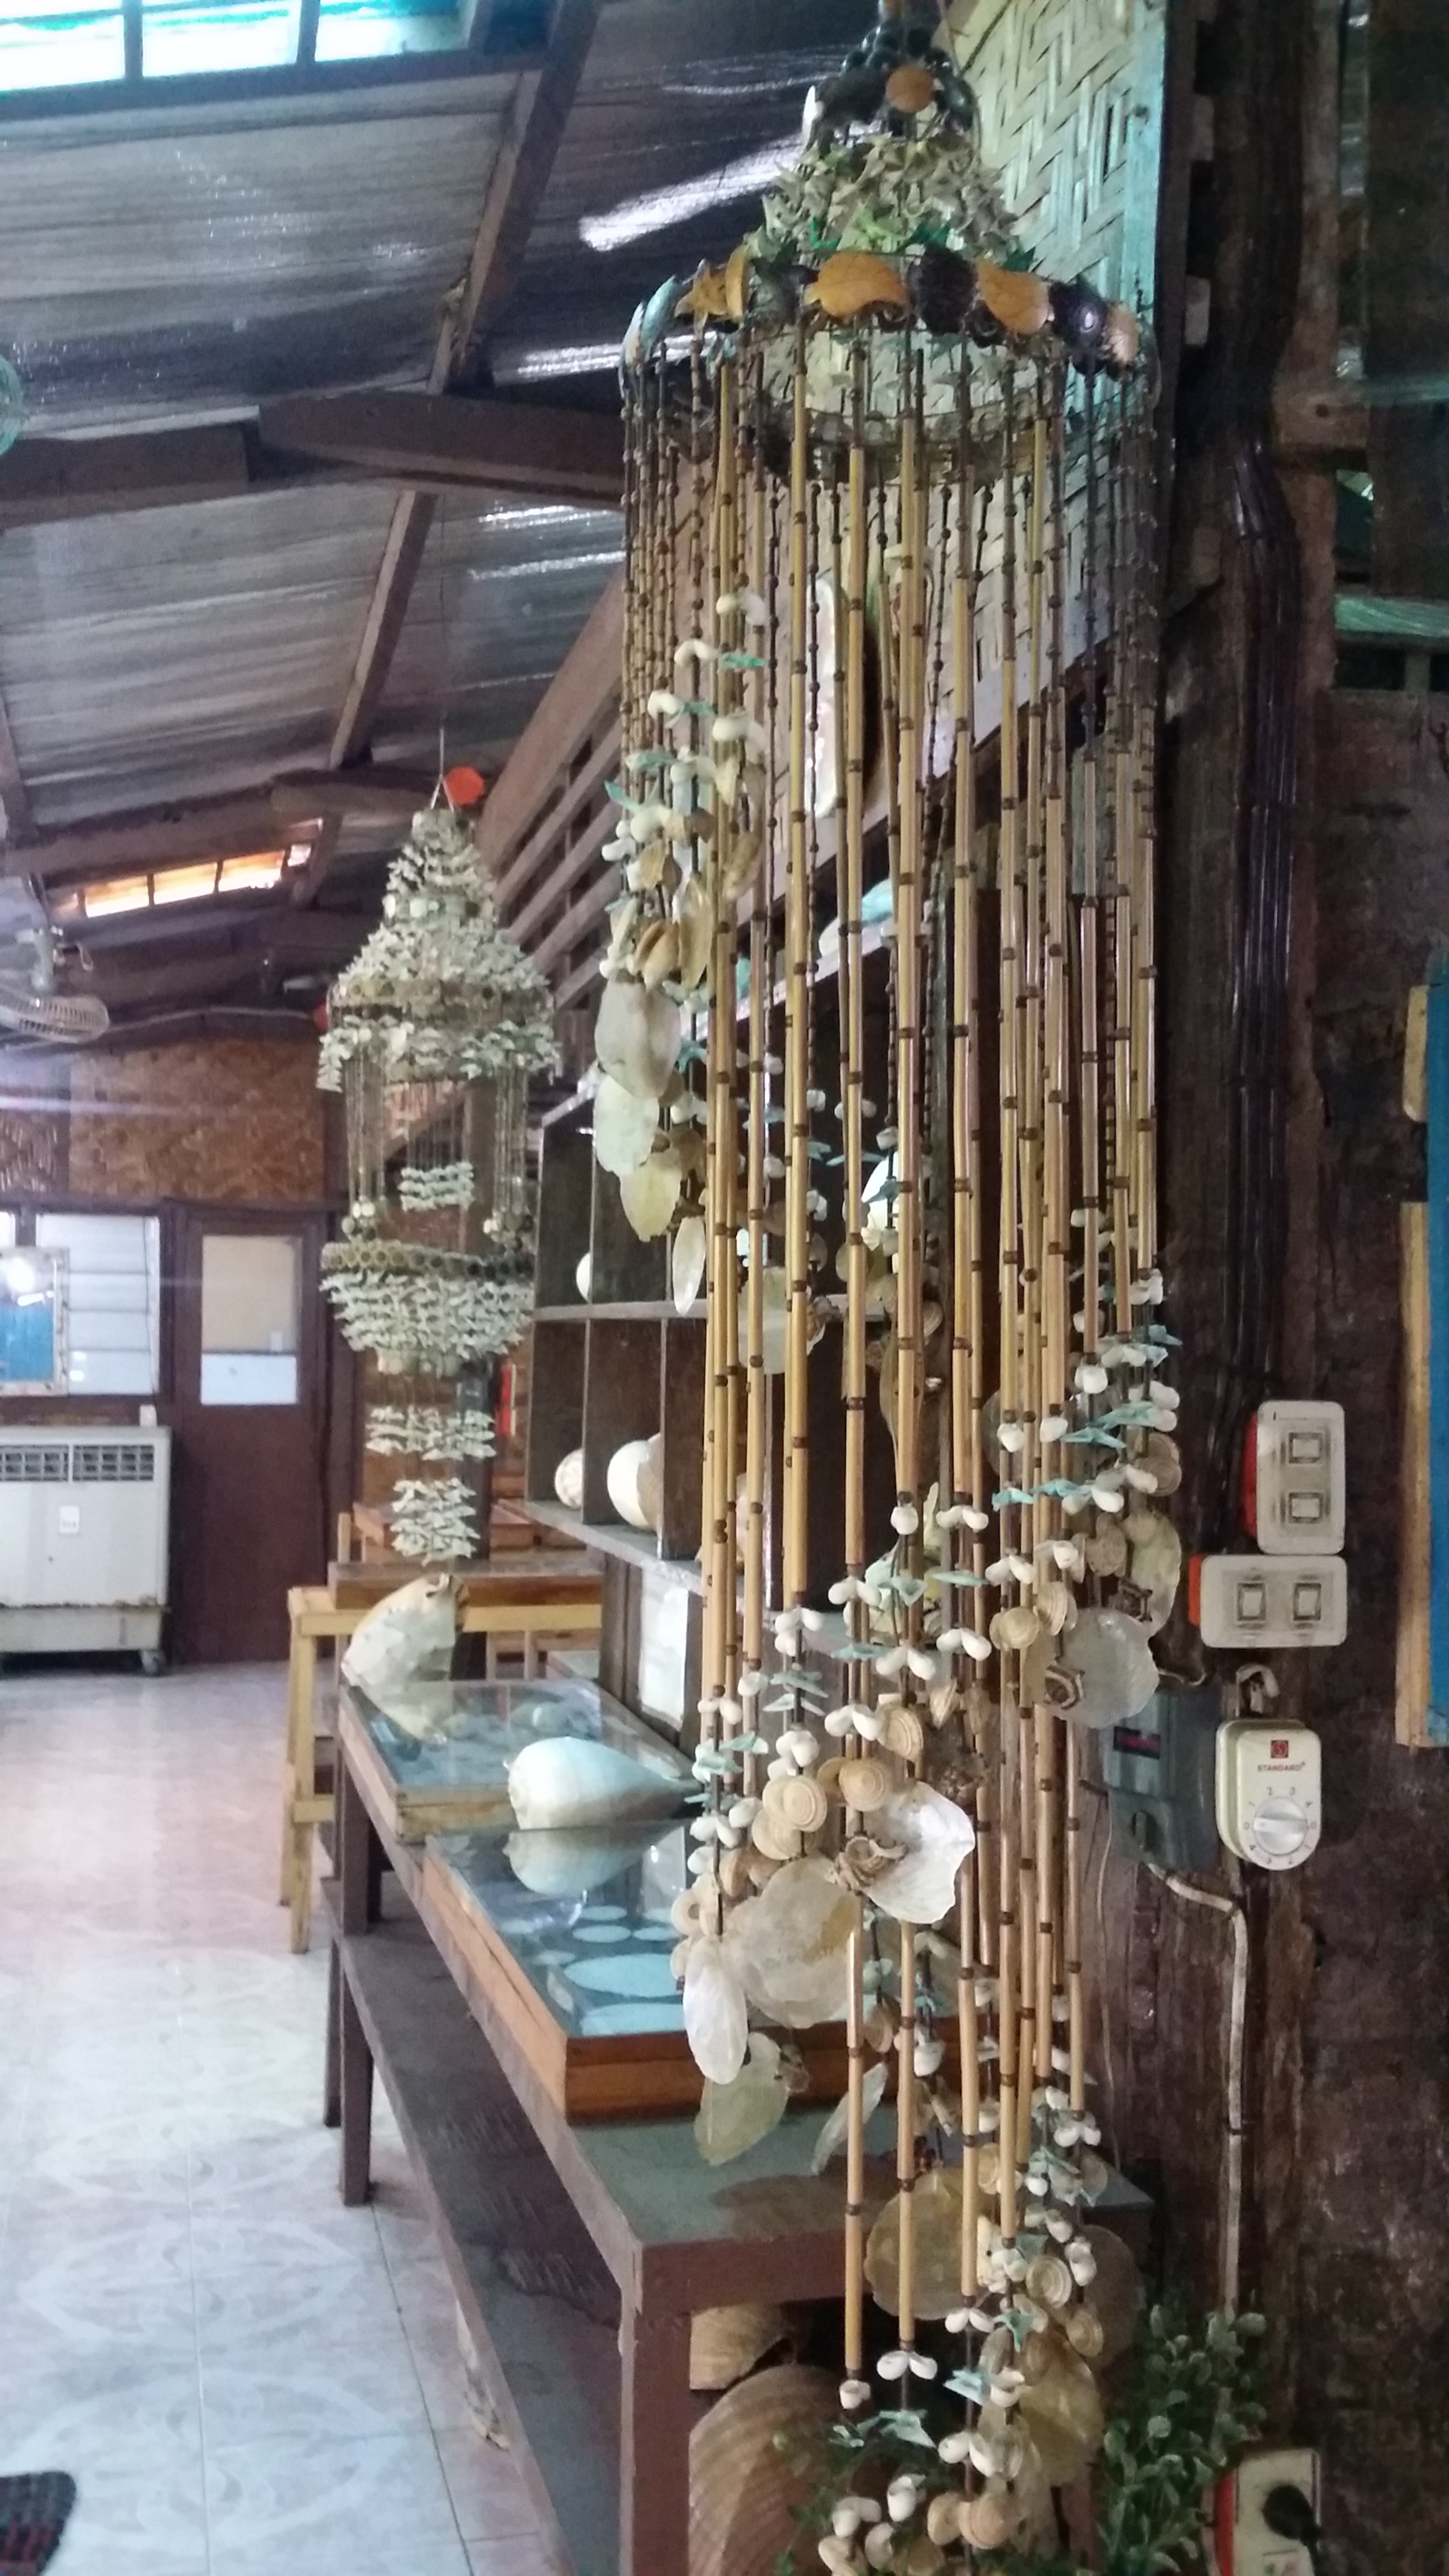
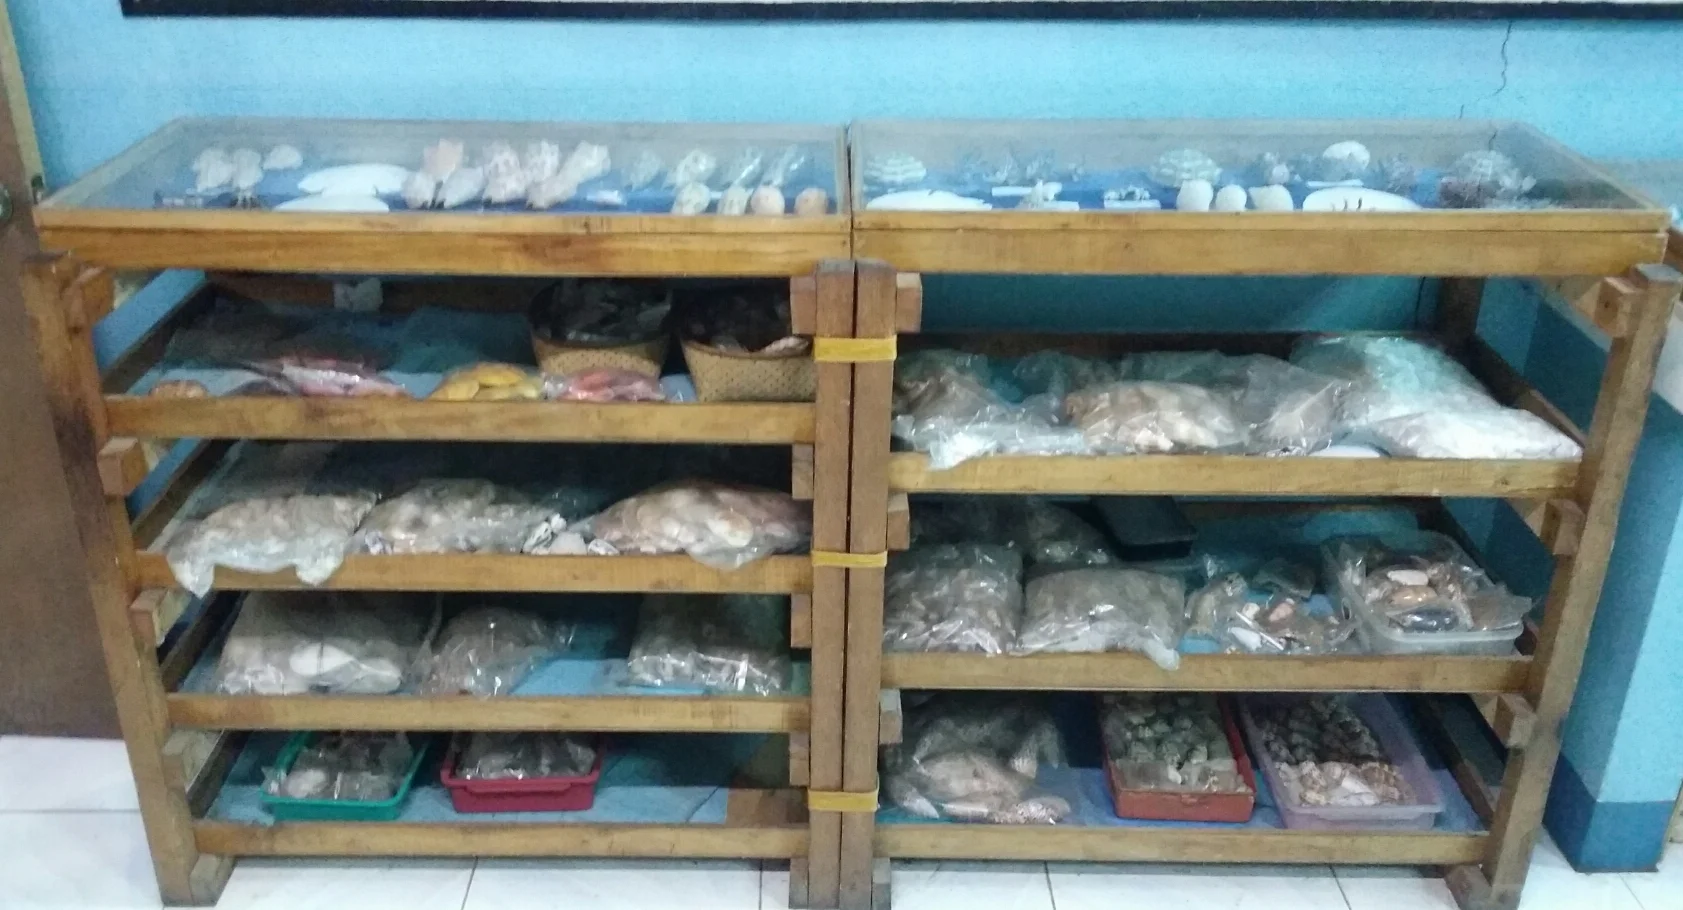
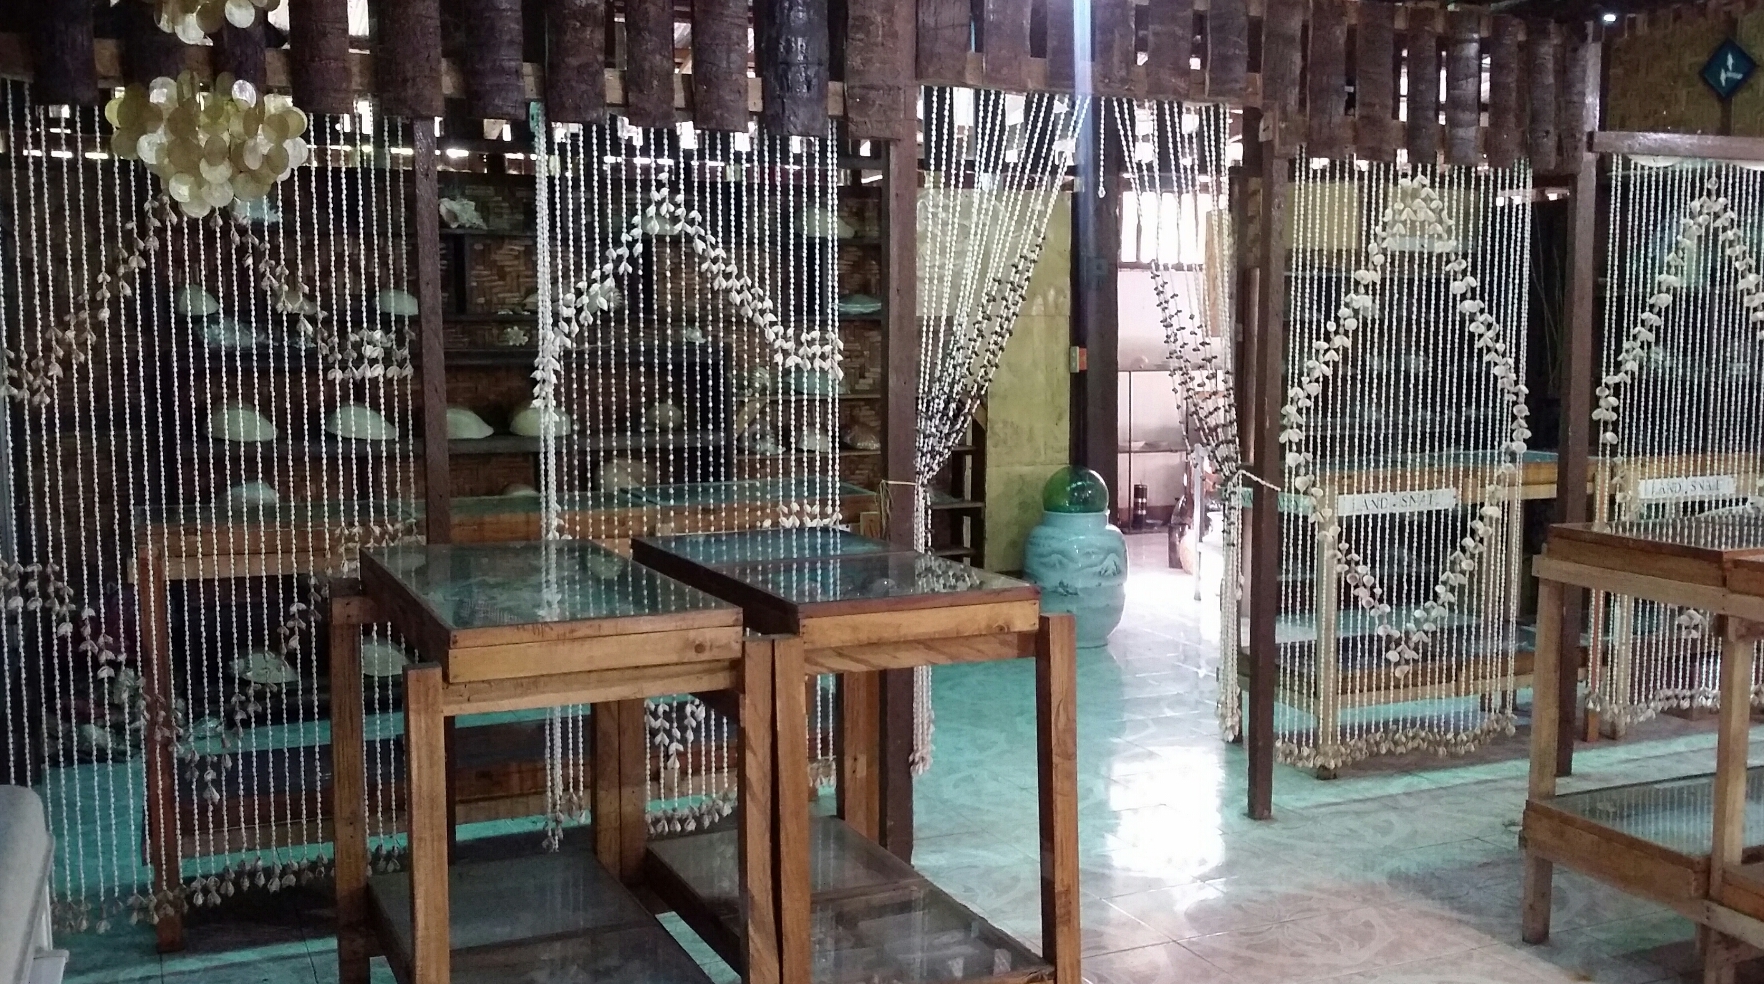
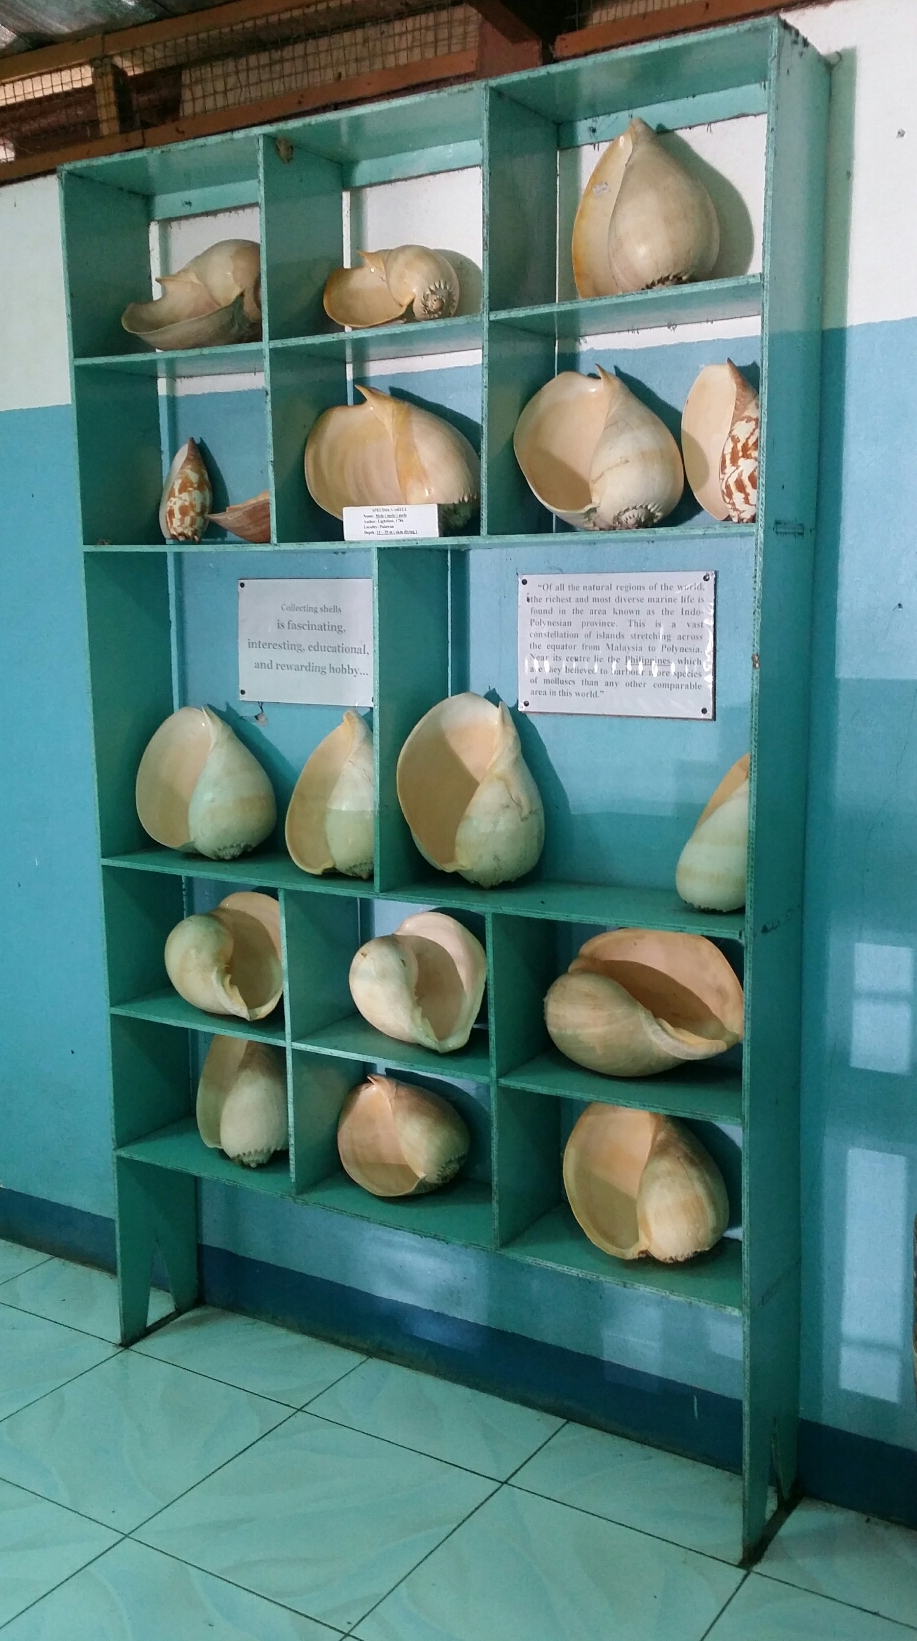
  • Shell Museum - Find some interesting shells and count them if you can.

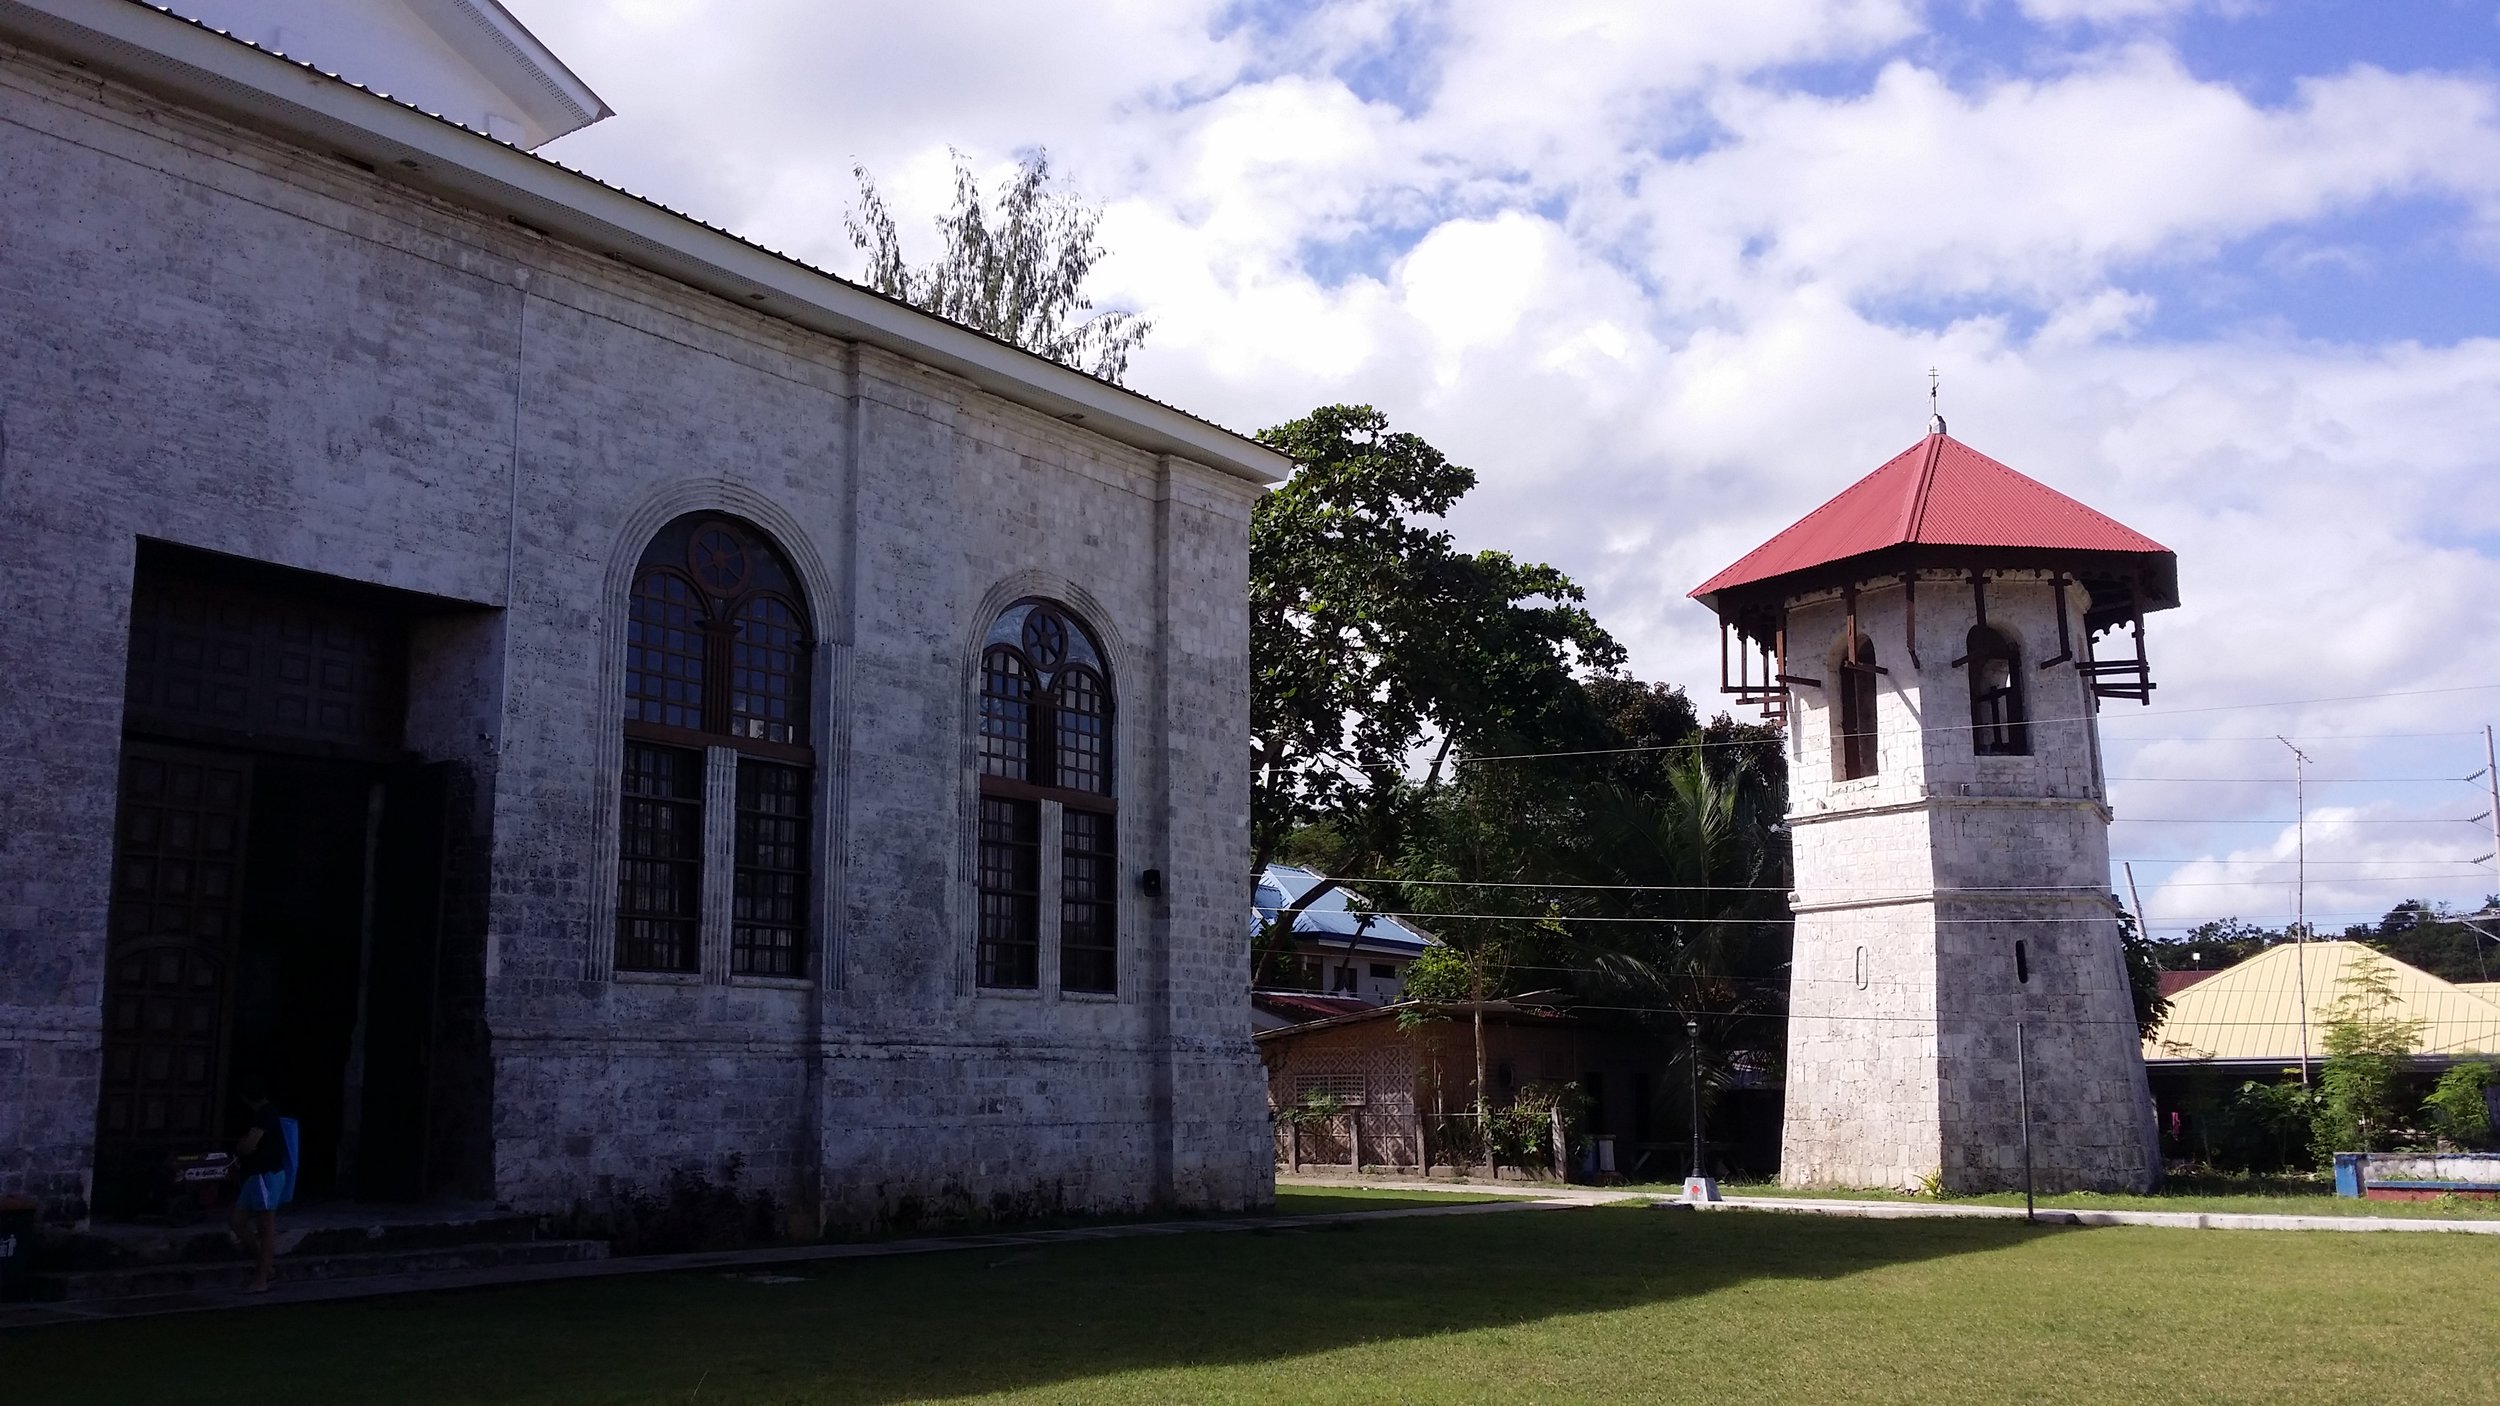
  • Baclayon Church - One of the oldest church in the Philippines. this church was once severely affected by a 7.2 earthquake in 2013.

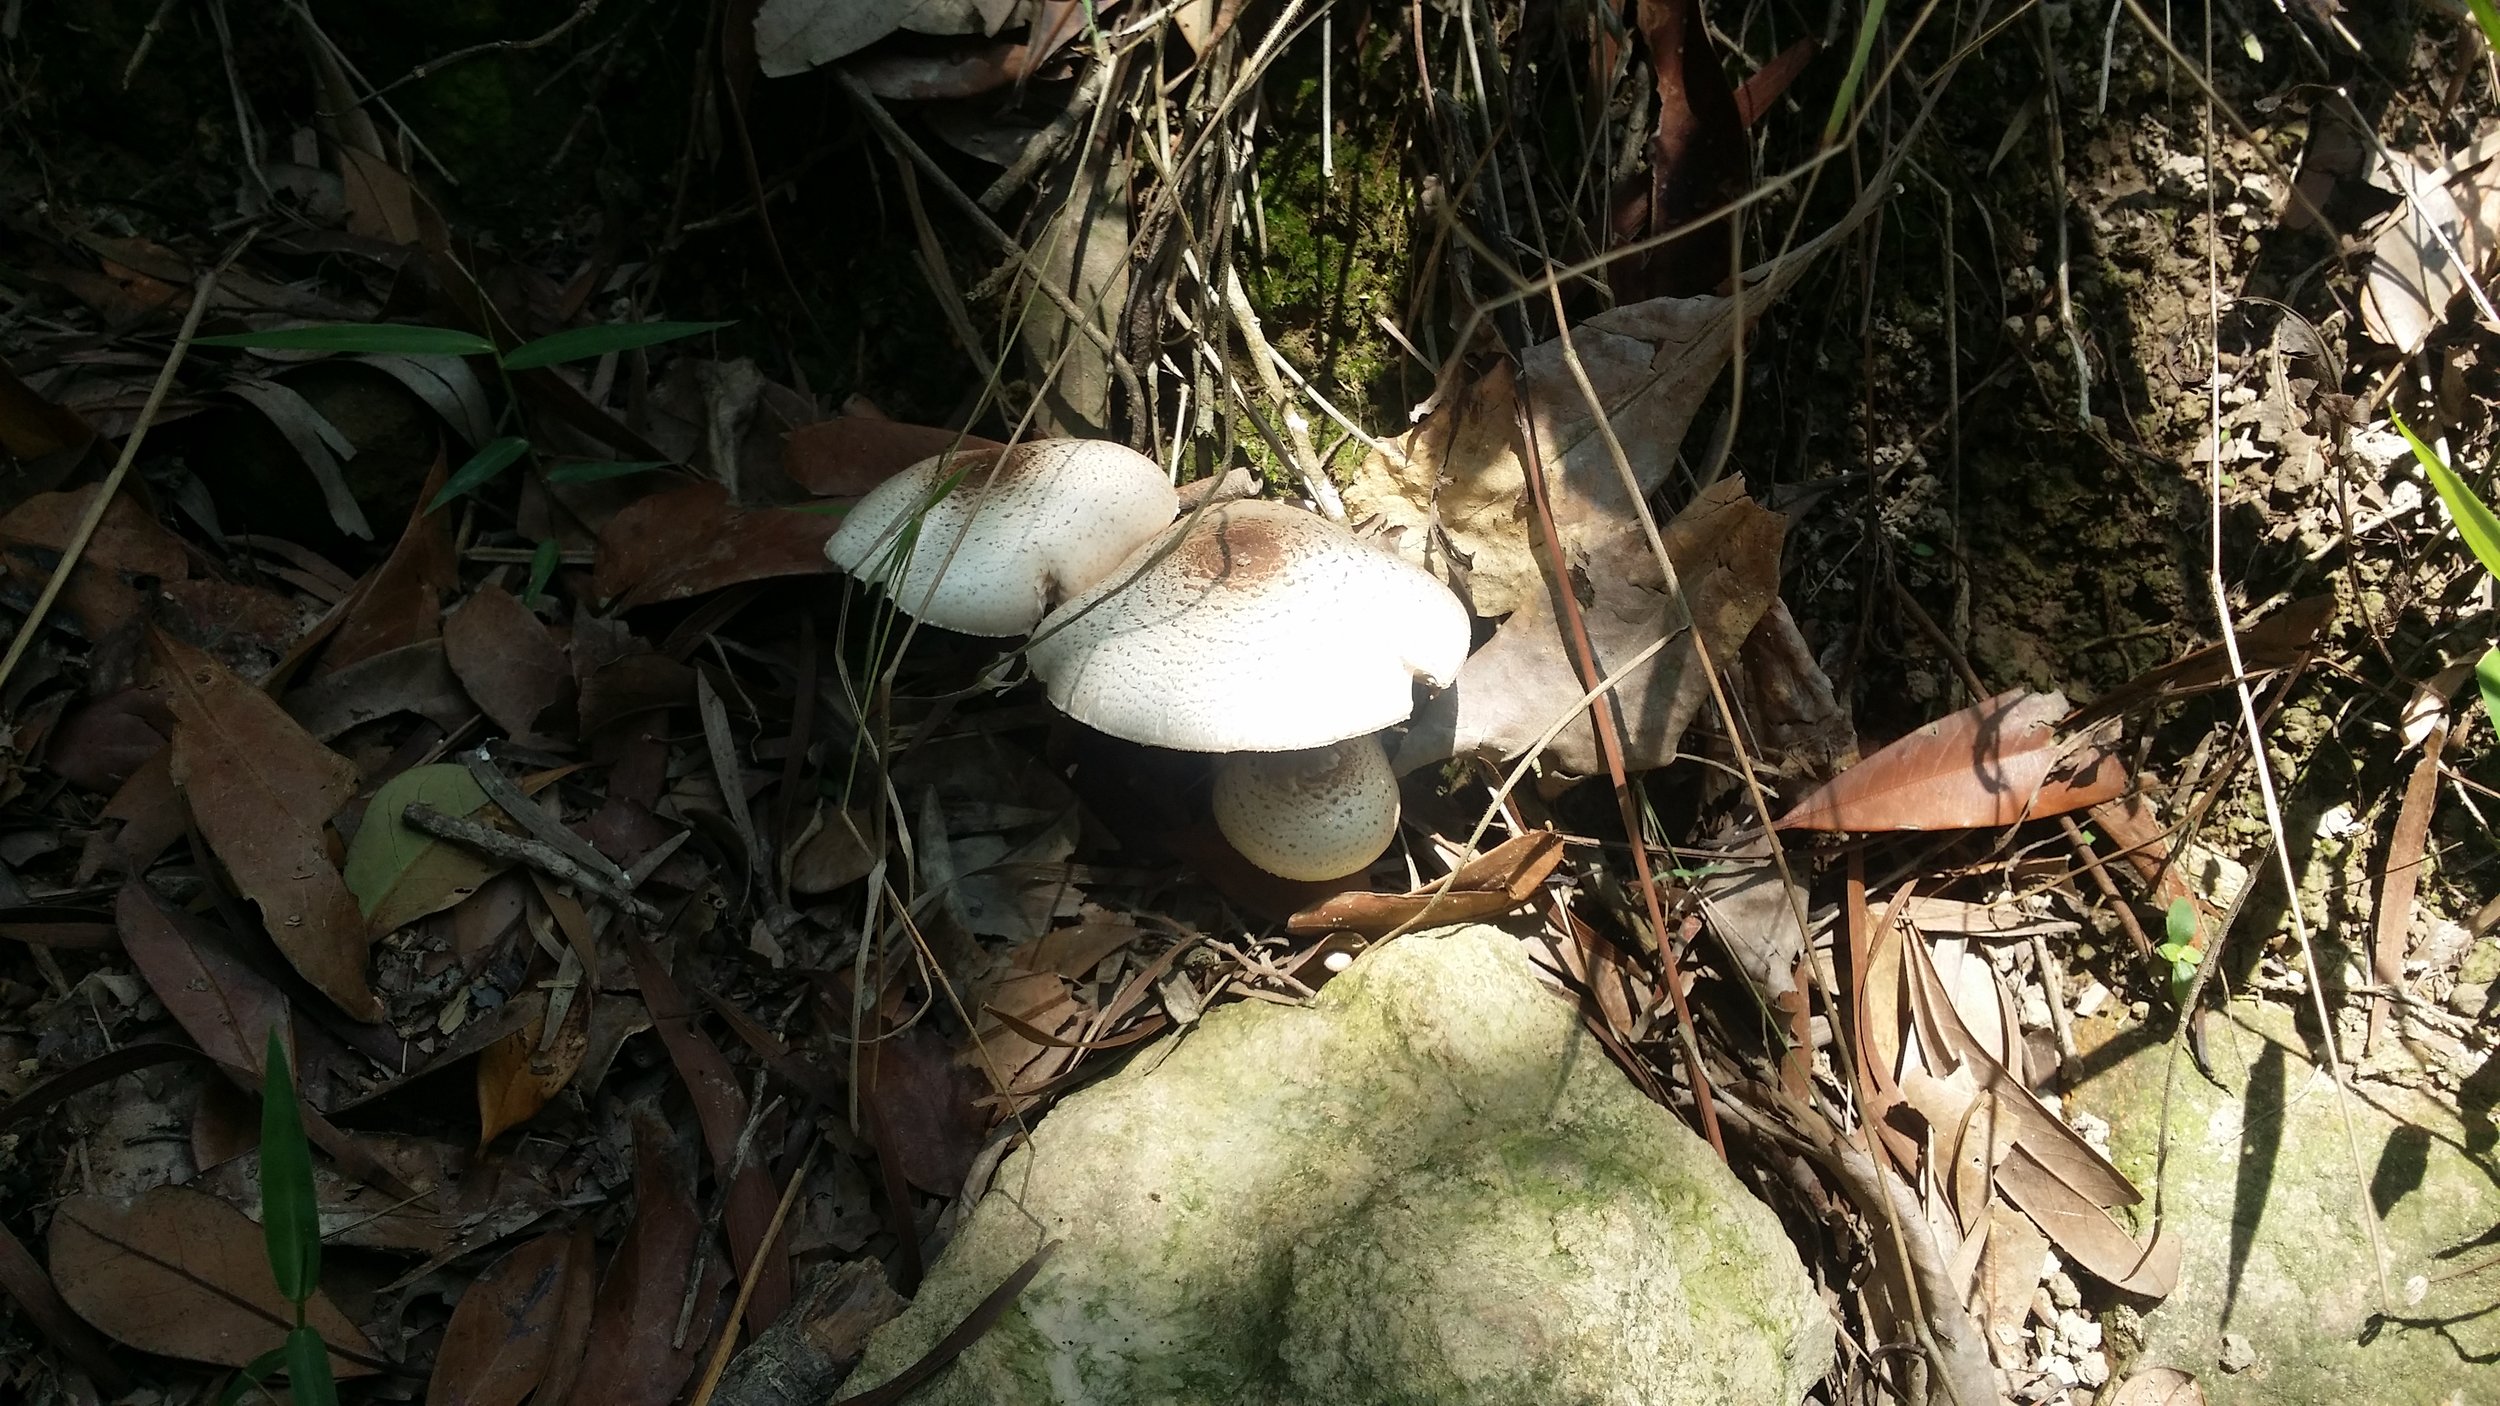
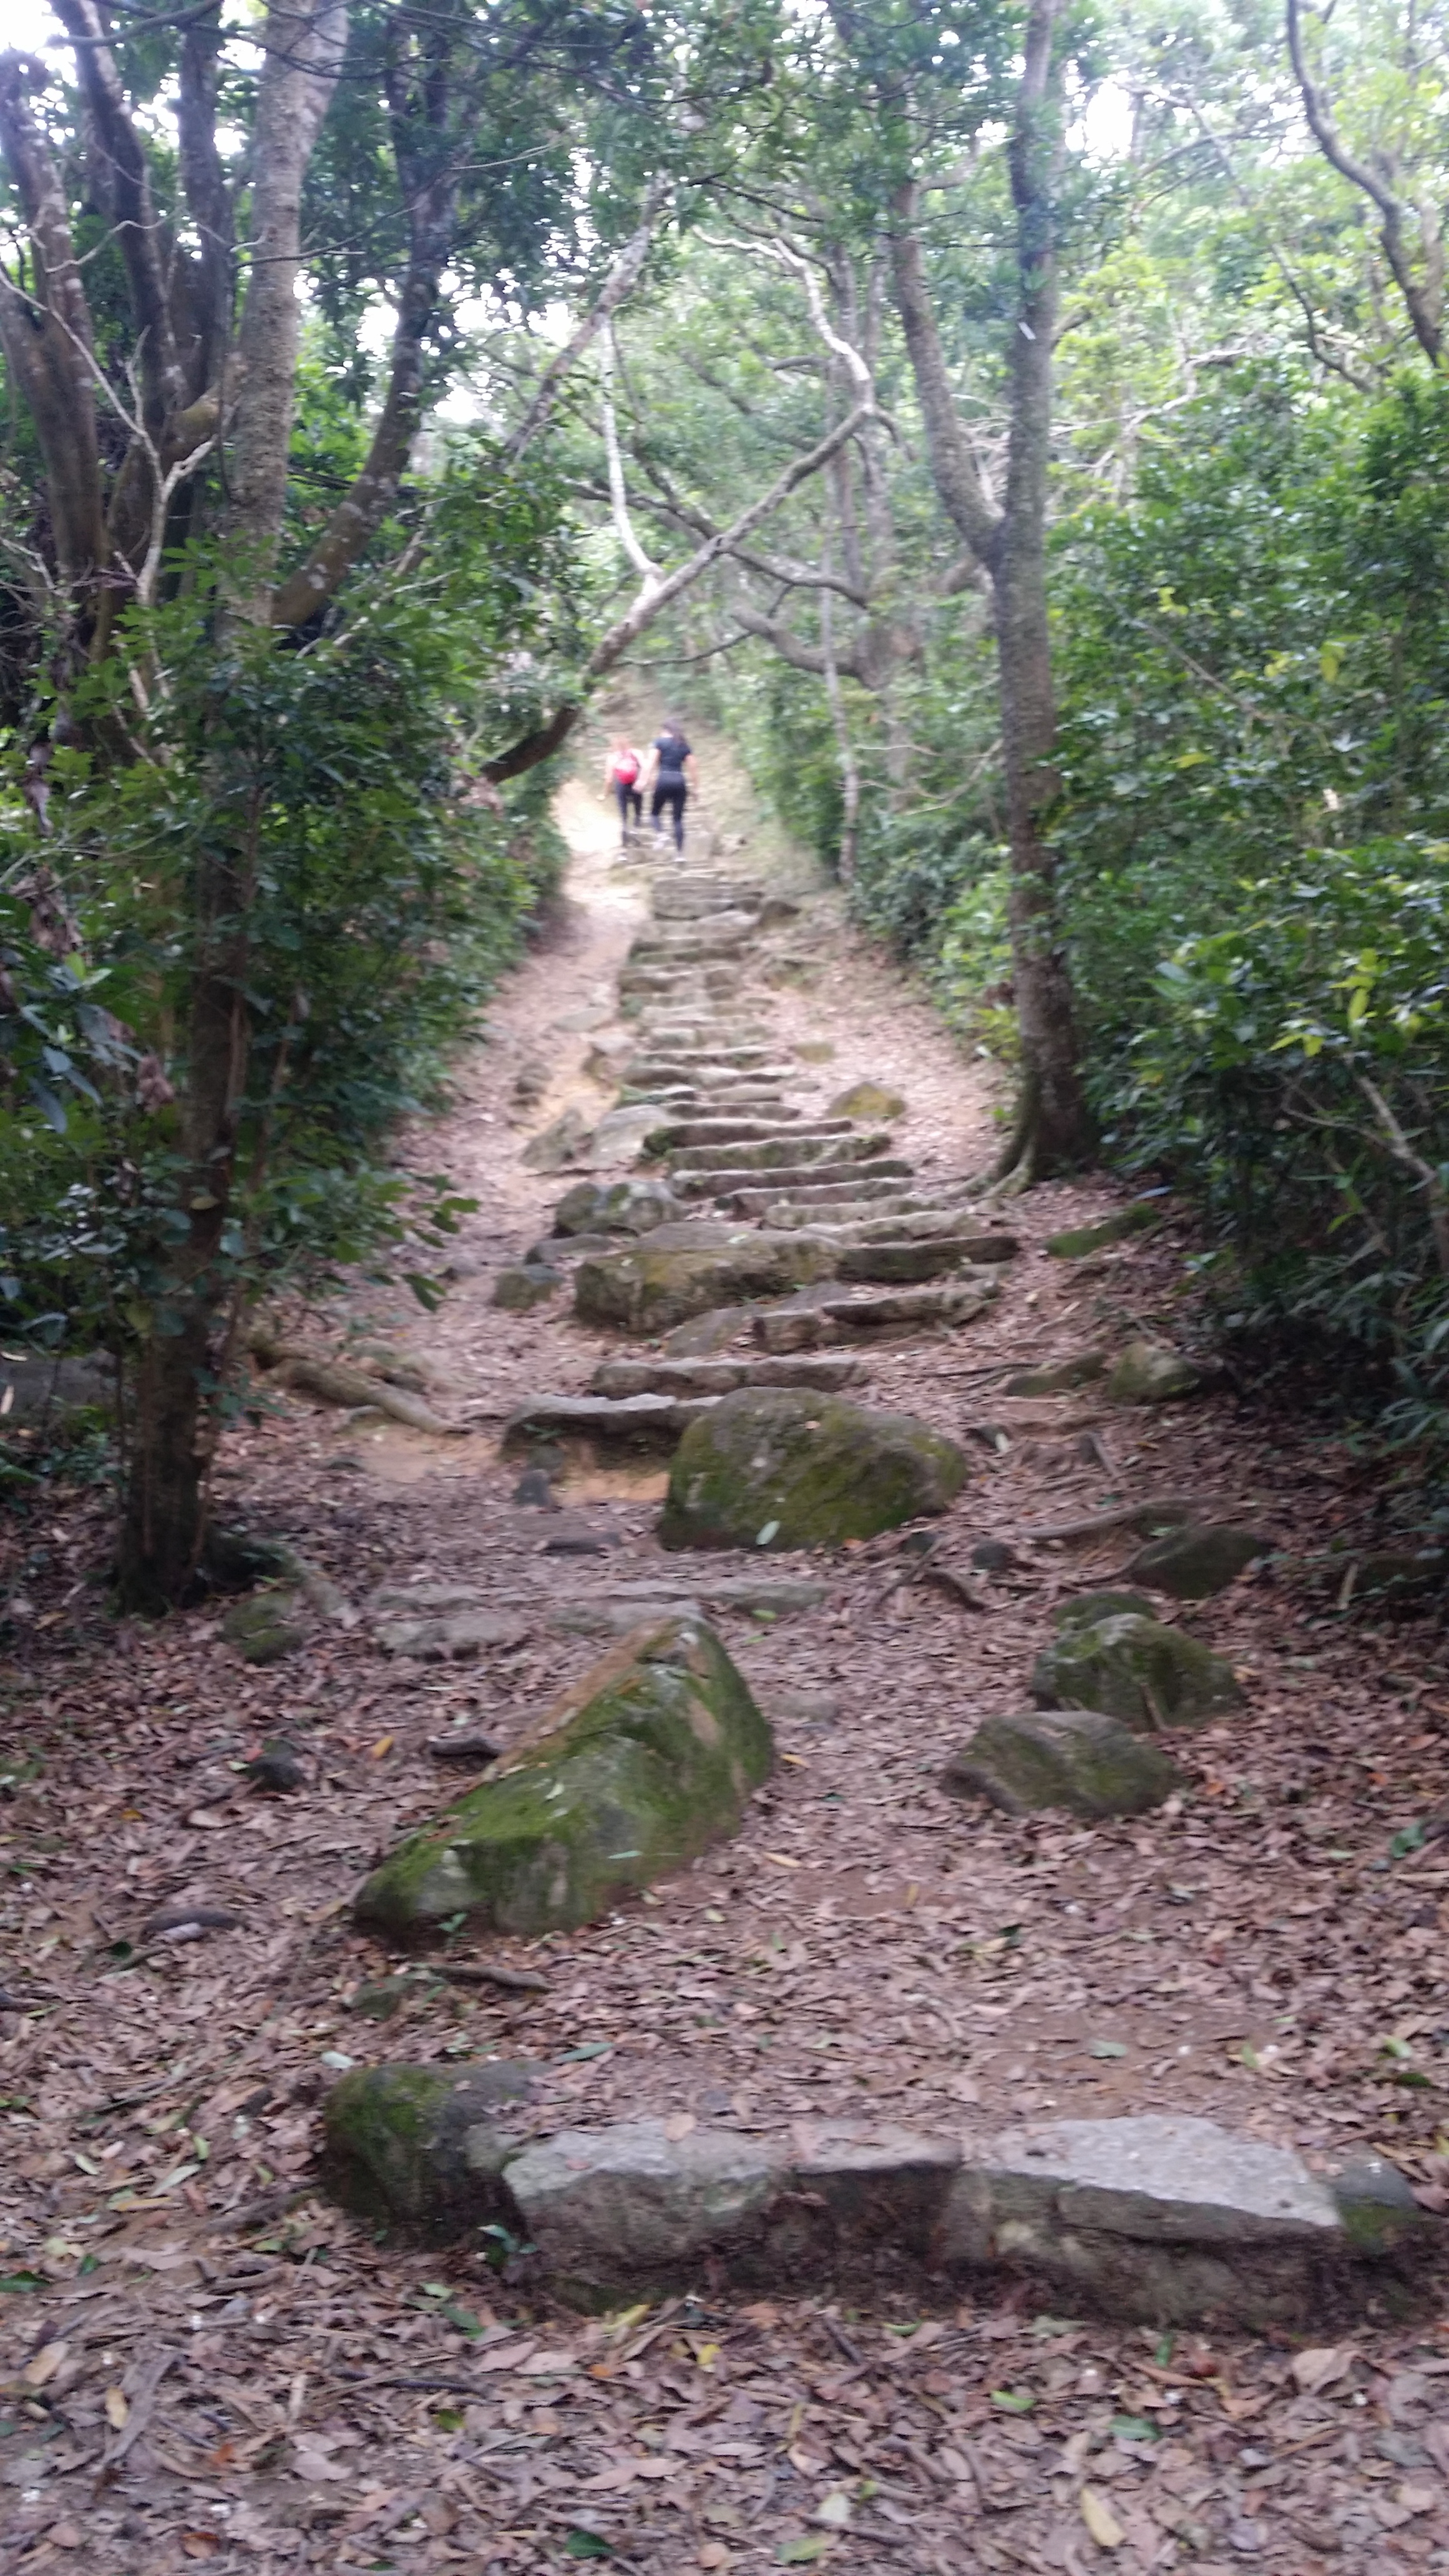
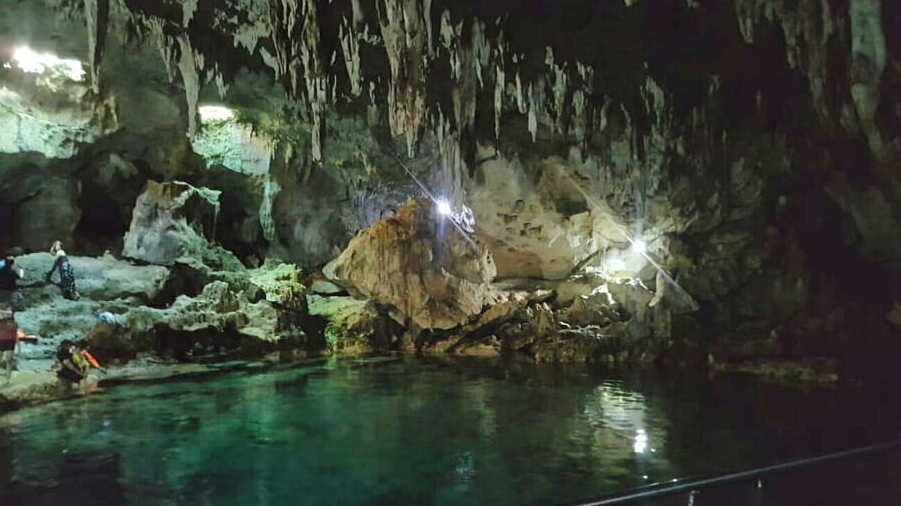
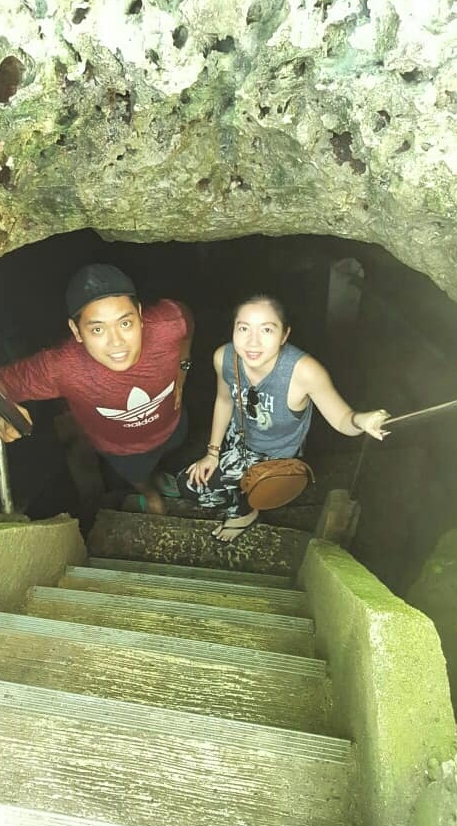
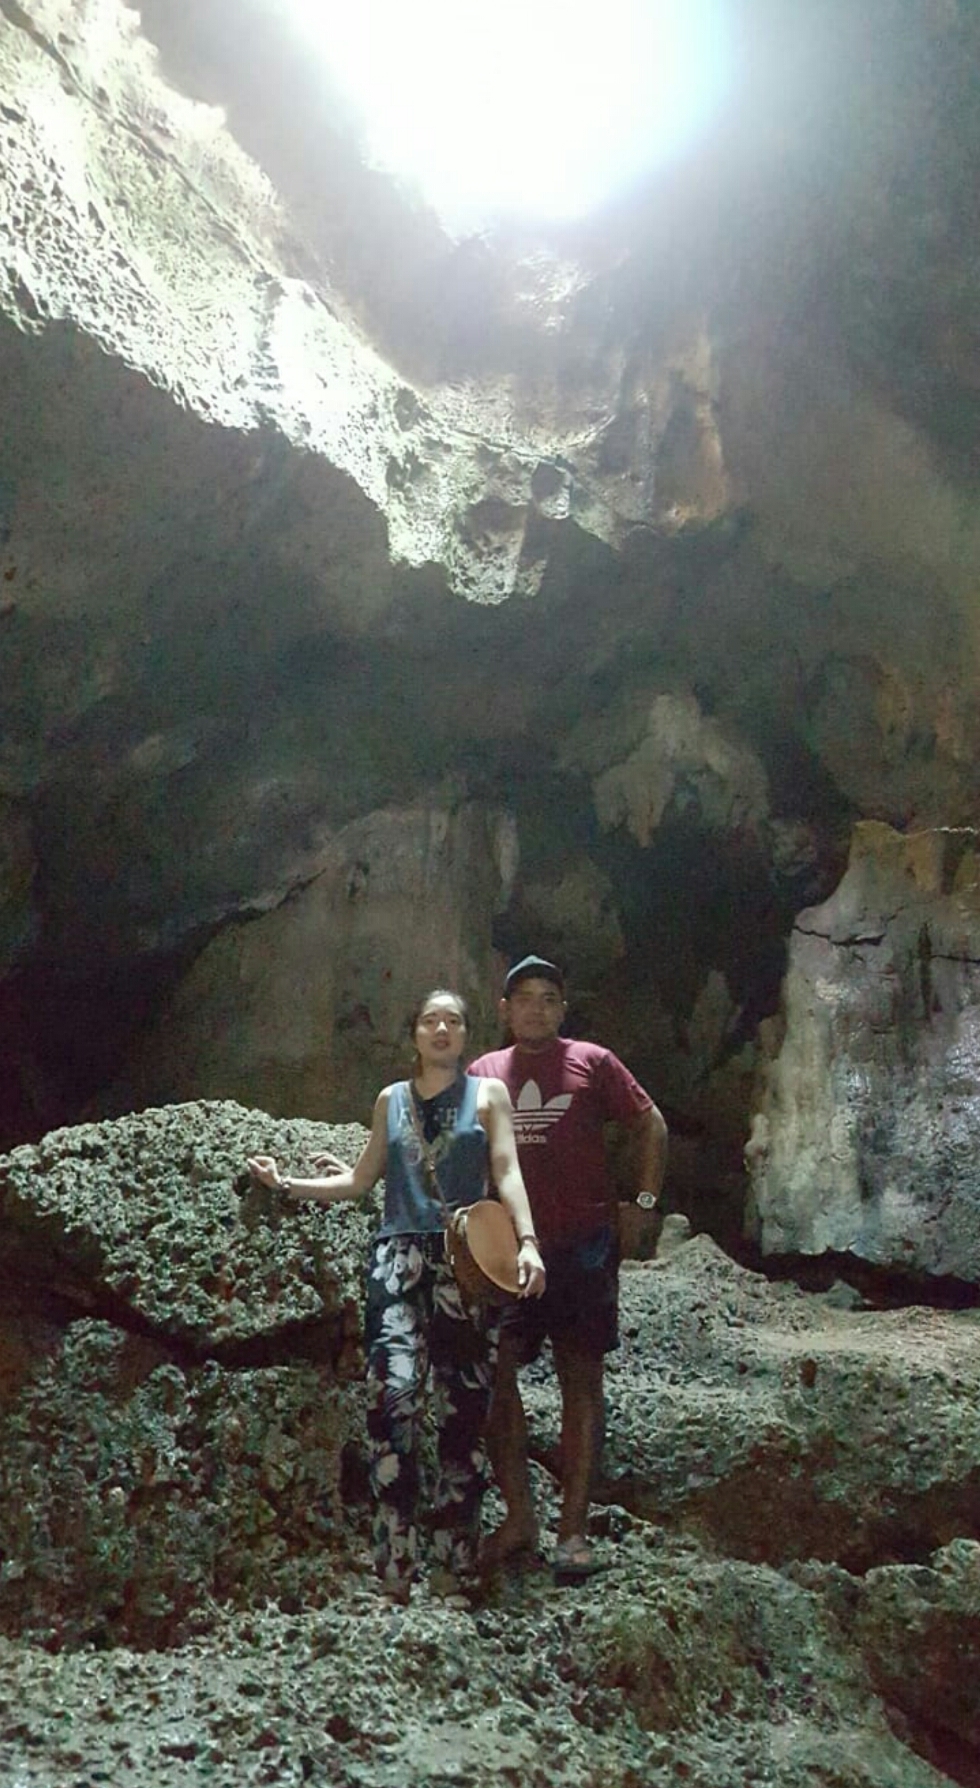
  • Hinagdaan Cave - It has natural light. It goes inside through the holes and creates some stunning light effects. There is also an enchanting lagoon that seems to be greenish on the surface because of the limestone at the bottom of the lagoon. Watch out where you step as it is slippery.

  • Panglao Watchtower - One of the heritage watchtower that was built in 1774.
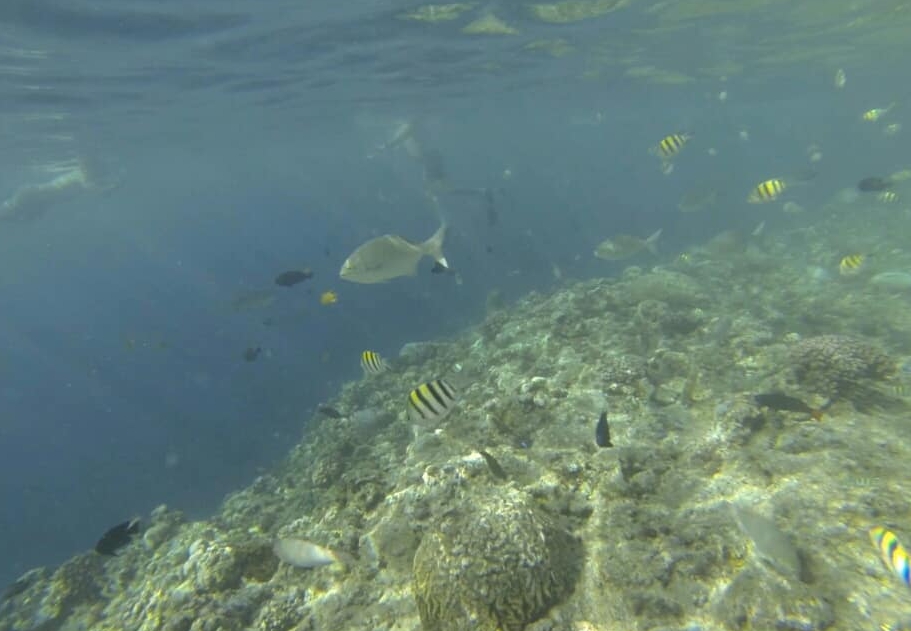
SCUBA DIVING

There are plenty of diving agencies around the island. Booking your diving trip in advance is mandatory as it will need a lot of preparations beforehand such as arranging your boat, dive guide, fitting in the gears and how much required tanks for your diving journey.

Balicasag Island, Cabilao Island, Doljo Island, Habagat Wreck and Pamilacan Island are probably the best diving sites to consider in Panglao.

Check out this site “The Best Dive sites of Panglao” in to know more.
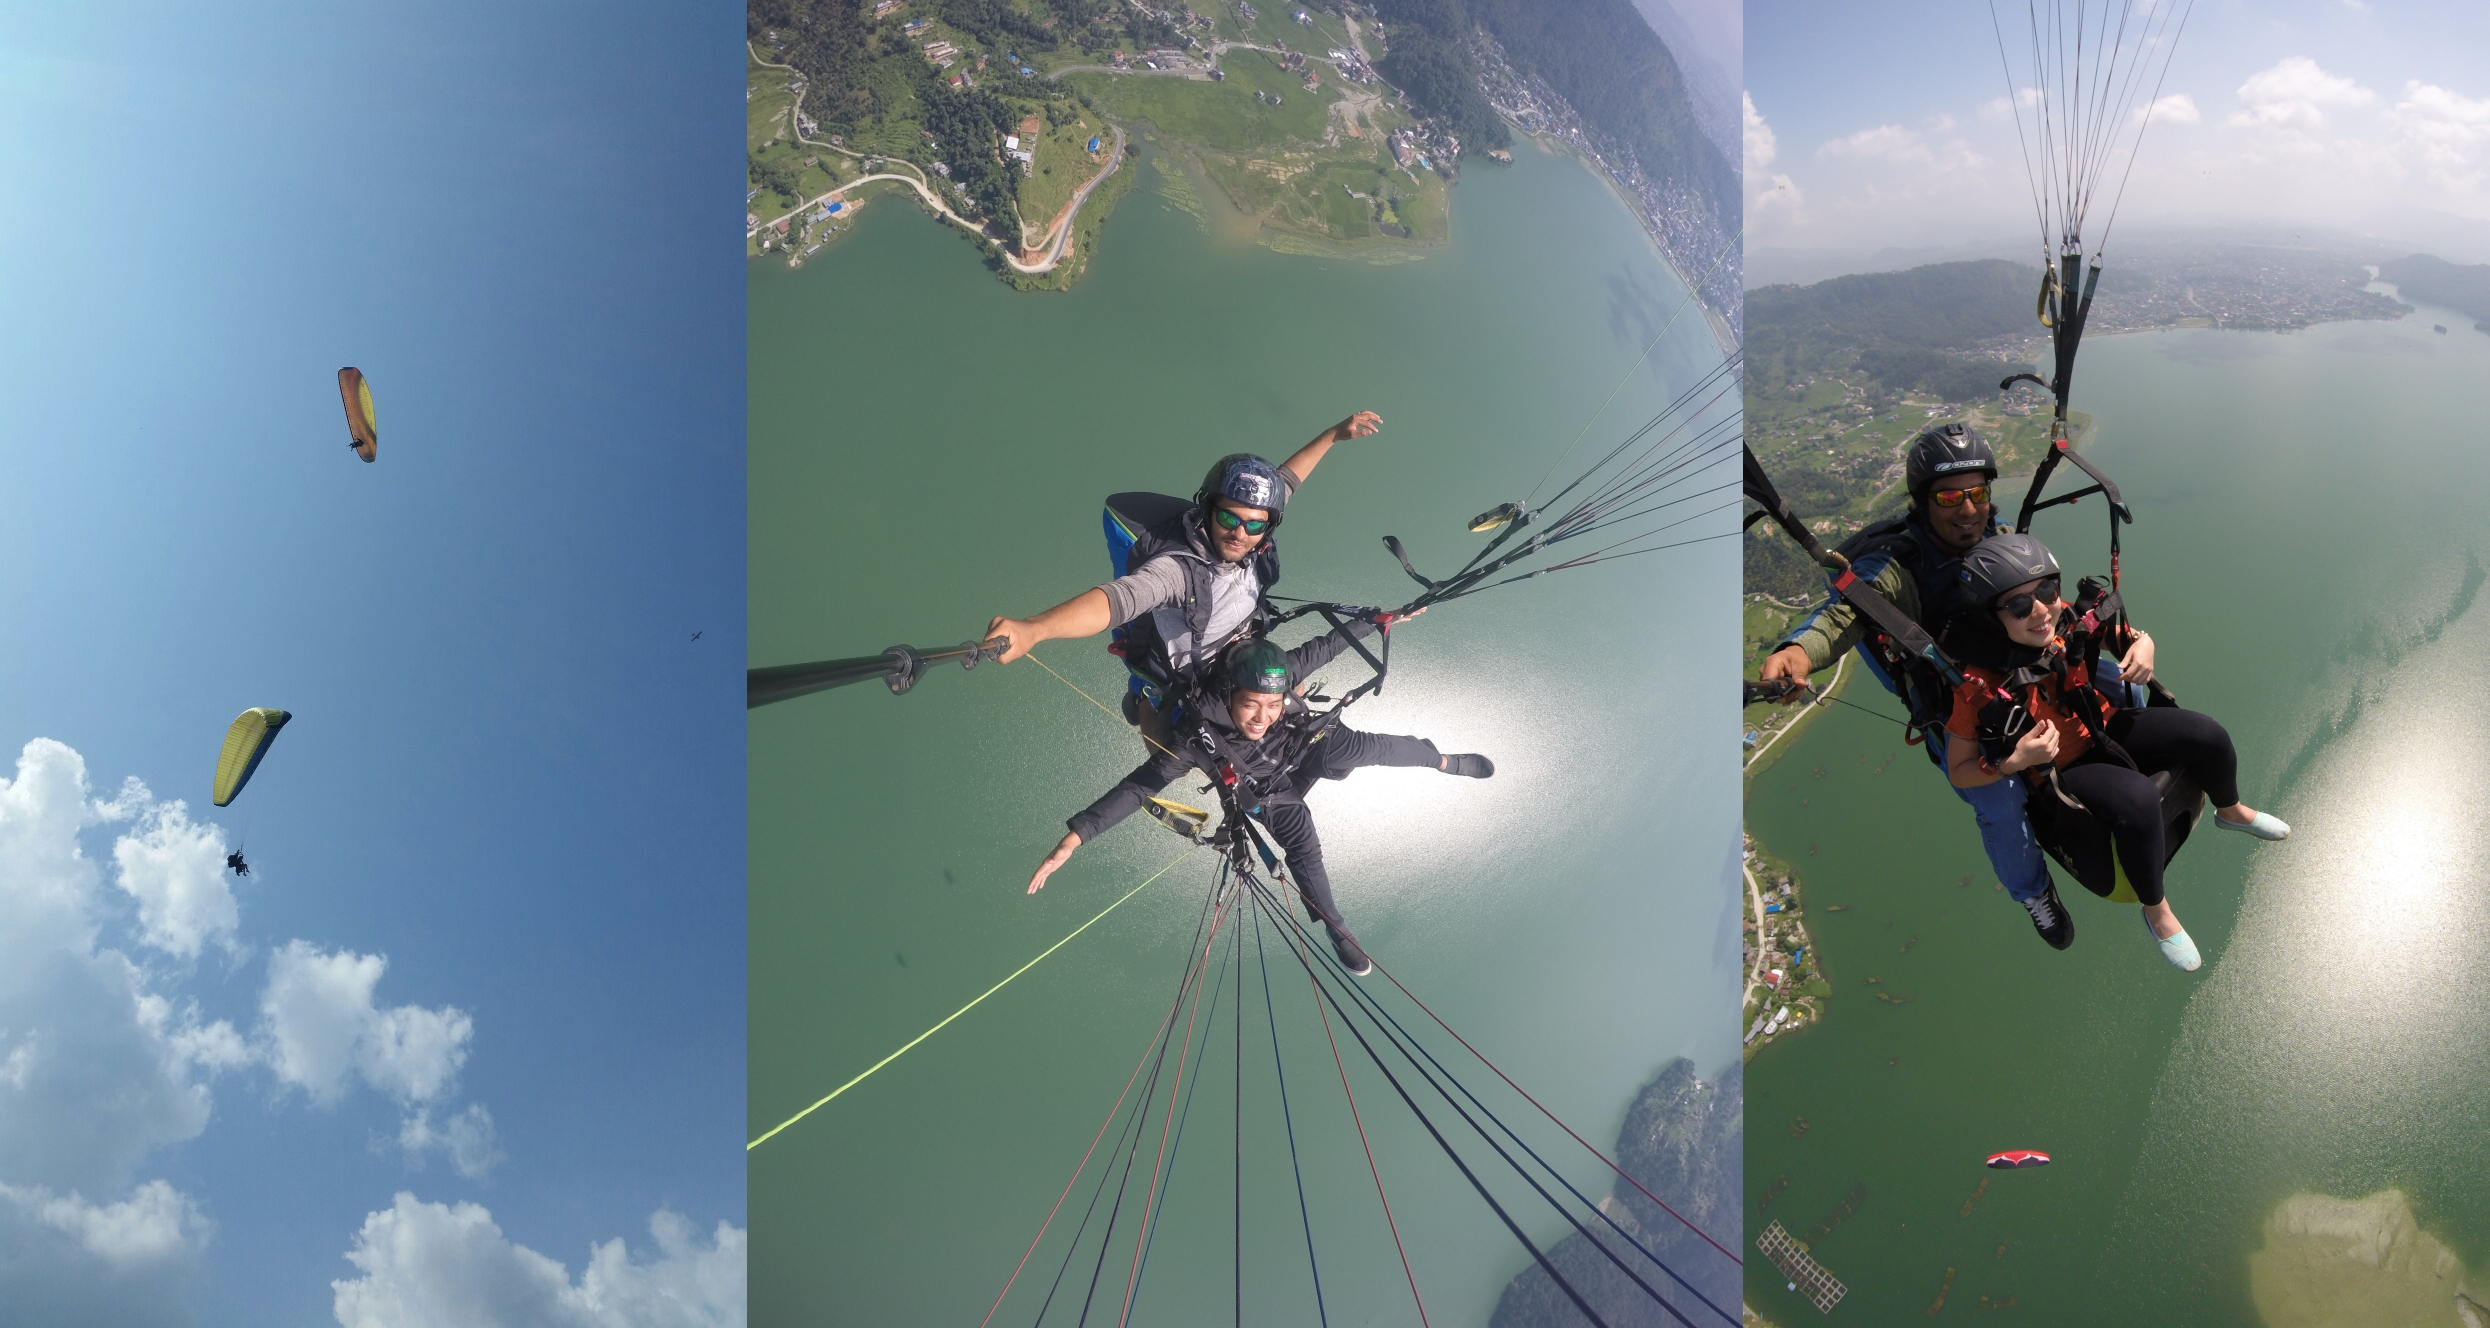
WATER SPORTS

There are many water sports for people to enjoy such as SUP (Stand Up Paddle), jet ski, kayaking, canoeing, surfing, windsurfing, scuba, snorkelling and parasailing.

Remember to book your trip in advance to secure your spot.
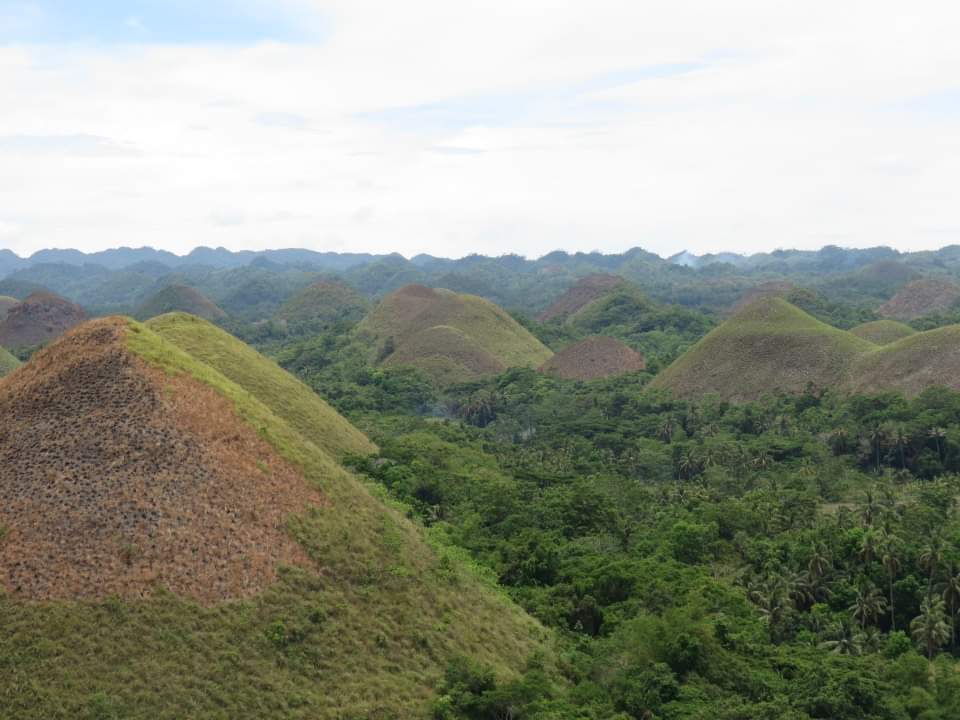
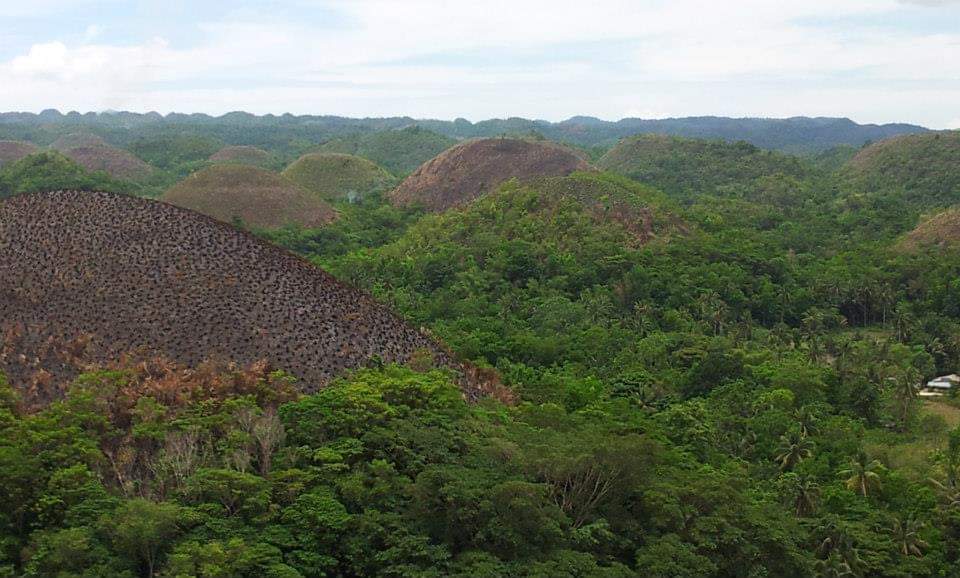
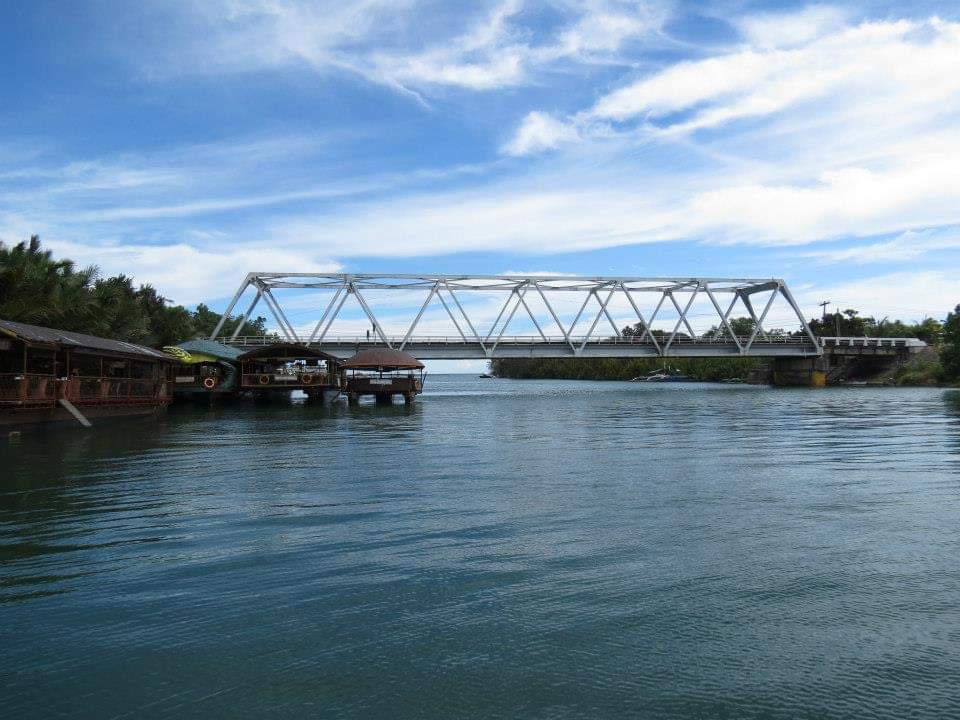
SIDE TRIP TO BOHOL

From Panglao Island, vacationers can do a side tour to Bohol. It is only two to three hours ride. Bohol is a beautiful place. There are many attractions and activities to do so it should be on your to-do list.

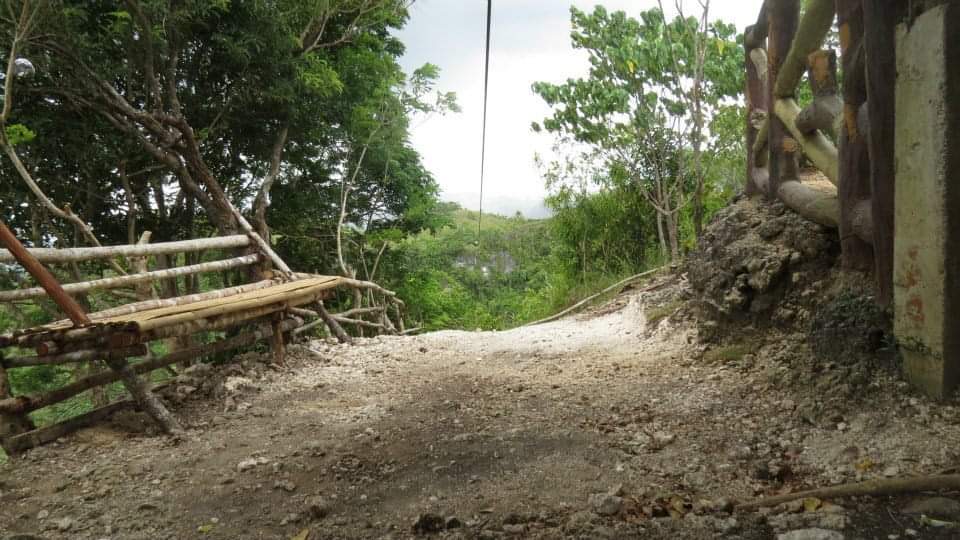
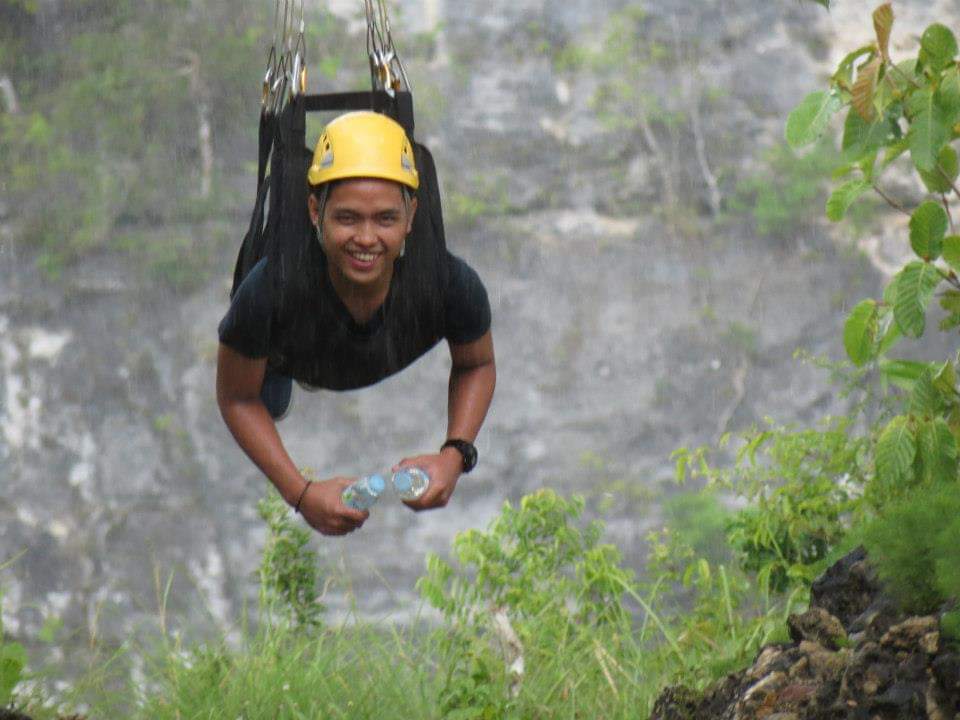
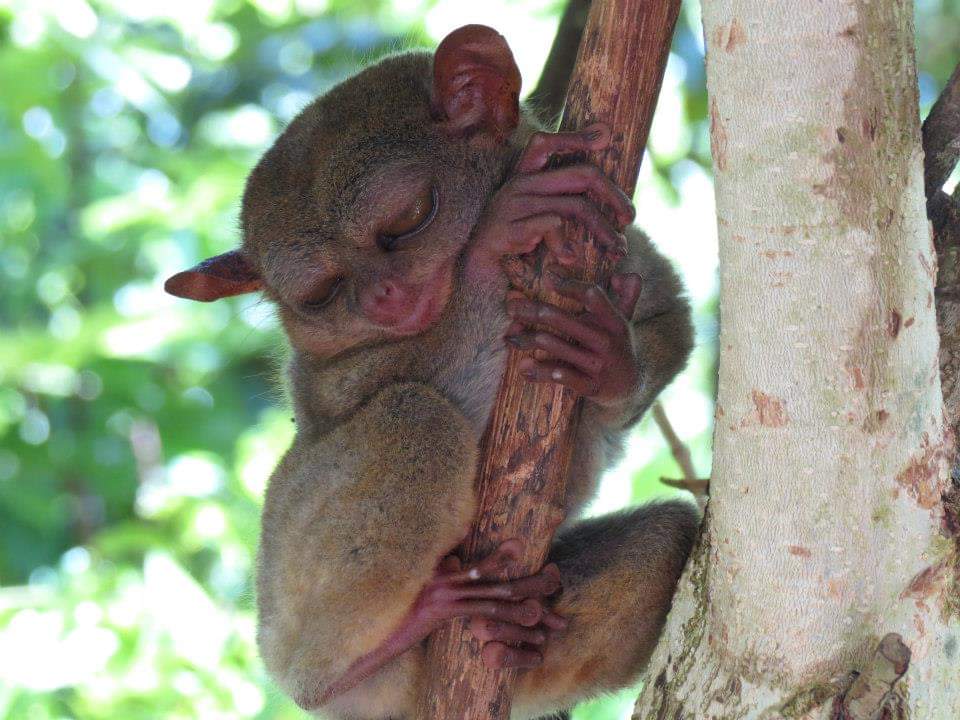
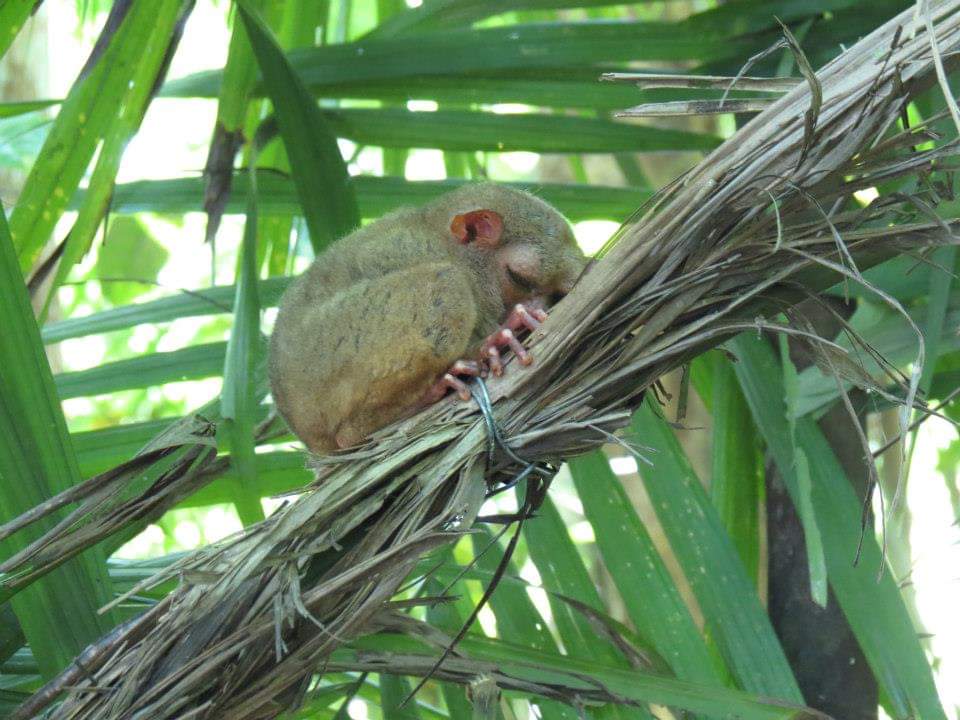
Attractions in Bohol includes The Philippines Tarsier, The Chocolate Hills, ATV ride around the hills, lunch buffet at Loboc Floating Restaurant, Loboc Eco-Tourism Adventure Park and Bohol human-made forest.

FOOD HUNTING

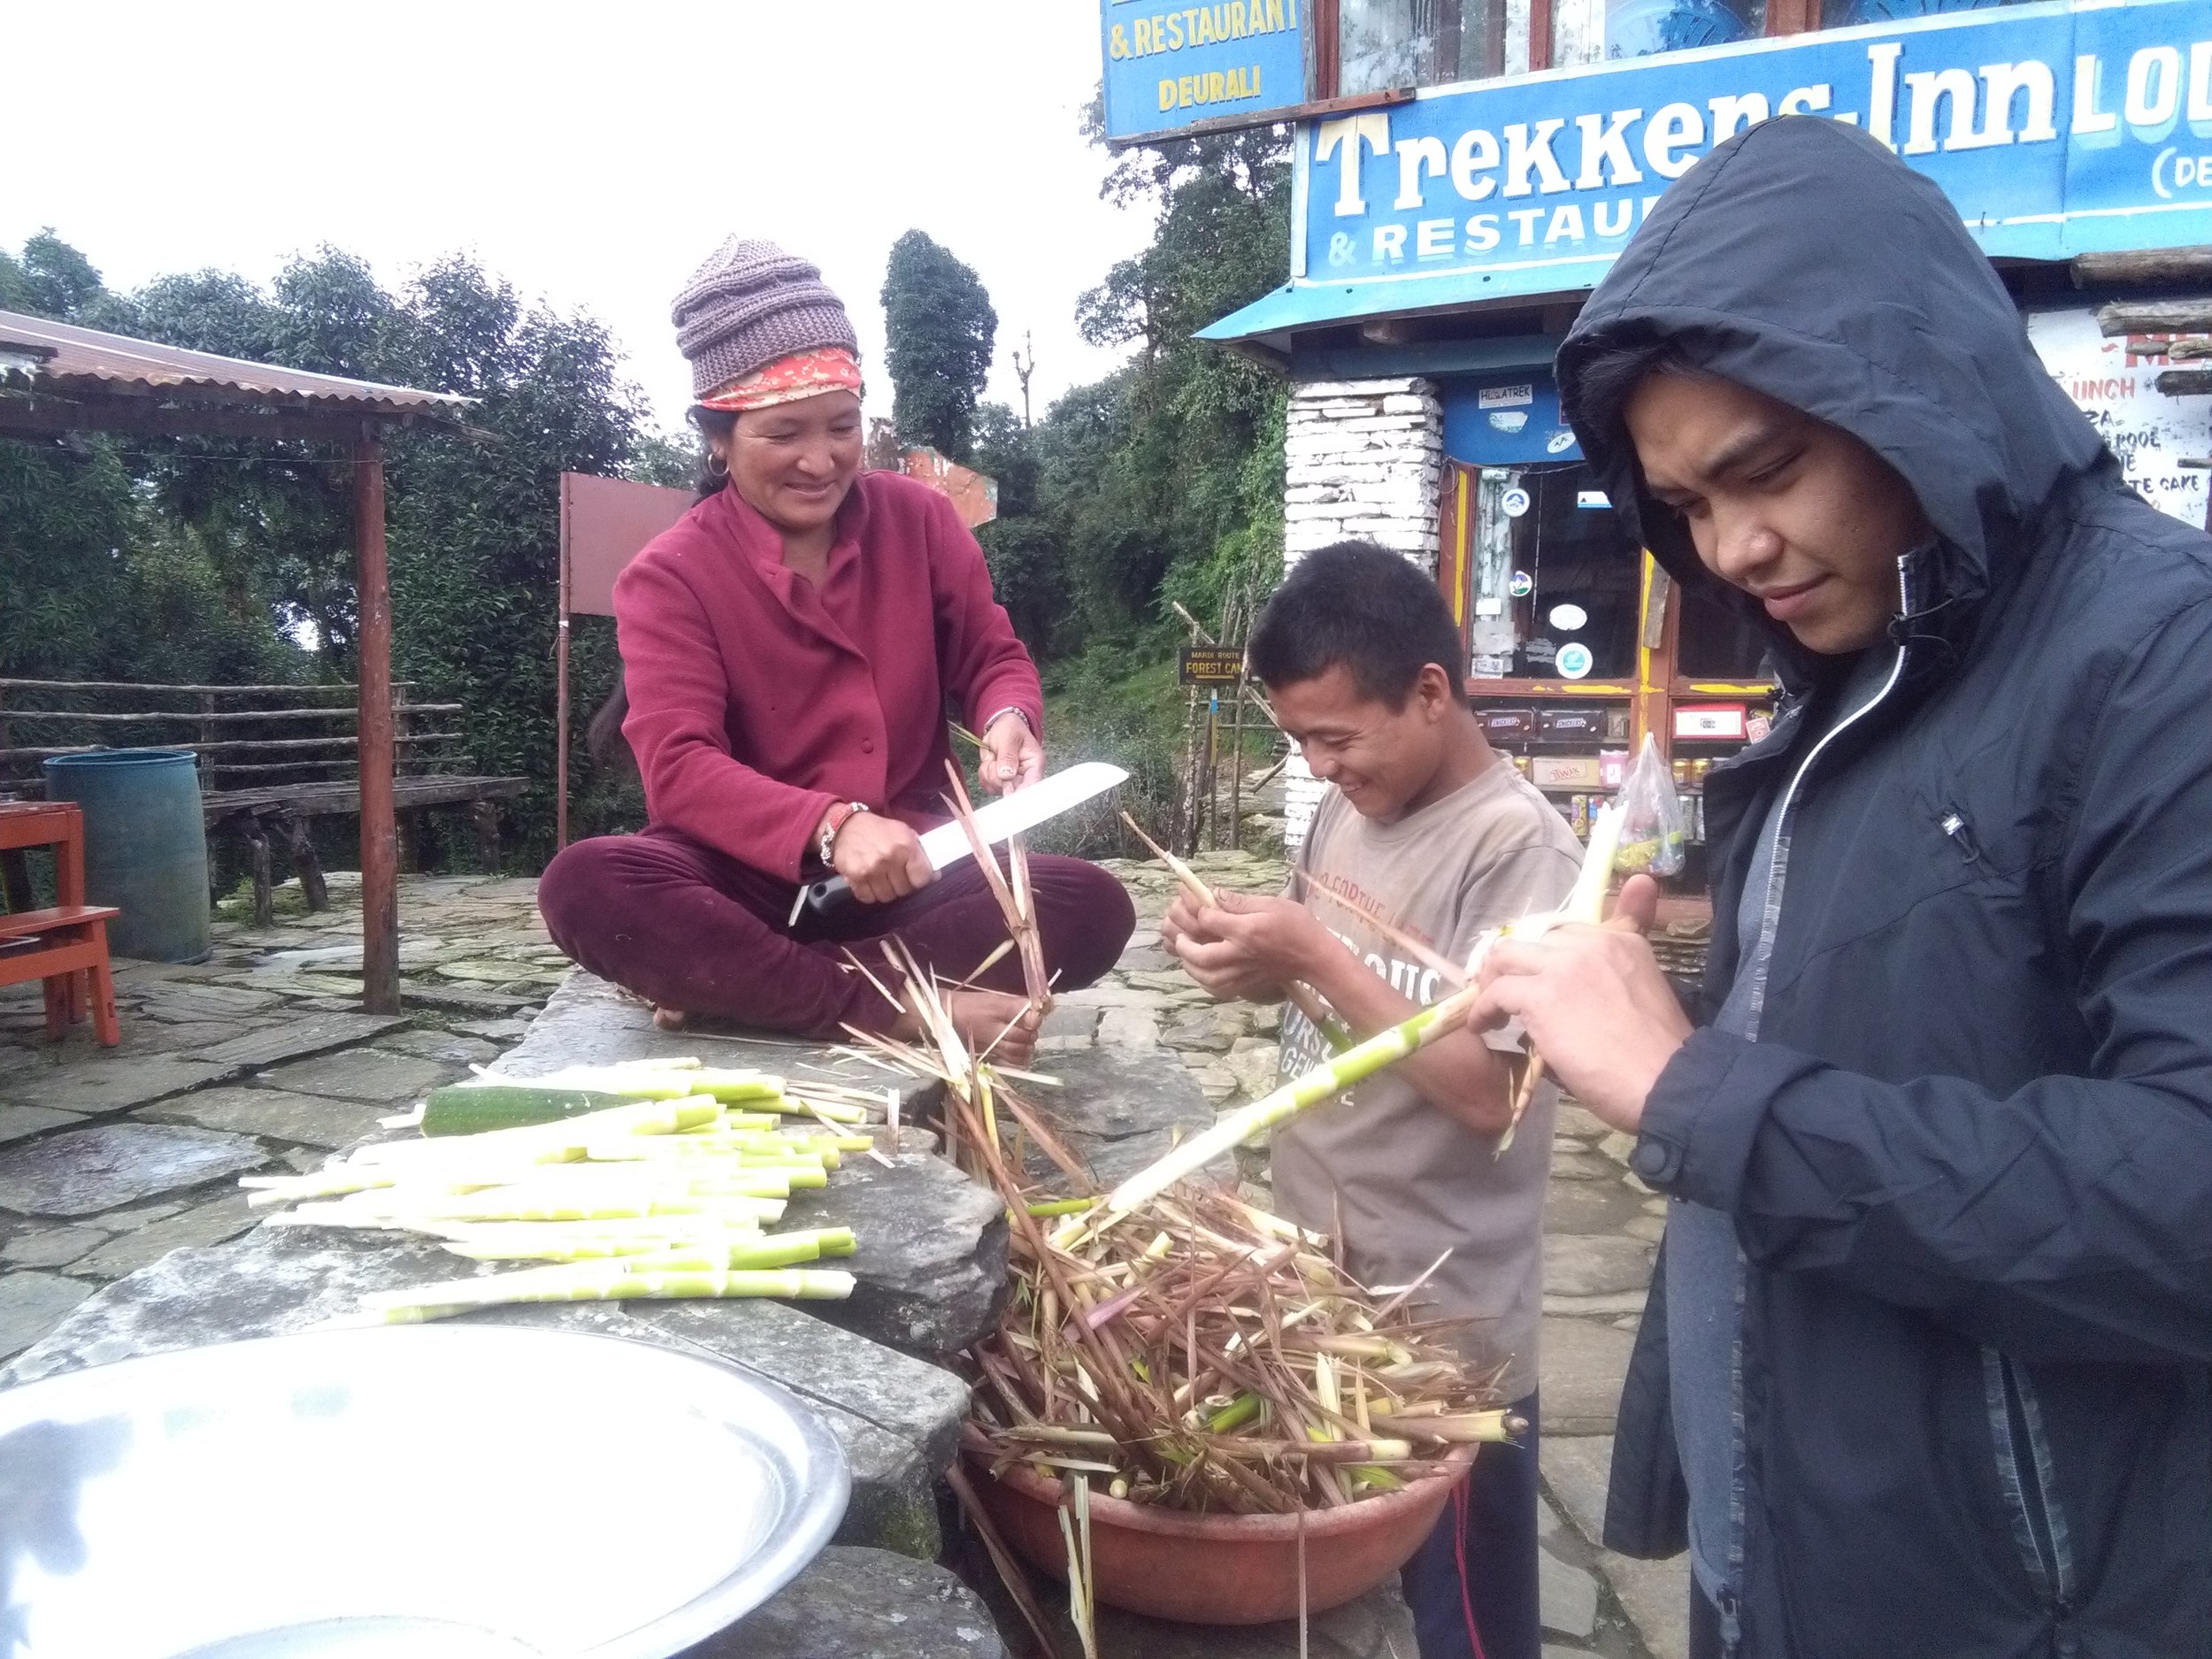
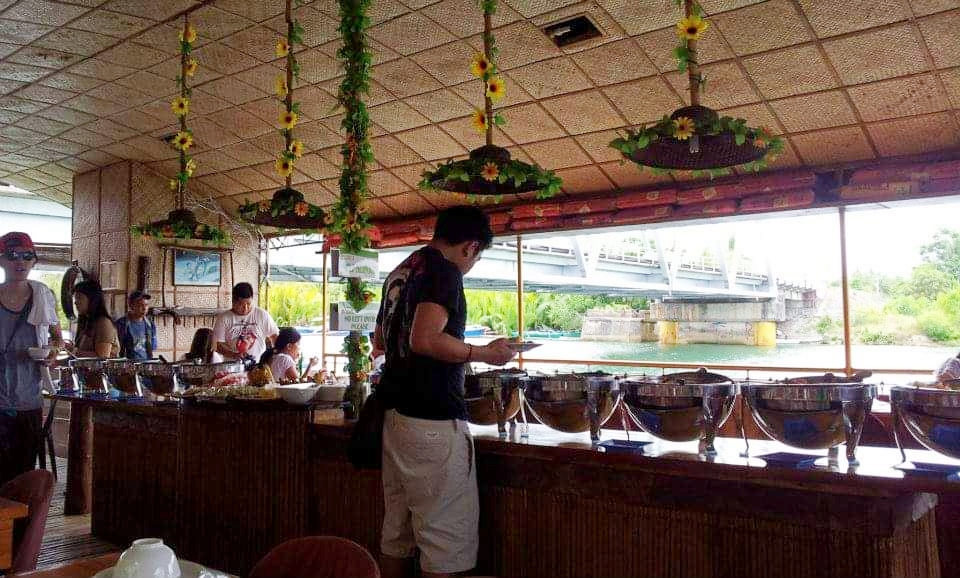
There are plenty of restaurants on the island. I find it hard to choose what restaurant to pick as there are too many and they all seem pretty good. You can find Filipino, Italian, Korean, Japanese, Spanish, Thai, American and Chinese cuisines. There is also some BBQ (cook to order) and buffet places to dine in. In simple words, Panglao has everything you need.

RELAXATION

Reward yourself with some relaxation treat. Trust me, we all deserve that from time to time! There are numbers of spas around the island. They are also plenty of massage services by the beach. Massage on the island is affordable and not super expensive.

If you are looking for some nail/ foot spa, there are a few shops available to tend to your needs too. Most hotels offer massage services in your room as well.

THE DO’S

  • Respect the rules in the hotels, restaurants, public areas such as the beach, park, etc

  • Try the Filipino cuisines and drink local beers (San Miguel or Red Horse)

  • Book your activities or scuba trip days in advance to avoid fully-booked or delaying your trip.

  • Be friendly to the locals so that they will be helpful to you too.

  • Tip your waiter, driver or masseuse accordingly. It will help with their daily expenses.

  • Always ask for the name and contact number of the person you are booking an activity. Ask for a receipt as proof.

  • Conserve water and only use it when needed.

THE DON’TS

  • Don’t litter anywhere. Put your trash in the bins.

  • Don’t cause any harm to nature.

  • When buying things or booking a trip, don’t bargain too much or unreasonable as they don’t earn much.

  • Don’t swim during night time as there will be no one to save you from drowning.

  • Don’t pay any advanced full payments for your activities; a deposit usually is what they will ask.

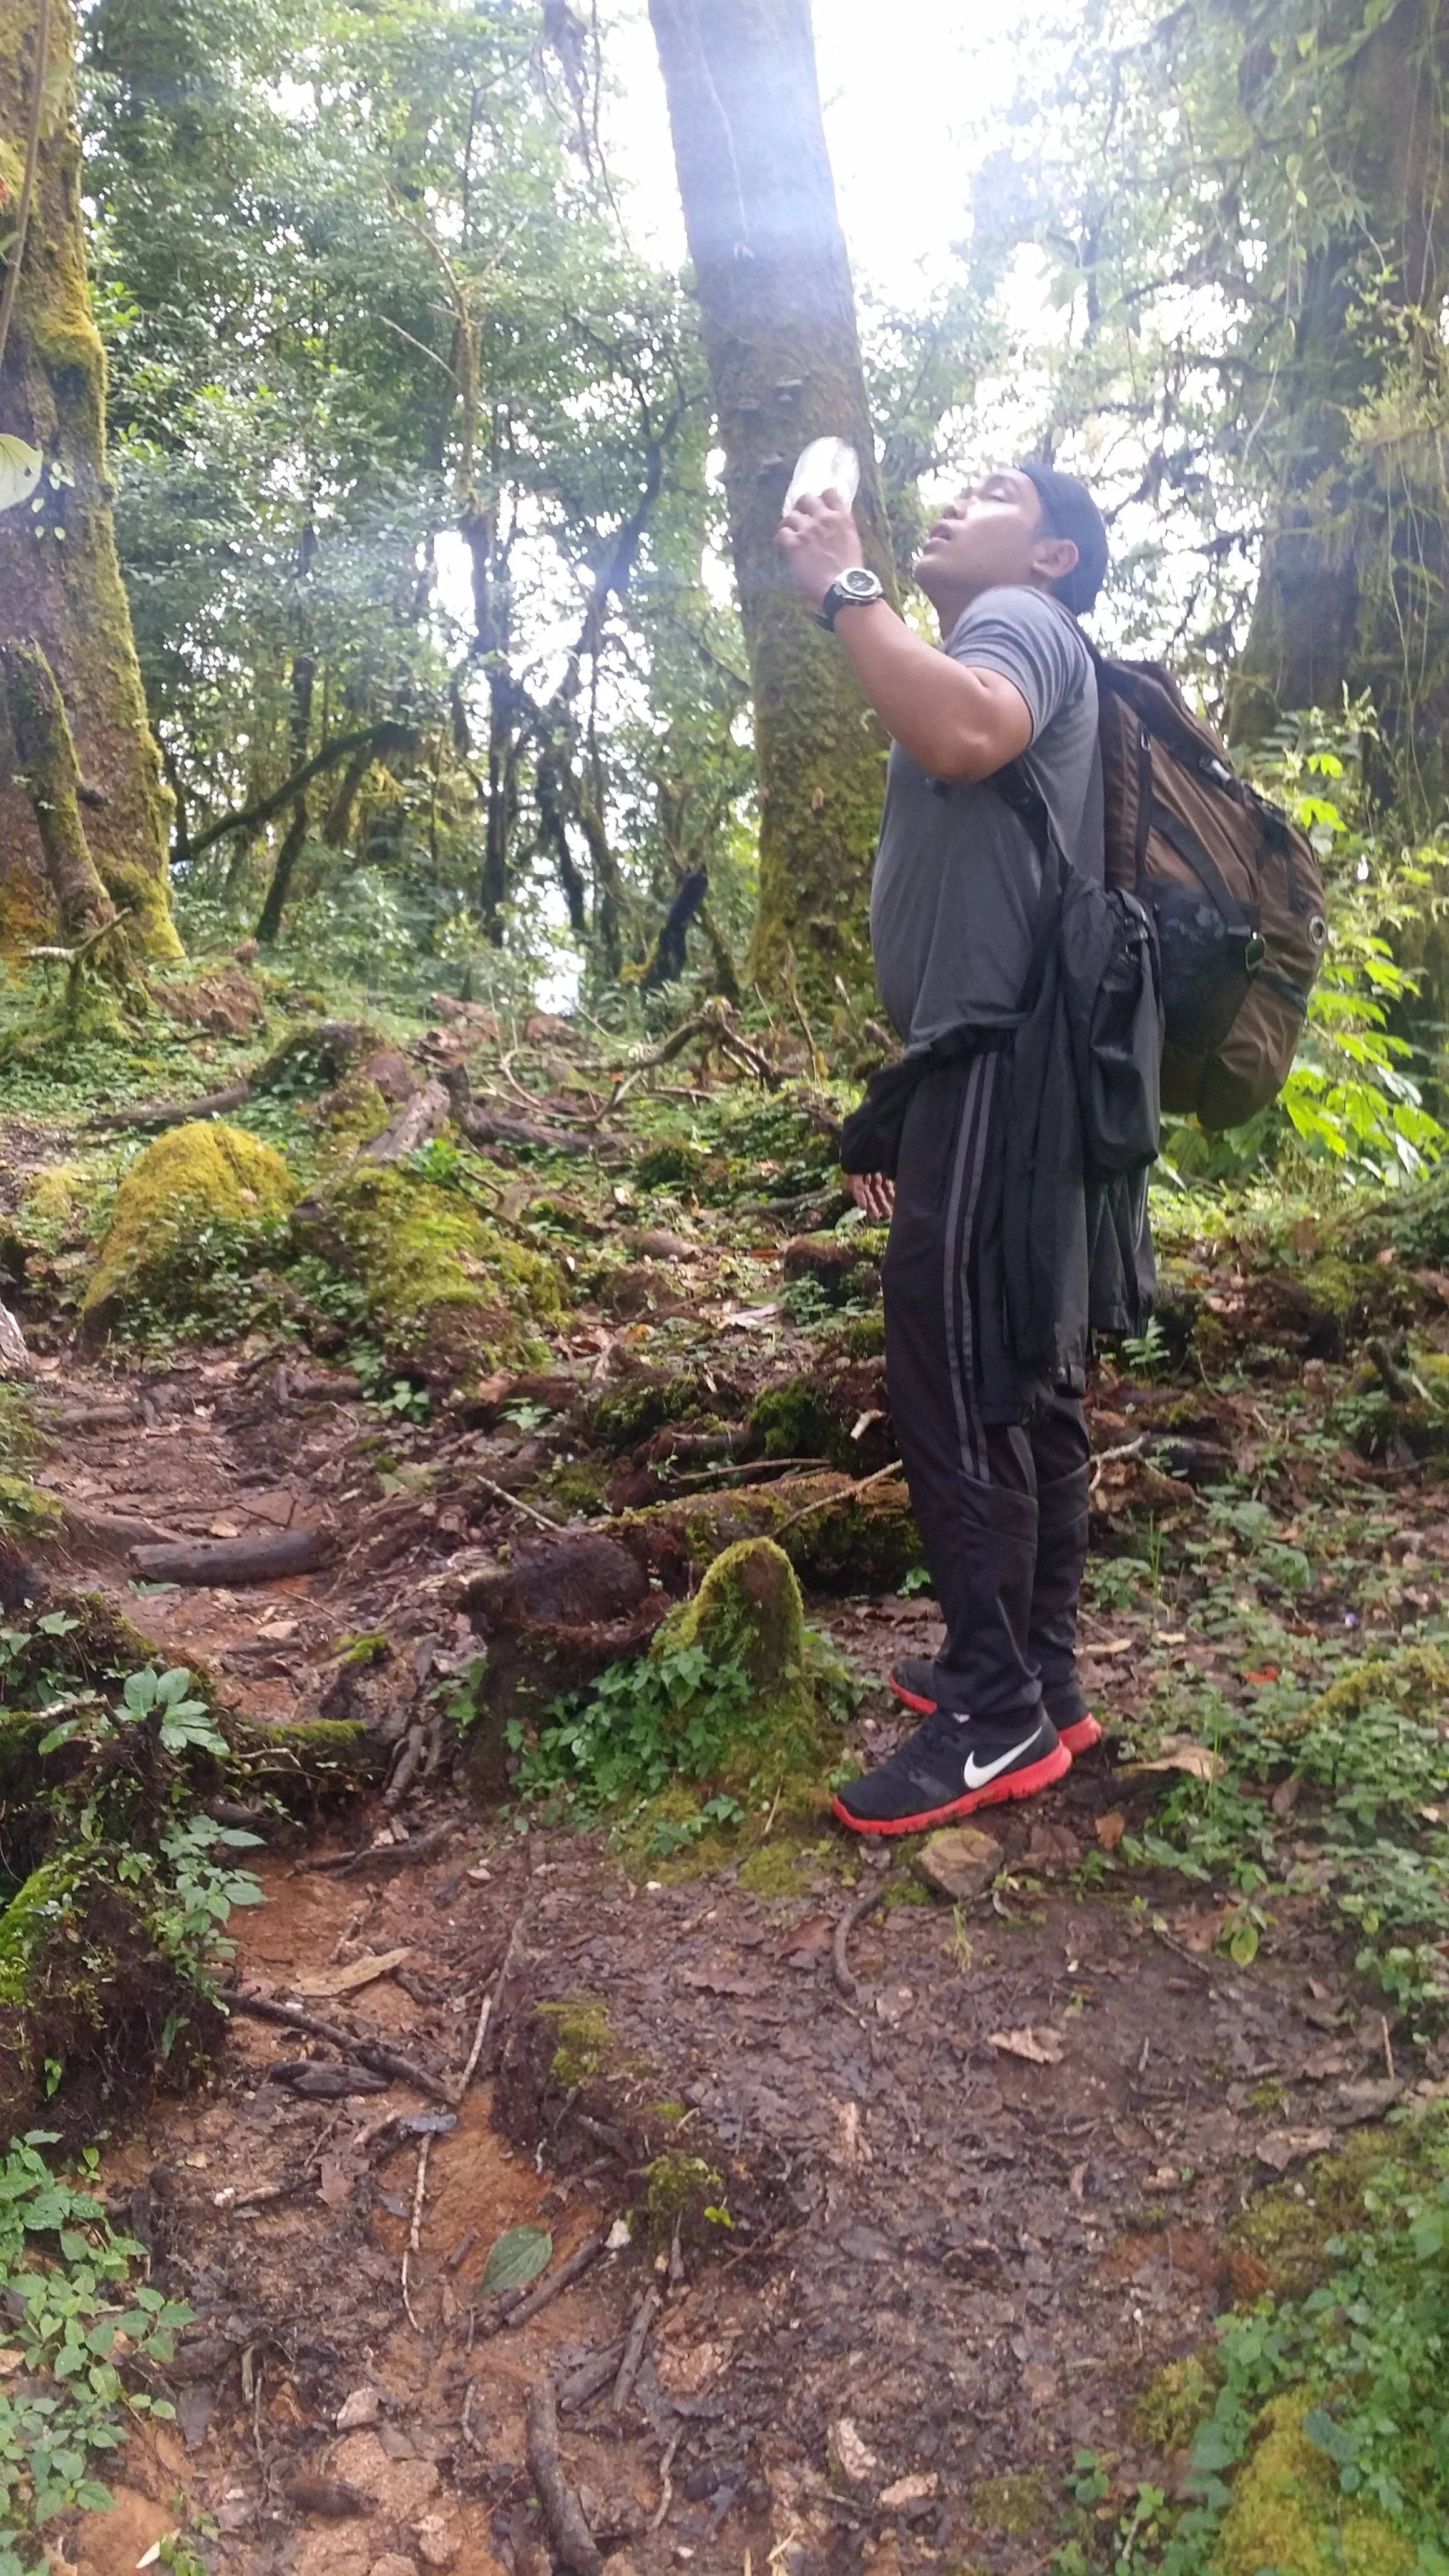
  • Don’t drink the tap water as it is not drinkable. Always drink from bottles.

OVERALL EXPERIENCE

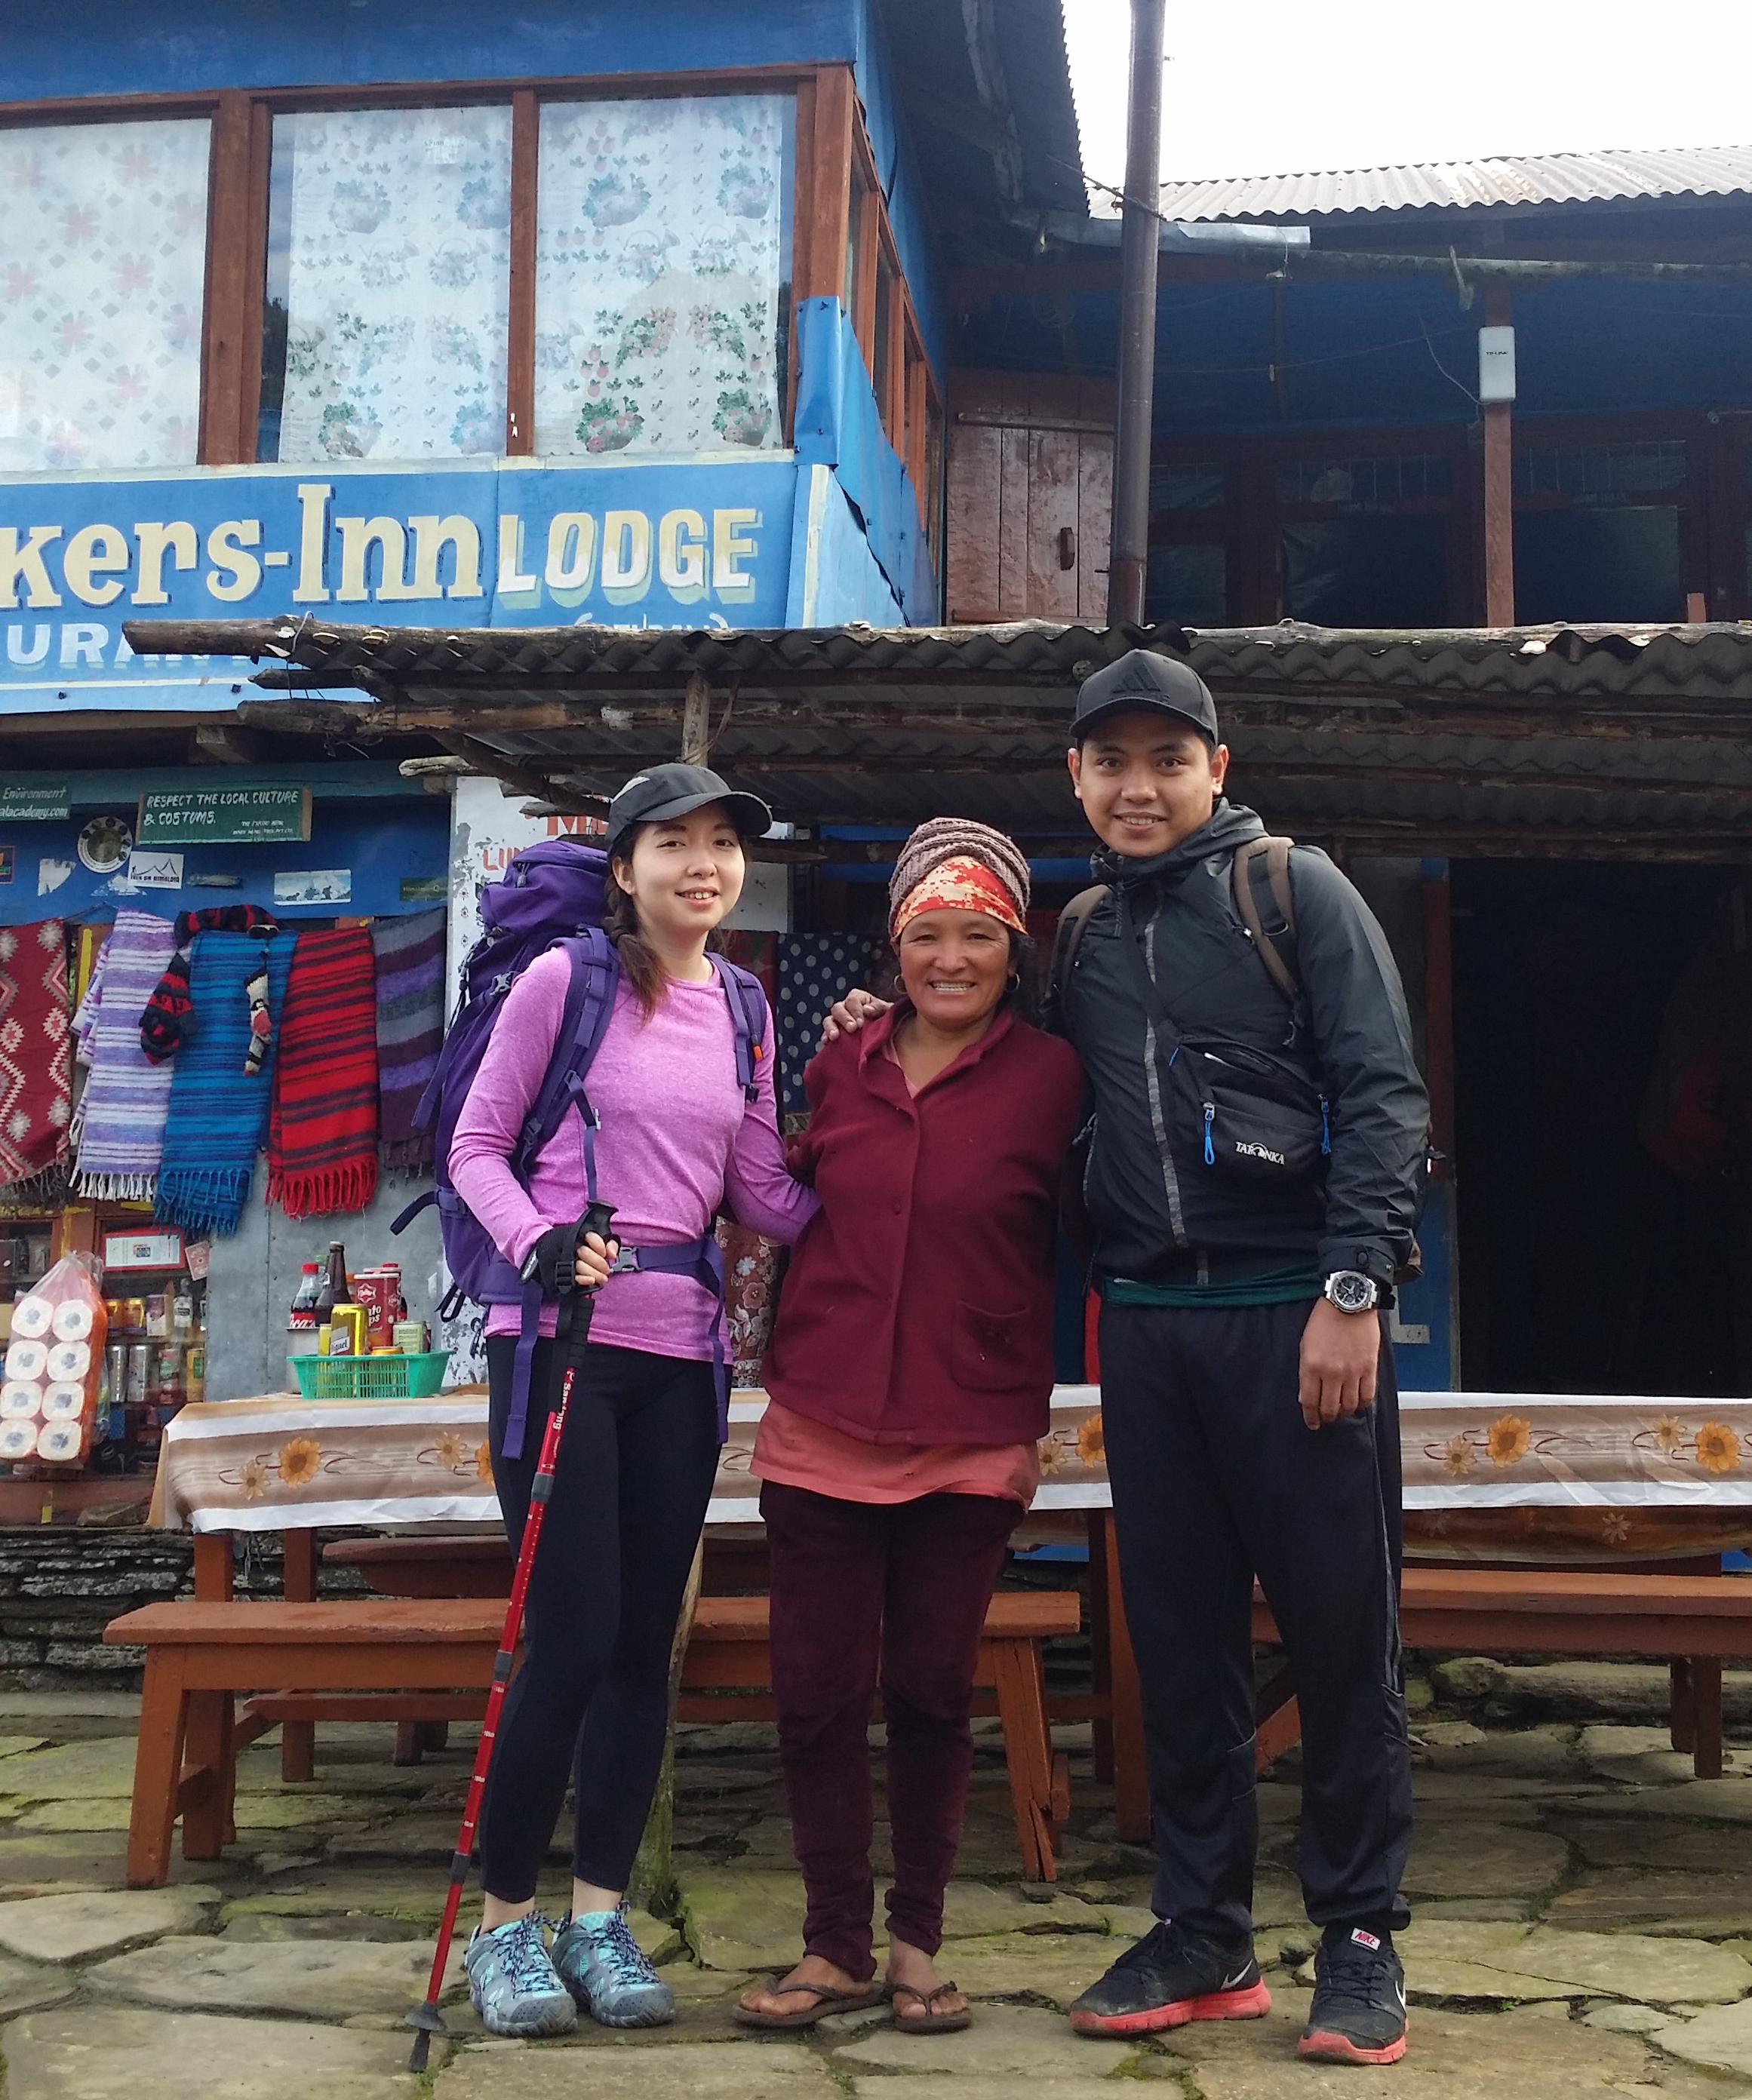
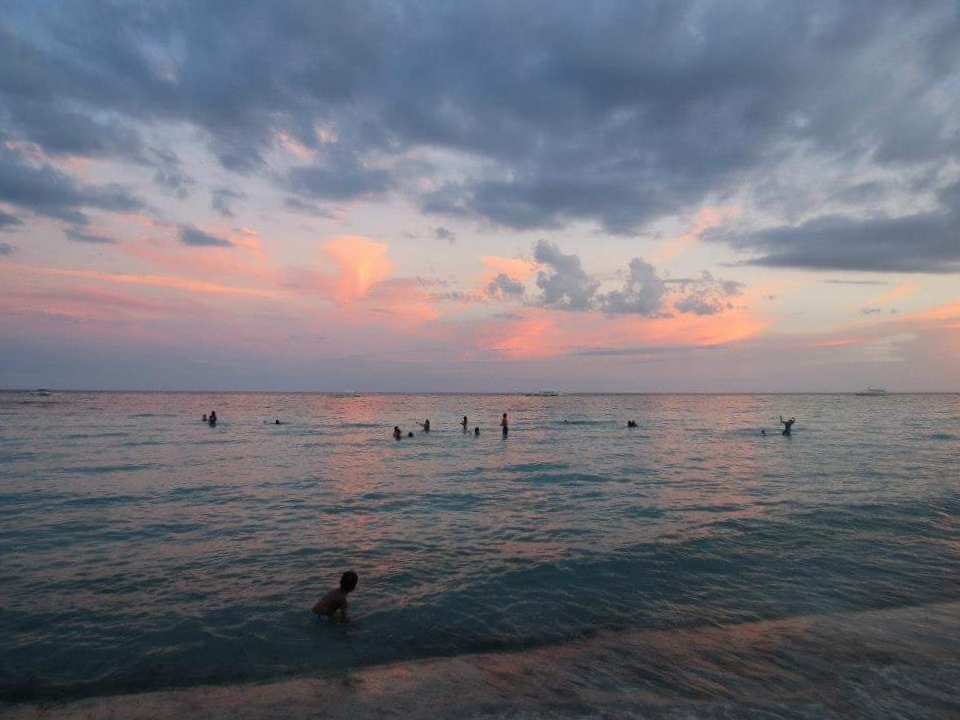
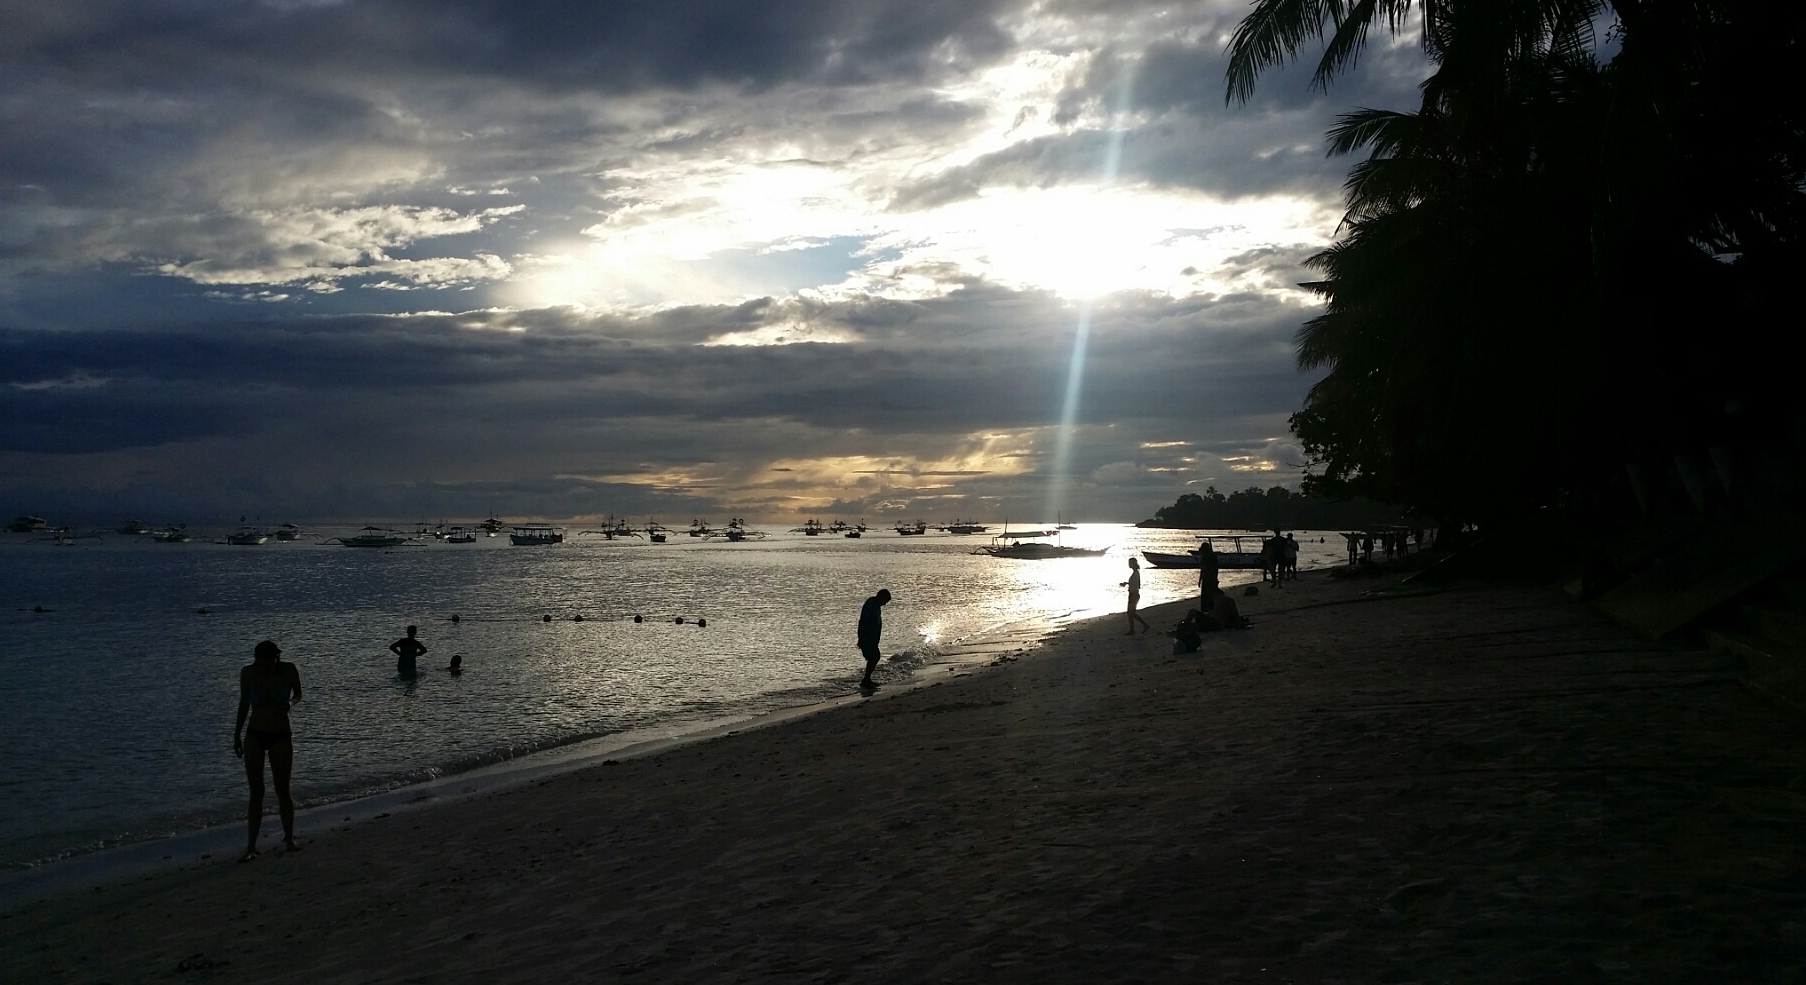
When I first arrived at Panglao Island and strolled around the beach area, I immediately thought of Boracay. Panglao has the Boracay-vibe which is a fun, relaxing and party place. Panglao is beautiful day and night. It is not over-crowded yet, but I believe it will become one very soon as more and more people are slowly discovering this beautiful island. I receive nothing but friendliness from the locals, and the accommodation was very warming.

Overall, I had a great experience, and I will be back for sure.

If you have any questions in terms of the trip, activities and which places to book, feel free to leave me a comment below. I will be more than happy to help.

Yours Truly,

Michelle Chan

High Junk Peak

COVER.jpg

Summertime has arrived. Hiking is one of the hottest activities to do in Hong Kong. However, the sun shouldn't stop hikers to hike. Hiking in this kind of hot and humid weather could still be enjoyable, however, one must find a good hiking spot to feel that it's worth the sweat. High Junk Peak is probably one of the best hike and suitable hiking spots in Hong Kong during this hot season. Why is that? Continue reading this blog to find out. 


ABOUT HIGH JUNK PEAK

High Junk Peak is located in Clear Water Bay section in the New Territories. High Junk Peak is probably one of the treacherous hikes in Hong Kong. Hiking High Junk Peak is a quick hike with a stunning and scenic view of Clear Water Bay on the left side and Tseung Kwan O on the right side. High Junk Peak measures about 344 meters above sea level. 

Hiking High Junk Peak can be challenging especially when climbing up to the peak. This hike reminds me of the Sharp Peak hike, however, High Junk Peak is a lot shorter. 

See The Treacherous Sharp Peak Hike to read more about it and if you are also interested.


BASIC INFORMATION OF THE HIKE

DURATION - 3.5 hours

DISTANCE - 6.5KM

DIFFICULTY LEVEL - Fairly Difficult

CELLPHONE/ INTERNET COVERAGE - Everywhere

BEST TIME TO HIKE - Winter or Autumn (Do not go during rainy season)

WATER LEVEL - 1

STARTING POINT - Ng Fai Tin (Hang Hau)

FINISHING POINT - Po Toi O


HOW TO GET THERE AND WHAT TO TAKE

EASIEST WAY AND MOST CONVENIENT WAY TO START THE HIKE

The easiest way to start the hike is to take KMB bus no, 91 from Diamond Hill. If you are taking the train to Diamond Hill, you must get off at exit C1. If you are taking a bus or taxi to Diamond Hill, go to Plaza Hollywood Shopping Mall and find the bus terminal.

From there, you can the bus no. 91 from the bus terminal. Get off at Ng Fai Tin. The total journey time should not take more than 30 minutes except if there is any traffic. 

From Ng Fai Tin bus stop, cross the road to the Pavilion and turn right. You will see some stairs and a map and that is where the hike start. 

ENDING THE HIKE IN PO TOI O

The most convenient route to end the hike is at Po Toi O. From there, you can take the minibus no. 16 in the minibus station. It stops at Clear Water Bay, Hang Hau MTR or Po Lam Railway Station. 


HIKE DIARY

DIAMOND HILL TO NG FAI TIN

The easiest way to get to Ng Fai Tin is by taking a bus from Diamond Hill MTR Exit C and go to the bus terminal to take bus no. 91. The bus ride to Ng Fai Tin should take about less than 30 minutes. 

NG FAI TIN - THE PAVILION AND A SHORT FLIGHT OF STEPS

Once you reach Ng Fai Tin, you must cross the road to the other side to a small pavilion. On the right side, there is a map and stairs going up. That is where you start the hike. Up ahead you will be able to see Tseung Kwan O and Sai Kung area on the other side. 

SHEUNG YEUNG SHAN

After a short flight of steps, you will encounter a signpost. Follow Sheung Yeung Shan trail or Mountain Bike trail for another half an hour. While trekking, you will pass by a ridge and you will be able to see the High Junk Peak view from there.

We also encounter some interesting flowers, wheat field, mushrooms and some Gypsy Moth Caterpillars. 

There will be another signpost, turn to left fork to Tai Miu trail.

TAI MIU TRAIL

After a few more minutes of trekking, you will come across a resting area, mainly benches. You may allow yourself to take a few minutes rest or have a few snacks. Climbing up the High Junk Peak starts in this area. Follow the ribbons wrapped in tree branches to get started with your hike to the peak.

THE HIGH JUNK PEAK

The first few minutes will be downhill and will eventually be descending to the valley. It will later lead you up to a steep gravel near the peak. From there, you may see Clear Water Bay from the south side. 

Climbing up to the peak can be challenging especially for those with less experience, however, there are many big rocks for you to use to pull yourself up to the peak. Just be careful on the rocks and make sure that it is stable to step on. Climbing up to the peak takes about 30-40 minutes. Wear hand gloves if necessary. 

PANORAMIC VIEWS OF CLEAR WATER BAY AND TSEUNG KWAN O

The view on top is very stunning and rewarding. The clear water from Clear Water Bay is just amazing. I have enjoyed my time on top and took a lot of pictures as well. There are plenty of giant rocks for you to sit, stand or even do a yoga pose for a fantastic picture.

TIN HA SHAN

While descending down, you will be able to enjoy the views of Po Toi O Fishing Ground, Clear Water Bay Golf Course, and Tai Mui Temple. You will also need to cross the entrance of Clear Water Bay Golf Club and follow Tai Au Mun Road to the left. Lastly, you must turn right to Po Toi O Chuen Road to end the hike. 

ENDING THE HIKE IN PO TOI O

Your hike is near to the end when you spot a minibus station in Po Toi O. From there, you may take the minibus no. 16 via Po Lam Railway Station. There is an option to drop off at Clear Water Bay or Hang Hau MTR (Nan Fong Plaza).


WHAT TO BRING AND WEAR

  • Small towel
  • Hiking pants/ jogging pants (no jeans/denim!)
  • Short/ Long-Sleeve Shirt
  • Hiking shoes
  • Trekking pole - can be useful when descending 
  • Extra shirt - for changing
  • Cap - to protect your face from sun exposure
  • Umbrella/ waterproof jacket with hoodie - in case of rain 
  • Windbreaker jacket (optional) - It will be very windy in the middle of the hike from Violet Hill path to Tse Long Bridge
  • Toiletries - tissue/ wet tissue, sunscreen, OFF spray (to avoid insects)
  • Portable charger
  • Water - 1L
  • Snacks - fruits (apples or bananas), boiled eggs, protein/ energy bars, digestives biscuits or bread


OVERALL EXPERIENCE

This hike for me was one of the best I ever hike in Hong Kong during summer. Hiking High Junk Peak was not very difficult, though a little bit challenging. Clambering up was the challenging part of the entire hike, which is exactly what I am looking for in a hike. The view on top was spectacular. I enjoyed it a lot and somehow I felt that I was on an island in Thailand or the Philippines. I would definitely recommend this hike. 

If you have any concerns or questions, feel free to leave a comment below. I will be more than happy to help. 


Yours Truly,

Michelle Chan

The Treacherous Sharp Peak Hike

COVER.jpg

Sharp Peak has always been on my "To hike list". It took me years to finally conquer this treacherous hike. Why the long wait? It is mainly because of work and personal schedules, seeking a good weather to do it and also preparing myself to be fit enough to do this hike. I have only known 2 people who had done this hike before. Is it really that difficult? Let's find out!


ABOUT SHARP PEAK

Sharp Peak measures about 468m. It is located in Sai Kung. Sharp Peak has been categorized as one of the toughest hikes in Hong Kong. This spot is famous for many hikers and it also attracts beginner hikers. It is indeed a very challenging hike as it is a very steep hike and the non-stop clambering up and down the hills can be overwhelming.

Sharp Peak is visible in most part of Sai Kung. It is not hard to point out which mountain is Sharp Peak as the peak is probably the sharpest one you can see in Sai Kung. 


BASIC INFORMATION OF THE HIKE

DURATION - 7 hours

DISTANCE - Around 15-16km

DIFFICULTY LEVEL - Difficult

CELLPHONE/ INTERNET COVERAGE - Everywhere

BEST TIME TO HIKE - Winter or Autumn (Do not go during rainy season)

WATER LEVEL - 2.5L 

STARTING POINT - Pak Tam Au

FINISHING POINT - Sai Wan Village


HOW TO GET THERE AND WHAT TO TAKE

EASIEST WAY AND MOST CONVENIENT WAY TO START THE HIKE

Take MTR or bus to Choi Hung MTR (Exit C1) and take green minibus no. 1A. Get off at the last stop in Sai Kung Pier/ Town area. From there, you may take the bus no. 94 and get off at Pak Tam Au. 

Once you get off the bus, find the sign to Maclehose Section 2 (via Chek Keng). It should be the opposite side of the bus stop. There is a public toilet for you to use before starting the long hike. 

ENDING THE HIKE IN SAI WAN VILLAGE

If you are not ending your hike back to the starting point or to Wong Shek Pier or Ham Tin. Then, you may definitely end your hike in Sai Wan Village. From the village, there is boat service to bring you back to Sai Kung Pier, however, the boat service is only available during summer and peak season. You may also take a village minibus back to Sai Kung Town. All you have to do is to hike/ walk a little bit more for at least 30-45 minutes to reach the minibus stop area. During non-peak season, there is only 1 minibus service and it leaves exactly at 4:45 pm sharp.

It is better to ask the people in Sai Wan Village for ways of transportation just to be sure. Frequent transportation in Sai Wan village varies in what season it is. 


HIKE DIARY

SAI KUNG TOWN TO PAK TAM AU

As mention in "How to get there and what to take", you may take the bus no. 94 from Sai Kung Town and get off at Pak Tam Au. You may also take a taxi ride if you don't mind paying more. The taxi fare should take around HK$90-120. If you're taking the bus, keep track on the bus stops as the bus ride goes very fast. Once you get off Pak Tam Au, you will see the Machelose signpost to Section 2. You must cross the road and look for the public toilet if you need to take any toilet break before starting your hike. 

STARTING POINT - MACLEHOSE SECTION 2 TRAIL TO CHEK KENG

The starting of the hike will take you to a straight path for about half an hour. There will be a little bit of uphill then followed by some downhill. You will pass by Chek Keng and from there you will see many abandoned houses and ruins as you pass through the area. There is a public toilet area for you to take the last toilet break before starting the difficult and long hike. 

Don't forget to say hello to some cows along the way. They are friendly and they enjoy chilling on the grass. 

QUICK REST IN TAI LONG AU

After half an hour or so, you will come across a mini pavilion at Tai Long Au. You can put down your bags and have a quick rest here. On the left side, you may see a warning sign about not proceeding the hike upstairs. In that case, you are on the right path. This is where the Sharp Peak hike begins. The reason why a sign has been put up there is that hiking Sharp Peak is not ideal for everyone. You must be prepared for this hike as it requires a very demanding one. 

WATCH OUT FOR THE WARNING SIGNS

As you walk up the unstable stairs, you will come across plenty of warning signs. Once again, you are on the right path if you see those posts. You can also follow the ribbons tied up in the stems. Once you've reached a ridge-like path, you will see a warning signpost again and you must continue hiking on the right side as that this the way to Sharp Peak. 

CLAMBERING UP AND DOWN TO SHARP PEAK

The tricky and hard part begins when you have to start clambering up the hill. It is required to maintain your balance while clambering up. The whole process took me about 1 and a half hour to finish climbing up to the top. The hardest part for me is figuring out which way is the best way to climb. Make sure not to speed up while hiking up, hike at your own pace. 

PS: Wear a pair of gloves to protect yourself while clambering up.

A LONG WAY AT MEI FAN TEN

Once you are done admiring the views from the top. You will come across Mei Fan Ten when you descend down. It is a long way down and it is very steep too. Honestly, there were many moments where I was completely sick of how this path took ages to finish. Just when you think that the hill that you are looking at is the last one, then there goes another one at back. 

You must be very patient and you must watch out where you step as there are countless of small stones and rocks in the way. Stepping on them would probably be a bad idea and would end up making you slip down. 

VIEWS OF TAI WAN BEACH AND HAM TIN BEACH

You may enjoy the views of Tai Wan Beach and Ham Tin Beach while you are on your way to Sai Wan. The beaches are very clear and not very crowded. The beaches remind of an island in the Philippines called Malaspacua Island. It is as calm and beautiful as this 2 beaches. 

ENDING THE HIKE VIA SAI WAN VILLAGE

You will know that you've reach Sai Wan when you start stepping on sands instead of small stones and rocks. Walking on the sand may tire you up a little bit more. There are 2 campsites that you must pass before reaching the village area. 

Once you reached Sai Wan village, you may take a quick rest and perhaps reward yourself with some nice snacks before hiking for another 45 minutes to catch the village minibus to bring you back to Sai Kung Town. Don't forget to ask the shopkeepers about the time slot of the minibus or you may also inquire about boat service if you do not wish to catch the minibus. 

When you are back in Sai Kung Town, do not forget to reward yourself with a nice and satisfying meal. You've just conquered one of the toughest hikes in Hong Kong. Hiking Sharp Peak is not a joke and by finishing this hike only makes you stronger. 


WHAT TO BRING AND WEAR

  • Small towel
  • Hiking pants/ jogging pants (no jeans/denim!)
  • Short/ Long-Sleeve Shirt
  • Hiking shoes
  • Trekking pole - can be useful when descending 
  • Extra shirt - for changing
  • Cap - to protect your face from sun exposure
  • Umbrella/ waterproof jacket with hoodie - in case of rain 
  • Windbreaker jacket (optional) - It will be very windy in the middle of the hike from Violet Hill path to Tse Long Bridge
  • Toiletries - tissue/ wet tissue, sunscreen, OFF spray (to avoid insects)
  • Portable charger
  • Water - 2.5L
  • Snacks - fruits (apples or bananas), boiled eggs, protein/ energy bars, digestives biscuits or bread


OVERALL EXPERIENCE

My overall experience was good and bad. Good, because I have finally conquered this difficult hike. bad, because I was extremely tired. However, it was satisfying and it was probably the best hike I ever did in Hong Kong. The only thing I did not enjoy was the countless small stones and rocks around the paths. I have no more recollection of how many times I slipped and fell on the ground because of those annoying little things. But I'm glad that I didn't injure myself. 

I wouldn't mind doing this hike again after a few years. I will surely recommend Sharp Peak to people and for those who are seeking a tough challenge. 


If you have any questions or concerns about Sharp Peak hike, feel free to leave a comment below. I will be more than happy to help. 


Yours Truly,

Michelle Chan

The Mardi Himal Trek

1.jpg

As mentioned in my "Discover Nepal" blog, here is my blog about our Mardi Himal trek experience. I was very hype on writing this blog and i hope that the resources that i have provided in here would be useful. 

This blog contains information about the trek, routes, requirements, weather, best season, food, lodges, teahouses, the do's and don'ts, things to bring, what to expect, my personal experience and the ups and downs during the trek. 

A SHORT INTRODUCTION ABOUT MARDI HIMAL

Mardi Himal is located at the east of the ABC (Annapurna Base Camp) and facing front is the Macchapuchhre (Fishtail). Mardi Himal has been open since 2011 and every year, more and more trekkers are beginning to discover it. Mardi Himal is a very peaceful and not very crowded area compare to other major treks in Nepal such as the Everest Base Camp, Annapurna Circuit and ABC (Annapurna Base Camp).. Mardi Himal is surrounded with many beautiful flowers and plants. There are also many buffalos, donkeys, chickens around the trail and yaks/ naks can be seen at the Mardi Himal Upper View Point/ Base Camp. 

The highest point of the Mardi Himal trek is at 4,500 meters (Mardi Himal Base Camp). The minimum duration for Mardi Himal trek is 4 days and 6 days being the maximum. There are plenty of camps around the Mardi Himal route that trekkers can stay and also have their meals. 

THERE ARE 8 CAMPS IN THE MARDI HIMAL ROUTE:

  • Australian Camp (1,650 meters) - Plenty of lodges and teahouses are available in this camp
  • Pitam Deurali (2,100 meters) - Plenty of rooms for trekkers to stay and very nice people
  • Kokar Forest Camp (2,600 meters) - Plenty of rooms available and nice food
  • Babal Dada Low Camp (3,150 meters) - The best view of the Mt Machhapuchhre in the trek
  • Middle Camp - More lodges and teahouses are being build and should be ready by next year
  • High Camp (3,600 meters) - Limited space but more lodges are being build at the moment
  • Base Camp (4,500 meters) - No lodges or teahouses, need to bring your own tents
  • Sidding (1,750 meters) - The most beautiful lodge in the Mardi Himal route


WHY MARDI HIMAL

They are a lot of mountains in Nepal but why did we chose Mardi Himal? The reason is very simple, it is because Mardi Himal is probably the newest trek. It is also because we want to have a glimpse of the Annapurna South and the Mt. Machhapuchhre (also known as Fishtail). Machhapuchhre is a holy mountain and no one has ever climb that mountain. Mardi Himal is also not very crowded. It is definitely a perfect place and a good start for our first trek. 


HOW TO GET TO MARDI HIMAL

There are 4 options on how to get to Mardi Himal, from booking through an agency to doing it yourself. Do your research to know which of these options suits you best.

OPTION #1 - BOOKING A PACKAGE TOUR THROUGH ONLINE

The good thing about booking your trek online is that it is convenient and everything is arranged accordingly. There are plenty of online trekking agencies for you to choose, which also give you enough time to pick the right one.

Package tours include a set of an itinerary, a mountain guide, porter/s, food, accommodation and permits. Prices start from $700 up to $1,500 per person. Prices also tend to increase during peak season. 

However, booking through online can be very expensive. It is the most convenient option but expensive. 

OPTION #2 - BOOKING A PACKAGE TOUR IN NEPAL VIA TREKKING AGENCY

Booking a package tour within Nepal is a lot cheaper than booking through online. If you have extra days in Nepal, you may take some time to go and inquire about trekking packages around Pokhara and Kathmandu. Another good thing about this is that you get to talk face to face with the agency yourself and it is much clearer to deal with the trekking details in person. Plus, you will meet your guide in person and to confirm everything before starting your trek. 

Package tours include a set of an itinerary, a mountain guide, porter/s, food, accommodation and permits. Prices starts from $500 up to $800 per person. Prices also tends to increase during peak season. 

OPTION #3 - BOOKING A MOUNTAIN GUIDE ONLY VIA TREKKING AGENCY

Booking just a mountain guide can save you a lot of money. As the money that you pay for goes directly to your mountain guide and of course a bit of commission to the agency. This is a lot cheaper than getting the package tour. The good thing about this is that you can do the trek your way. For example, making your trek shorter, hence you pay your mountain guide a lot lesser. 

However, you will need to find and bargain your own room in the lodges and order your meals during the trek yourself. I mean, this is not hard as communication is quite easy. All the food and drinks menu are all in English and the lodge owners speak fair English. On the other hand, if you treat your guide nicely and if you try to build a good relationship with your guide, then the chances of your guide helping you out during your trek would be likely. 

Prices starts from $20 up to $50 per day, depending on how experienced your guide is. Your mountain guide should be paying for their own accommodation and meal throughout the trek. Be sure to discuss this clearly and agree on the terms. Also, make sure that your guide has a proper insurance and it is still valid. 

Aside from your guide ffee, there will be an additional charge for getting a trekking permit when booking from a trekking agency. I would really recommend people to try to book their mountain guide from an agency because it is safer and most of the guide are legit. Remember that your guide will be with you for a few days. 

OPTION #4 - INDEPENDENT TREKKING

If you are an experienced trekker/ mountaineer, then doing an independent trek to Mardi Himal is possible. This is probably the cheapest option to complete the Mardi Himal trek. You only need to pay for the permits, your insurance, transportations, food, water and accommodation. The trail in Mardi Himal is quite stable and you can ask around the mountain people about the trail in case you are in doubt. Independent trekking allows you to challenge yourself and achieve something. However, there are a few cons doing an independent trekking. 

THESE ARE THE CONS OF INDEPENDENT TREKKING

  • It is more challenging and the chances of getting lost is high
  • It may be harder for you to communicate better without a mountain guide
  • There might be some information or updates about the trek that you may not know of
  • It is not safe when you are doing it alone
  • In case of any accident, nobody is there to help you

HIRING A PORTER

Getting a porter for your trek will be good during the trek The best thing about it is that you don't need to carry your own backpack and you can relax more while trekking. It is less exhausting having somebody carrying your belongings. 

Please be reminded that if you are hiring a porter, remember not to put too much stuff in your backpack and don't take advantage of your porter. Try to pack light and be kind to your porter. The price for hiring a porter should be lower than what you are paying for your guide. 

5.jpg

But of course, if you are the type who likes challenges and hard work then you shouldn't consider hiring a porter at all. Nothing else feels better than achieving something without the help of anyone unless of course you have a health condition, then taking this challenge is just a bad idea. 

WHICH OPTION DID WE CHOOSE?

We chose option #3, which is booking a mountain guide only via trekking agency. Honestly, I think this is the most reasonable and the best value out of all the options. We booked through "Plan Himalaya" and we got this amazing mountain guide. Everything was settled smoothly and professionally.

Chandra, the owner of "Plan Himalaya" is very professional and he took time to meet us before we leave Kathmandu to Pokhara and quickly brief us about the trek. He have also given me advices and information about the Mardi Himal trek over the phone. He helped us arranged our trek and everything went perfectly. I would definitely recommend Plan Himalaya and I will book my next trek with Plan Himalaya again. 

Our mountain guide, Kapil is originally from the Mt. Everest Region and he has been a mountain guide for many years. He has plenty of experiences not just in mountain trekking but he also knows a lot about the nature, health, religions and the economy. He is very outgoing, open-minded and professional. I would definitely look for him when I do trekking in Nepal. 

HERE ARE THE CONTACTS OF THE AGENCY AND OUR GUIDE IN CASE YOU NEED IT:

TREKKING AGENCY - PLAN HIMALAYA

Website - www.planhimalaya.com

Contact - Mr. Chandra GT (Managing Director & Owner of Plan Himalaya)

Contact number - +977 985 1105516

MOUNTAIN GUIDE - KAPIL MANTHERBU KULU

Contact number - +977 982 3397547 OR +977 984 9501441

Meet our mountain guide, Kapil. He is a very kind and friendly man.

Meet our mountain guide, Kapil. He is a very kind and friendly man.


WHAT ARE THE REQUIREMENTS

TREKKING PERMITS

Trekking to Mardi Himal would require you to obtain some permits. You need trekking permits for ACAP (Annapurna Conservation Area Project) and a TIMS card (Tourism Information Management System). You can easily obtain these permit from any trekking agency and if you have are booking your trek from a trekking agency, then the permits should be already included in your package, 

On the other hand, if you are going for an independent trekking. Trekking permits are also available at the Nepal Tourism Board official offices in Pokhara and Kathmandu

If you have hire your own mountain guide, he/ she can help you to arrange your trekking permits. 

GET AN INSURANCE FOR YOUR TREK

it is highly recommended to buy an insurance for your trek. You should find an insurance that can cover you up for 5000 meters above sea level, if you are doing the Mardi Himal trek. 

I got my insurance at World Nomads. The price is reasonable and it covers emergency evacuation, medical insurance, travel insurance and many others. I would really highly recommend World Nomads as it is worldwide and one of the best insurance for trekking in the world. 

Click this link "World Nomads" to find out more about the packages. 

PHYSICAL & MENTALLY PREPARED

There is no need to be super fit in order to do this trek. I would say, you should just be fit enough to do it - No heart conditions and if you don't get fatigue very easily. If you also suffer from a regular stomach ache, then you should consider seeing your doctor to see if he/ she can prescribe with some pills to avoid any diarhhea.

You should also be mentally prepared for this trek as the trek last for 4 to 6 days. The weather might weaken your body and mind or the food might upset your tummy and affects your mood. If you are not used to being around nature/ forest/ mountain area, then this may require you some time to adapt to it. 

It is important to know if you are really prepared for all the things you will have to encounter during your trek, so you will be fully aware and prepared for it in case some circumstances comes up. 

DO's AND DON'Ts

Even though you are going to be in the mountain area, there are something that you must know about the Do's and Don'ts. It is good to be aware, so you can avoid offending anybody just in case. 

DO'S

  • Greet everyone you meet in the trek
  • Be friendly to your fellow trekkers and try to help when you can
  • Safety always comes first! If you feel like you are unwell, take a break for a while
  • Only order sufficient amount of food that you can finish
  • Turn off the electricity in your room whenever you don't need it
  • Drink Ginger Lemon Tea and Garlic Soup to avoid having altitude sickness
  • Take care of the nature, do not destroy them
  • Have plenty of rest and sleep before trekking
  • Have a good breakfast before starting your trek
  • Chat with your mountain guide and get to know him/her better
  • Always wash your hands and mouth before eating your meal
  • Close your door and windows at all times to avoid having any insects (moths, butterflies, flies) to come in your room especially at night time. 

DON'TS

  • No PDA (Public Display Affection), this is strictly prohibited and should be respected 
  • Do not throw rubbish anywhere in the mountain/ forest
  • Do not shout and talk too loudly, contain your volume
  • Do not go trekking with an empty stomach
  • Do not waste food and do not order too much food when you can't finish it
  • Do not bring a lot of things. The ideal weight for one backpack should be no more than 10kg.
  • Do not consume anything unusual. Trust me you do not want to trek with an upset stomach.
  • Do not waste electricity, try to save as much as you can
  • Do not swear too openly, try to swear in your mind
  • Do not bargain for something unrealistic
  • Do not harm any animals, try to conserve them or just leave them alone
  • Do not drink water from the tap, only drink from a water bottle or boiled water


WHEN IS BEST TIME TO GO TREKKING TO MARDI HIMAL

Knowing when is the best time to do the Mardi Himal trek is also important as your entire trek will depends on how good the season is. If you are not aware of when is the best time to go, your trekking trip might end up into a disaster. 

FIRST BEST SEASON - OCTOBER TO EARLY DECEMBER

October to early December are the best season to go trekking to Mardi Himal as the skies are clear during these months. This is also considered as the busiest months and peak season in Mardi Himal. As October is the start of the Autumn season, the weather will be chill and you can experience a lot leaves falling down from the trees. November to December will be the coldest months and there is a possibility that some trail may be covered with snows, which will make it hard to trek. 

SECOND BEST SEASON - FEBRUARY TO APRIL

February to April will be the second best season to go trekking to Mardi Himal. Around this time the dry season is almost over and it is not super cold anymore. The snows by then will be gone and the trail will be easier to trek. 

THIRD BEST SEASON - MAY TO JUNE

May to June will be the third best season to go trekking to Mardi Himal. It is the summer season and if you enjoy the sun, then this is probably the best time for you to go. Take note that by June, it will be the pre-monsoon season and occasional rain may happen during the trek. On the other hand, flowers are starting to bloom beautifully during these months. 

NON-PEAK SEASON - JUNE TO EARLY SEPTEMBER

June to early September will be the non-peak season to go trekking to Mardi Himal. The reason why it is the non-peak season is because this time around is the monsoon season. The chances of rain and thunderstorms are very likely and very high during this period. Also, this is also the time that leeches comes out as it is the wet season. Remember to wear long trekking pants, long sleeves, long socks and wear ankle trekking boots to avoid those tiny teeny leeches to get into your skin. 


THE LODGES/ TEAHOUSES

The lodges and teahouses around the Mardi Himal route are very basic and simple. The mountain people are very friendly and welcoming. As you enter a teahouse, you will automatically feel at home. Staying at the teahouse and lodges is very laid back and relaxing. I also felt that time is actually slower in the mountain area. 

FOOD AND DRINKS

Both food and drinks are available in the teahouses. There are quite a lot of food selection in the menu - both meat and vegetarian options are available. The food are quite delicious and the portions are big. I find the vegetables very fresh as every teahouses grow their own crops. The prices for both food and drinks increases as you get higher to the top. 

ACCOMMODATION

The rooms in the lodges are very simple and decent looking. Most of the rooms are made from woods or stones. Every room has a decent mattress with nice bed sheets and pillows. Small rooms (good for 2 people) and big rooms (good for 4-6 people) are available in most of the lodges. However, trekkers will need to share the toilet and most of the lodges only have 1 toilet available to use. There is, of course, a place for you to wash but there is no hot water, so that means you will have to wash with cold water. Hot water is available too but you will just need to ask the owners/ staff to boil you some hot water. There may be some extra charges for that. 


WHAT TO EXPECT DURING THE TREK

It is important to know what to expect before starting your trek. It is a must that you are aware of the possible circumstances you might experience during your trek. 

THE WEATHER

As we all know that the weather is very unpredictable and it changes all the time. Make sure to have your raincoat packed in your backpack and as well as jackets/ ponchos, thick socks, legs warmer and beanie/cap to protect yourself from the cold weather. Even though you are going to trek during the hot season, the weather in the mountain is different. The higher you get, the colder it gets. 

THE LEECHES, BEES AND OTHER FLYING INSECTS

During wet season/ monsoon time, there will be plenty of rain coming down, which means there will be a lot of leeches. This is the prime time for leeches to come out and find some people to hang on and have a taste of their blood. The good news is that leeches have their weakness too! You can throw some salt at them whenever they are on your skin. Another way to avoid those annoying leeches to get onto your skin is to wear something tight and cover up your ankles - wear ankle trekking boots, long sleeves, long pants and long socks.

There are also some bees and other flying insects. They are super annoying and they are just everywhere you go! Well, except when it is raining but once the sun's out then they are also out. As much as you hate them and their annoying buzzing sounds, you shouldn't really do anything to them. Do not try to fight with them or even try to hit them with something. Just simply leave them be and continue walking as if like they don't exist. 

THE DONKEYS AND BUFFALOS FOOTSTEPS

During the wet season, the trail will be very wet and muddy, which means the donkeys and buffalos will definitely ruin and make the way even more complicated to walk. It is quite difficult for us to get through the muddy paths. We had to find and make our own way to get through it. Just be careful and try not to fall in those muds.

POSSIBLE SICKNESS (ALTITUDE SICKNESS, FEVER, COLD, DIARHHEA)

Yes! This should be included in your top priority as staying healthy during your trek is a must because once you start to feel ill, then it is quite impossible to proceed to your trek. You should always watch out for any a headache or if you are feeling a bit of nausea, even a minor headache. When you feel that you are having any symptoms, then you should take some pills right away to eliminate any altitude sickness, headache or fever. Taking ginger lemon tea and drinking garlic soup could also help you a lot. 

MEAT SHORTAGE IN TEAHOUSES

For some unforeseen events, meat shortage may be possible around the mountain area while you are trekking. Running out of chickens and buffalos meat is possible especially during the non-peak season. On the other hand, there are vegetables and canned Tuna available if there is no meat available. Trying to be a vegetarian for a few days doesn't sound that bad. 


WHAT TO BRING WHEN TREKKING

In case you are wondering what you really need to bring when trekking. Here's a guideline for you to have an idea on what to bring and what not to bring, 

Take note that this is a "backpack travel", so trying to minimise your belongings would help you a lot while trekking. 

"Light packing should be always in your mind!"

ESSENTIAL THINGS TO BRING WHEN TREKKING

  • Trekking Pants
  • T-Shirts, Long Sleeves 
  • A set of sleeping clothes (use only for the sleeping time)
  • Quick-dry towel for body washing
  • Towel for sweat
  • Underwear
  • Sports Bra/ Bralette (for girls)
  • Waterproof and Windproof jacket
  • Raincoat (get the one that can cover your backpack as well)
  • Trekking poles/ sticks
  • Socks (bring some thick and some thin socks with you)
  • Trekking shoes (better get ankled trekking boots to avoid leeches and sprains)
  • Slippers or Crocs 
  • Sunglasses (with a good UV protection)
  • Cap (getting a waterproof cap would be ideal - for sweats and in case of rain)
  • Medicine kit (tablets for cold and fever, Betadine, band-aids)
  • Toiletries (soap, shampoo, deodorant, powder, cologne, alcohol, mosquito repellent, comb)
  • Sunblock lotion
  • Tissues and wet tissues 
  • Flashlight/ Torchlight/ Headlight (bring some spare batteries)
  • A travel journal or a small notebook and a pen (to write down your travel diaries)
  • Plastic bags (for putting rubbish)
  • Camera and charger
  • Adaptors (for charging)
  • Some protein bars/ energy bars/ Digestives (for snacks)
  • Trekking map
  • Hand gloves (if you have sensitive/ soft skin)

OTHER THINGS TO BRING WHEN TREKKING (OPTIONAL)

  • Playing cards (for pass time and free time)
  • Books to read when not trekking
  • Bum bag (to put all your important stuff like phone, wallet, passport, etc)
  • Water bottle (1L) or you may simply re-use a plastic water bottle to refill water
  • Duct tape (in case any of your stuff breaks)
  • Karabiners (for hanging wet cloths)
  • Padlocks (to lock away your bags, but most rooms in the lodges have locks already)
  • Shaver (It's not a long trek, so I'm sure you can let it grow a bit more)
  • Water purification tablets (in case you want to purify your own water)
  • Laundry powder (for washing of clothes/ underwear)

THINGS YOU DO NOT NEED TO BRING

  • Hair dryer
  • Your whole make-up and cosmetic sets (I mean you're only trekking!)
  • Ipad/ Laptop (you are there for nature and don't let electronics get in the way)
  • Pillow, blankets (the lodges will provide, so there's no need for that)
  • Kitchen utensils (the teahouses will provide)
  • Pieces of jewelry/ accessories (you don't really need that)


WHERE TO BUY YOUR TREKKING EQUIPMENT

Yes! Don't forget to add this to your list. People often forget the simple things like making a checklist of what equipment you need to bring for trekking. Find a time to do a shopping checklist first to see what you already have and what you are missing. 

Don't buy cheap quality equipment, especially when buying some trekking poles, jackets, trekking shoes, backpack and safety/ medicine kits. Remember that buying cheap quality would only bring you some problems and not solutions. There are no trekking shops in the mountain areas, so make sure that you got everything ready before starting your trek. 

BUYING TREKKING EQUIPMENT IN YOUR HOME COUNTRY OR ONLINE SHOP

Buying your trekking equipment directly in your home country or online shop should be a good idea. It gives you enough time to think about what you need and what you are missing. If you are the type who likes everything to be in order and ready to go, then this is definitely what you should do. 

BUYING TREKKING EQUIPMENT IN NEPAL

There are plenty of trekking shops in Nepal. As Nepal is filled with mountains, it is very possible that you can find all the equipment you need for trekking anywhere in Nepal, except the mountain area. Buying your equipment in Nepal could be a lot cheaper and in nice quality too. 


WHAT TO EAT AND DRINK DURING THE TREK

Knowing what to eat and drink can guarantee you a healthy and comfortable trekking endeavour. You need to watch out what you eat and drink while trekking as if you don't take good care of your diet then your trip might end up horribly. Trust me, you do not want to upset your stomach and having that while trekking in the mountain is not a good thing.

HERE ARE SOME TIPS ON HOW TO EAT & DRINK PROPERLY: 

WHAT TO EAT AND NOT TO EAT

  • Eat a lot of greens and vegetables
  • Eat chicken for protein
  • Don't eat too spicy food (especially if you are not used to it)
  • Don't eat cheese (if you are suffering from Lactose Intolerant)
  • Eat energy bars and Digestives for snacks
  • Don't skip any meal, eat 4 times a day (Breakfast, Lunch, Tea time and Dinner)
  • Eat more during Breakfast time

WHAT TO DRINK AND NOT TO DRINK

  • Drink garlic soup to avoid altitude sickness
  • Drink Ginger Tea/ Ginger Lemon Tea/ Honey Ginger Lemon Tea to avoid altitude sickness
  • Drink plenty of water (only drink from water bottle or boiled water)
  • Never drink water from the tap
  • Drink some vitamins to avoid any possible cold
  • Drink Ibuprofen (if you are feeling sick due to altitude sickness)
  • Try to avoid drinking any alcohol/ beers to avoid any possible hangover or headache


MARDI HIMAL TREK DIARIES

During our trek, I have written down things we did during our trek and the circumstances we had to face while trekking. We trekk for 6 days and I made sure that I wrote down all the details during this unforgettable experience so that I will be able to share it to people. 

TREK DAY 1 - NOT A LONG TREK BUT A GREAT START

On our first trekking day, we left our hotel at 7:00am. We rented a taxi to bring us to Kande, where we start our trek. We ate our breakfast while we were in the car as we didn't had any time to eat our breakfast in the hotel. The car ride took us 1.5 hour to reach Kande. 

Left - In the car while admiring the Mt Machhapuchhre viewRight - Mt Machhapuchhre

Left - In the car while admiring the Mt Machhapuchhre view

Right - Mt Machhapuchhre

When we started our trek, we were already feeling very excited. The weather seems very nice and clear. We met this male dog on our way and he followed and sort of guided us for hours. We decided to name him Blackie, the dog guide. 

Meet our dog guide, Blackie

Meet our dog guide, Blackie

We stopped at Australian Camp and Pothana after 2 hours and we submitted our permits at the registration area. Yes, trekking permits are required when trekking Mardi Himal. Please refer back to "What are the requirements?" to know more about it. Australian Camp was named after the Australian mountaineers arrived the camp area. It has plenty of lodges and teahouses. The camp looks nice and decent. 

Australian Camp

Australian Camp

Registration are at Pothana

Registration are at Pothana

After the registration, we continued to hike up to PItam Deurali for 1.5 hours. The trail was very stable and we saw a lot of plants and flowers. It was such a beautiful day for trekking. When we finally arrived at PItam Deurali, we stayed at "Trekkers Inn-Lodge". We were the only guest at that time as it is not the peak season yet. We occupy a room with a dining table outside the room. 

The lodge owners are very welcoming and very nice people. We got to go inside their kitchen and watch them cook our meal live in action. Thanks to our mountain guide, Kapil as he happen to have a very good relationship with the lodge owners. The food was very delicious and fresh. 

Although, we didn't trek for long hours today but it was a great start. I thought to myself that we will definitely be trekking for longer hours in the next 5 days. Today was a relaxing trek and we perfectly enjoyed it. 

Trekking Route (in order) - Kande, Australian Camp, Pothana, PItam Deurali

Total hours of trekking - 3.5 hours

Total hours of car ride - 1.5 hour

Highest Altitude - PItam Deurali (2,100 meters)

Overnight stay at Lodge/ Teahouse - Trekkers Inn-Lodge (Deurali)


TREK DAY 2 - A LONG WAY UP TO LOW CAMP

On our day 2, we wake up early to start our trek to Forest Camp at 7:00am. We have been told by our mountain guide, Kapil that there is no camp around the forest area, which normally take around 4-5 hours to reach the Forest Camp. We had packed some energy bars, so we can eat that when we get hungry. There are many different types of plants and flowers around the forest and Kapil was very generous to share us his knowledge about the plants and flowers we saw on our way. 

Left - Direction to start trek to Forest Camp from DeuraliMiddle - Small pond around the forestRight - More uphill

Left - Direction to start trek to Forest Camp from Deurali

Middle - Small pond around the forest

Right - More uphill

After that exhausting and dry forest trail, we finally arrived at the Forest Camp after 5 hours. We had our lunch in one of the teahouse. There are plenty of rooms available in the lodges and it seems like Forest Camp is where most trekkers go for overnight stay. There was no meat available, so we ordered all vegetables dishes. It's not really a big deal for me, since I love eating vegetables but I can see that Ryan wasn't very happy as he is a meaty person. But the food were delicious and that was the best lunch we had so far. 

The Forest Camp

We continued our trek at around 1:30pm. The trail started off well, a bit of steep and muds. Then suddenly rain started pouring. We all thought it's just a small rain but it's actually getting heavier and we struggled real hard. While trekking and suffering at the same time, we met some tiny sticky creatures, the leeches! There are everywhere around our raincoats, pants and shoes. This is our first time encountering these tiny little creatures and we definitely dislike them. We stopped over at the Rest Camp to cool down for a bit and wait till the rain slow down. The camp is very small and there is no lodges, mainly only for resting for trekkers, guides and mountain people.

As soon as the rain has settle down a bit, we continued our trek to Low Camp. It was very challenging ascending to Low Camp. It is very muddy and slippery. Our shoes are all wet and full of muds in and out and leeches kept biting and drinking our blood on our ankles. We were all tired and we just want everything to be over. 

After trekking for 4 hours, we finally arrived at the Low Camp. We quickly settle down into our rooms. We dry and wash ourselves. We had to wash our shoes with freezing cold water because our shoes was very muddy. The temperature at the Low Camp obviously dropped especially it was raining. It felt like it was 10 degrees up there. 

Hotel Machhapuchhre

Hotel Machhapuchhre

Trekking Route (in order) - Pitam Deurali, Forest Camp, Rest Camp, Low Camp

Total hours of trekking - 9 hours

Highest Altitude - Low Camp (3,150 meters)

Overnight stay at Lodge/ Teahouse - Hotel Machhapucchre (Low Camp)


TREK DAY 3 - ALL IS WELL UNTIL WE START TO ASCEND TO HIGH CAMP

On our day 3, we woke up very early to have our breakfast. The sky was very clear and we were fortunate enough to have seen the Mt Machhapuchhre in clear view while having our breakfast. It was the best breakfast experience ever! 

We left Low Camp at 8:00am sharp and we ascend up to Middle Camp first. The trail was stable and not very muddy. When we arrived at the Middle Camp, we took some time to take pictures with the spectacular "bed of clouds" view. The sky was very clear and nice. The phone and internet connection at the Middle Camp is quite stable, so I took some time check my messages and update my family and friends back in Hong Kong about our whereabouts. There are also a few lodges being build and it should be ready by early next year as Mardi Himal has been attracting more and more people.

"Bed of Clouds"

Middle Camp

On our way to High Camp

On our way up to High Camp, the trail started steep followed by plenty more of steep trail. It was challenging and I actually slipped once because I stepped onto some clay soil. I swear, those clays are traitors! Do not step on those! We have also seen plenty of buffalo and they stopped whatever they were doing and was just staring at us. The buffalos in the mountains are not very used to people and seeing them frightens them. 

Everything was going well until suddenly out of nowhere, some raindrops started pouring down. Everything happened very quickly but we manage to get our raincoats out just in time. It's a shame how we were just 30 minutes away to the High Camp and it was a pity that we all had to experience getting wet again and of course we had to deal with the leeches again. The trail are muddy and slippery once again. 

When we finally arrived at the High Camp, we saw some teahouses and lodges being build. I have a feeling that Mardi Himal will soon be filled with trekkers. We quickly settle down into our room and dry ourselves while our lunch meal are being prepared. As the rain didn't stop, we decided to postpone our plan to ascend Upper Viewpoint in the next morning.

Trekking Route (in order) - Low Camp, Middle Camp, High Camp

Total hours of trekking - 4 hours

Highest Altitude - High Camp (3,600 meters)

Overnight stay at Lodge/ Teahouse - Hotel Trekkers Paradise


TREK DAY 4 - ANOTHER RAINY AND FOGGY DAY AT HIGH CAMP

On our day 4, we woke up at 4:30am and it was still pouring outside. We were planning to ascend to Upper Viewpoint but the weather was just really bad. The rain and fog are just surreal. It rained all morning till afternoon. We were somehow loosing hope but we still decided to stay one more night at High Camp and plan to go to Upper Viewpoint the next morning. 

So, we spent the whole afternoon at High Camp in our room and at the dining hall. We played cards game and chat around. The rain somehow stopped for some time, so we walked around and hike up a bit for 30 minutes. Then, the rain came back! It comes and it goes. 

Left - Inside our room, just chilling and restingMiddle - Directions at High CampRight - It's going to be a long way up to Upper Viewpoint

Left - Inside our room, just chilling and resting

Middle - Directions at High Camp

Right - It's going to be a long way up to Upper Viewpoint

We met a few trekkers who manage to get to the Upper Viewpoint. We asked about how the trek went and as expected, there was no view. It was all fogs and the weather didn't really cooperate. However, they had a rare Yak farm experience, which made their trek a bit better in spite of the rain and fogs. It's good to know that there's something else good in there. 

Trekking Route - High Camp

Total hours of trekking - 30 minutes

Highest Altitude - High Camp (3,600 meters)

Overnight stay at Lodge/ Teahouse - Hotel Trekkers Paradise


TREK DAY 5 - FINALLY CONQUERED OUR QUEST

On our day 5, we wake up super early at 4:00am and our guide, Kapil went to check out the weather situation and he came back with a great news that we can head on to Upper Viewpoint. We left High Camp at 5:00am. It was still very dark and we have to use our torchlights and headlights in order for us to see, of course! It was very cold and a bit windy but we warmed up after some time. While ascending, the weather started to get clear followed by a few fogs. It was drizzling a bit but not too extreme. 

We reached Upper Viewpoint after 2.5 hours and out of nowhere the sky became foggy again. We still try to head on further at the Viewpoint. We waited for some time. We can see that the fogs are eliminating but then some more fogs are on its way. 

While waiting for our luck, we stayed at the Yak farm and drank some fresh warm yak milk. It was a good experience and this is our first time seeing and being close to the yaks and naks. Yaks are male yaks while Naks are female yaks. I'm not so sure why people call it yak milk, i guess it's because it's a lot easier for people to say it, 

After waiting for some time, we decided to head down to High Camp before the weather worsen. Although, we didn't get to see what we came for, which is the Annapurna South and Mt Machhapuchhre view, but at least we reached the top at 4,200 meters above sea level and the breakfast at Low Camp with the breathtaking Mt Machhapuchhre view are already good enough. There is always a next time. We would definitely look for a better season when the sky are much clearer. We manage to see the Annapurna Base Camp but it was still covered with some clouds and it was pointless to try to take a picture of it. There is always a next time. 

Descending back to High Camp is very challenging. The trail are steep and plenty of rocks and stones. Most of the big rocks are actually moving when we step onto it. There were times that I though I would fall but Thank God none of us did. As soon as we arrived at the High Camp, we packed our belongings, had a quick breakfast/ lunch and descend to Low Camp. 

It was still drizzling when we left High Camp and it was very muddy everywhere. Everything is wet and slippery. The trail are harder to cross and we had to take more time to find another path that is safe to walk. It was horrible to be honest. We felt very dirty and we just didn't care about those muds getting into our shoes, all we wanted is to not pay too much attention on the muds but to just finish the trek. We had enough of rain and being wet for 4 days straight. The tiny and annoying leeches are of course in our way and it didn't failed to spoil our mood even more. But this this time we had our weapon, some salts. Yes, leeches are afraid of salts and they become weak after splashing them with some salt. 

After 3 hours of descending, we finally arrived at the Low Camp and as usual, we cleaned ourselves up and we took some rest as we are super exhausted. It was a long day and a wet one too.  

Trekking Route (in order) - Upper View Point, High Camp, Middle Camp, Low Camp

Total hours of trekking - 6.5 hours

Highest Altitude - Upper View Point (4,200 meters)

Overnight stay at Lodge/ Teahouse - Hotel Machhapuchhre (Low Camp)


TREK DAY 6 - LAST GOODBYE AND A TOUGH DESCEND

On our day 6, we woke up at 7:00am, we had a quick wash up and packed up all of our belongings. It was our last breakfast at Low Camp with the Mt Machhapuchhre view. We had apple pancakes and ginger lemon tea for breakfast. I'd say this is by far the best apple pancake I ever had in my life. 

We left Low Camp by 8:00am and started our trek down to Sidding. The trail was a bit dry, since the rain had already stopped. There are still some trail that are a bit muddy. We were so glad that the leeches had finally stop attacking us. Unfortunately, we had encountered many donkeys in the way. They were delivering supplies up to the high camps. They totally ruined the trail, while making it extra harder for us to pass without stepping into muds. Anyways, we still made it and found our way down. Descending down is not very easy. It is actually quite tough and tiring. The donkeys made our trek longer because we need to find another way to walk. It feels like we have been descending forever. 

After 3 hours of trekking, we finally reach Sidding. We saw a lot of donkeys assembling and ready to hike up to the high camps to deliver supplies, such hardworking donkeys! The lodge in Sidding is probably the most beautiful and modern looking lodge in the Mardi Himal route and they have a decent toilet. We had our lunch at "Hotel Trekker's Home Nepal" while waiting for our jeep ride to bring us back to Pokhara. 

Left - The most beautiful lodge in the Mardi Himal routeRight - Entering our last stop in the Mardi Himal route

Left - The most beautiful lodge in the Mardi Himal route

Right - Entering our last stop in the Mardi Himal route

Left - Donkeys assembling Right - Some buffalos dipping in the water

Left - Donkeys assembling 

Right - Some buffalos dipping in the water

We left Sidding at 2:00pm and we arrived to our hotel in Pokhara after 3 hours. The ride was super bumpy and the roads were not very even, especially coming down from the hill. We had some mini adrenaline rush while inside the jeep. It was a rare experience and it was quite fun quite frankly. We also passed by the Mardi River. The water drop from the Mt Machhapuchhre. The jeep ride cost us 10,000 NPR but we had other people inside the car, so we sort of shared the cost. We paid 3,500 NPR for 2 people. 

Left - Some waterfalls while we were inside the jeepRight - The Mardi River

Left - Some waterfalls while we were inside the jeep

Right - The Mardi River

Right after we arrived at our hotel, we quickly freshen up. I think I spent more than 30 minutes in the bathroom. I have never felt this good taking shower before. Just imagine 6 days of no proper shower. We also unpack our belongings and we bring out our dirty clothes for laundry. After that, we went to the Lakeside to celebrate for conquering our Mardi Himal trek together with our awesome mountain guide/ friend, Kapil. 

Trekking/ Jeepney Route (in order) - Low Camp, Sidding, Lumre, Pokhara

Total hours of trekking - 3 hours

Total hours of jeepney ride - 3 hours


A LIST OF OUR COST IN THE MARDI HIMAL TREK

* The prices indicated below was during September 2017 and it is good for 2 people

  1. Mountain guide and trekking permits via Plan Himalaya = $240
  2. Food and drinks at teahouses = 20,920 NPR
  3. Lodges (overnight stay for 5 nights) = 2,540 NPR
  4. Taxi ride from Pokhara to Phedi = 2,000 NPR
  5. Jeepney ride from Sidding to Pokhara = 3,500 NPR
  6. Tips for our mountain guide = 5,000 NPR
  7. Tourist Bus from Kathmandu-Pokhara-Kathmandu = $28 (roundtrip)

Total in US Dollars = $268

Total in Nepalese Rupees = 33,960 NPR

Total Spending (for 2 people) = 60,760 NPR ($608 US Dollars)

We were genuinely happy with what we have spent. The money that we spent was super worth it and this is probably where most of my travel savings will be placed on. 


THE PRO'S AND CON'S ABOUT MARDI HIMAL TREK

There are some good things and some bad things during our Mardi Himal trek. Well, there is no such thing as perfect isn't it? Every goal comes with a price, hence the consequences. 

HERE IS A SUMMARISED LIST OF THE PROS AND CONS OF OUR AND SOME OTHER TREKKERS' EXPERIENCES IN THE MARDI HIMAL TREK:

PROS

  • The teahouses and lodges are in good shape
  • The food is made freshly and the teahouse owners grow their own vegetables
  • You can charge your electronics in some of the lodges
  • There is WIFI available in some lodges but connection might be limited and slow
  • You get to spend more time and get to know the nature even better
  • There is hot water available for shower, all you need to do is ask the owners
  • You get to sleep early and wake up early for 4-6 days straight
  • An opportunity to meet new people and socialise 
  • Good for meditating

CONS

  • There are no internet and mobile connection starting from the Low Camp area
  • There is only 1 toilet room in every lodges/ teahouses, so there might be some queue at times
  • The chances of having to deal with leeches during wet and rainy season is very high
  • The muds and unstable trail while trekking
  • Time is slower and you need to find things to do for pass time
  • It is very cold especially during night time at the High Camp
  • The weight of your backpack stays the same throughout your trek (if you don't have any porter). It doesn't get any lighter.
  • You may need to wear your clothes repeatedly (if you are packing light and smart)


Overall, my Mardi Himal and my first trekking experience has been great and I will always cherish these memories with me. The things I have gone through during the trek are not something I can find in my daily life. I challenge myself and even trained very hard at the gym to make myself fit enough. I did what I thought I couldn't. I proved to myself that I am capable and strong enough to take on this challenge. After this once in a lifetime experience, I will surely be craving for more. 

12.jpg

If you have any questions, feel free to comment below or send me an email. I will be more than happy to help.


WHAT'S NEXT? 

This is a very good question, what's next after conquering the Mardi Himal trek? As this is my first trekking experience, in which it turns out very well. Sure, I had some bad experiences too during the trek but i'm not going to let this stop me from doing what I love to do. 

My next trek would probably be still in Nepal. Why? I fell in love with Nepal and I want to see more of its beauty. I am thinking of trekking to Annapurna Base Camp or Everest Base Camp next. Let's see how things goes. Stay tune!


Yours Truly, 

Michelle Chan

Discover Nepal

140.jpg

Nepal is a very beautiful country and I have always wanted to visit this place. It has been 2 long years that me and my boyfriend, Ryan started planning our trip to Nepal. The reason why It took us this long to make this trip happen is due to our work schedule and we also needed a good amount of time to train ourselves to be physically fit for some trekking adventure. We both felt that 2017 is the right time for us to visit and that we are definitely ready for Nepal.  


A SHORT INTRODUCTION ABOUT NEPAL

Nepal is located in South Asia between China in the north and India to the east, west and south. Nepal is surrounded by mountains and rivers. The world's highest mountain can also be seen and climb in Nepal, the mighty Mount Everest measuring about 8,848 meters above sea level. 

The weather in Nepal runs like the 4 seasons. Summer (May-July), Autumn (August-November), Winter (December-February) and Spring (March-April). Temperatures varies in different places.

Nepali is the official language of the state. English is also highly spoken by many Nepali nationals. Nepalese hospitality is very warm and they are very humble people. 

"Visiting Nepal once is never going to be enough." To find out why, feel free to continue reading my blog.


HOW TO GET TO NEPAL

You may reach Nepal by taking a plane ride when travelling from another country or a bus ride when coming from India. Unfortunately, there are only a few airlines that brings you directly to Nepal with limited and selected flying schedule. I can name at least 7 countries that are able to fly directly to Nepal, which is Hong Kong, DOHA, Abu Dhabi, India, Singapore, Guangzhou and Thailand. These are the airlines that I saw flying direct when I was at the airport. In order to reach Nepal, connecting flights will be required. All international flights only stop at Kathmandu (Tribhuvan International Airport) and going around within Nepal by plane can be taken by their local airlines (Buddha Air, Tara Airlines and Himalayan Airlines). 

Left - Our plane tickets coming from Hong Kong to NepalRight - Waiting for our baggages. It was very crowded.

Left - Our plane tickets coming from Hong Kong to Nepal

Right - Waiting for our baggages. It was very crowded.


WHEN TO VISIT

The best time to visit Nepal will depends on what kind of excursion, festivals or activities you are looking for. The best time for trekking season is during October, being the most peak season and until February. The weather are supposedly to be nicer and cooler. If you are looking to experience some Nepalese festivals, then you will definitely need to check when the celebrations are being held and whether it is the right fit for you. Other activities such as Paragliding, bungee jumping, zip lining, water rafting and other outdoor activities are known to be available all year round but it is not highly recommended during the monsoon season which is around July, August to mid-September.

HERE ARE THE LIST OF POPULAR AND MAJOR FESTIVALS IN NEPAL:

  • Dashain and Tihar (September) - This is the biggest festivals based on religion in Nepal
  • Buddha Jayanti (May or June) - The birthday of the Buddha
  • Gai Jatra (August - September) - One of the most popular festivals in Nepal
  • Teej (August - September) - The fasting of Nepalese women, lots of prayers and purification
  • Janai Purnima - Celebrated by the Hindu community of Nepal
  • Shree Krishna Janmastami (August - September) - The birth of Lord Sri Krishna
  • Fagun Purnima (late February or early March) - The celebration of colours, the Holi festival
  • Indrajatra (August - September) - Celebrated by both Hindus and Buddhists
  • Maghe Sankranti (mid January) - The harbinger of the holy month
  • Mahashivaratri (February - March) - A celebration dedicated to the Lord Shiva


THE DO'S AND DON'TS  

Just like any other countries, there are some Do's and Don'ts that visitors should be aware of and should be respected accordingly.

DO'S

  • Cover up and don't wear anything too revealing
  • Tip the staff. Be generous!
  • Try different types of restaurants and dishes, especially Nepalese delicacies
  • Respect the locals and those who are older than you. Address them with "Dai" for men and "Didi" for women.
  • Take pictures of everything. For example, receipts, tickets, certificate, etc
  • Always ask questions when unsure especially when you are doing trekking
  • Make the effort to learn some Nepalese simple phrases. For example, greet everyone "Namaste" which means good day, good morning or hello and say "Dhanyabad" for Thank you. 
  • Be kind and be friendly to whoever you meet in Nepal
  • Always buy your bus tickets or activities via agency or hotel
  • Take good care of your belongings and don't be clumsy

DON'TS

  • Do not touch someone's head or feet as this is considered as impolite
  • Do not wear short shorts especially for women
  • NO PDA (Public Display Affection). Most of the Nepali people are conservative and it is disrespectful to show any signs of affection towards your loved one. 
  • Do not drink water from the tap. Always drink water from a water bottle or boiled water
  • Do not give money to beggars as it will just encourage them to rely on begging
  • Don't go to any unknown places, make sure you are with someone 
  • Don't feed the monkeys when visiting temples with monkeys around
  • Avoid being dehydrated, always have a bottle of water with you
  • Don't take any pictures of someone without their permission
  • Avoid bargaining too much, only bargain once and try to be reasonable and sensible too
  • Don't order too much food, try not to waste food. Think about the people who have nothing to eat or struggling to work for meal.


THE NEPALESE CULTURE & ETHNICITY

Visiting some of Nepal's museum and reading informations from the internet helps me to know more about the people and its ethnicity. Nepal is filled with different types of ethnicity. There are about 101 ethnic groups in Nepal and with over 92 languages. Nepali is the official language and it is what majority of the local people understand and speak in daily life.  

There are many kinds of customs and traditions in Nepal depending on which ethnicity they came from. Festivals occurs almost every month and it is the most colourful and eventful of their time. In Nepal, religion is an important matter and it is being practiced on a daily basis. The religion in Nepal consists of Buddhism, Hinduism, Islam, Christianity, Jainism, Sikhism and animism. 

HERE ARE A LIST OF DIFFERENT ETHNIC GROUPS ON NEPAL:

THE NORTHERN HIMALAYAN PEOPLE

The northern Himalayan people are mainly the Sherpas, Lopas, Manangis, Dolpa-pas and Baragaonlis who speaks Tibetan language. 

HILLS AND VALLEY PEOPLE

The hills and valley people are among the Magars, Gurungs, Tamangs, Newars, Thakuris, Chepangs, Brahmins, Sunuwars, Thakalis and Chhetris. 

THE TERAI PEOPLE

The Terai people consists of the Tharus, Darai, Majhi and Kumhal who speaks north Indian dialects. 


HOSPITALITY

While Nepal is known for its warm and welcoming hospitality especially towards the visitors. I have notice two things about the hospitality in Nepal while I'm visiting that I would like to share.

So for starters, I honestly find Nepal's hospitality very welcoming. It immediately made me felt like I'm at home already as soon as I landed in Nepal. The Nepalese people are very friendly and they are absolutely easy to talk to. If you are lucky and of course if you also got a friendly personality, then you might get a lot of information from the local whenever you are in doubt. Nepalese people also enjoys entertaining guests and making sure that they are being taken care of. 

Meanwhile, there are some locals that are quite laid back and it almost looks like they are on holiday too. What I meant about this is that, the service is quite slower than usual and some really take their time to bring you your order. I'm not saying that this is a bad thing but this is just what I have noticed while I'm in Nepal. I feel like the time is slower in Nepal. But I do believe that there are always room for improvements. 

But overall, I am satisfied with the hospitality. I admire how some locals would still try their best to communicate with the tourist even though they don't speak a lot of English. Sometimes, it's not about how much you know but it's the effort that you put into it. I truly appreciate the warm welcome from the Nepalese people that I have met during my visit. 


NEPALESE FOOD  

Nepali food has been influenced by Tibetan and Indian styles of cooking. The regular and daily Nepali food is Dal Bhat (Lentil soup with boiled rice) together with some curried vegetables and some pickles. Momos (steamed or fried dumplings) would be the second most popular Nepali dish. 

Left - Steamed Chicken MomoRight - Chicken Dal Bhat with crispy chip

Left - Steamed Chicken Momo

Right - Chicken Dal Bhat with crispy chip

I love eating Nepalese food. There are so much richness and spices in almost every dishes. Before coming to Nepal, I have already tried plenty of Nepali dishes here in Hong Kong, so I am quite familiar with the dishes. I have my top 5 favourite Nepalese dishes that I would recommend everyone to try.

Take note that Nepal doesn't serve any Beef as Cows are Nepal's national animal, so it is very obvious that they don't eat beef, let alone serve it to the people in the restaurant. So don't ever look for beef in the menu. 

HERE ARE SOME OF MY TOP 5 FAVOURITE NEPALESE DISHES:

MOMO

Left - Tuna and Cheese MomoCenter - Buffalo Momo Right - Vegetable Momo

Left - Tuna and Cheese Momo

Center - Buffalo Momo 

Right - Vegetable Momo

One of the most popular Nepalese dish will be the "Momo" - Dumplings with meat or veggies with Chatne sauce. Momo are served with various types of meat such as, Chicken, Pork and Buffalo. There is Vegetable Momo available in any restaurant too for those who don't eat meat. My most favourite Momo would be the Buffalo Momo because it has more flavour and very mouth-watering. 

DAL BHAT

Left - Chicken Dal Bhat with ChapatiCenter - Chicken Dal Bhat with rice and crispy chip on topRight - Another dish similar to Dal Bhat, Mashed Cheese with vegetables and curry sauce

Left - Chicken Dal Bhat with Chapati

Center - Chicken Dal Bhat with rice and crispy chip on top

Right - Another dish similar to Dal Bhat, Mashed Cheese with vegetables and curry sauce

Dal Bhat is very popular in a lot of Nepalese restaurant. This is a set meal good for lunch or dinner time. Dal Bhat is served with rice or Chapati with lentils, potatoes or beans on the side. The main meat for Dal Bhat would be Chicken, Buffalo and Goat. There is also a Vegetable Dal Bhat.

CHOWMIEN

Left - Chicken ChowmienRight - Vegetable Chowmien

Left - Chicken Chowmien

Right - Vegetable Chowmien

Chow mien is served with fried noodles with a lot of vegetables such as carrots, cabbages, bell peppers, garlic and onions. Chow mien is also served with Chicken, Pork and Buffalo.

THUKPA

X.jpg

Thukpa is a soup noodle in Nepalese dish. Just like the Thukpa, it contains a lot of vegetables and it serves with meat such as Chicken or Pork with lemon to add more flavour. The soup is very tasty and satisfying. This is one of my favourite Nepali dishes and this is something I will always be craving for.


ALOO KAULI (GOBI)

Aloo gobi is prepared with some sliced potatoes, cauliflowers and spices. The dish itself looks very simple but the taste is very nice and trust me you won't be able to stop yourself from eating this dish once you started. 


NEPALESE BEVERAGES

TEA

Tea is probably my favourite drink of all time. Coming to Nepal makes me more excited to try out different types of teas. The teas are served with the tea spices and fresh fruits. I would definitely recommend the Ginger Lemon Tea, Fresh Lemongrass, Fresh Mint Tea and Black Tea. 

MASALA CHAI/ TEA

Masala Chai is very popular all around Nepal. Masala is served with fresh milk. I have tried Masala tea in lots of different styles. I love how I got the chance to taste Masala Tea in many different styles. 

YAK MILK

E.jpg

It is a must for you to try Yak Milk when visiting Nepal for trekking. If you are lucky to bump into a Yak farm while trekking, you should definitely give Yak Milk a go. It is fresh and good to drink it while it's warm. 

BEER

The top 2 popular local beers are Everest and Gorkha. I have actually tried both of these famous beers and I absolutely love it. I thought the taste would be a lot stronger than other commercial beers like San Miguel or Carlsberg. In my opinion, it is quite smooth and I really enjoyed drinking them. 

KHUKRI RUM

Khukri Rum has an alcohol content of 42.8%. The Khukri Rum is placed in a bottle with the shape of Nepalese Gurkha dagger, Kukri. I have never tried this drink yet, but I would definitely try it when I go back to Nepal. 


EXPENSES AND CURRENCIES

The currency in Nepal is the Nepalese Rupees (NPR). The notes are divided into 5, 10, 20, 50, 100, 500 and 1000 being the highest notes for Nepalese Rupees. For your information, there are no coins in Nepali money. You may exchange Nepalese Rupees all around the cities in Nepal. I heard that Thamel is a good place to exchange with better rates. It is impossible to exchange your money to Nepalese Rupees outside Nepal unless you are exchanging it from your Nepali friend overseas. Make sure to ask for smaller notes when exchanging, for paying smaller bills. Be sure to also exchange your Nepalese Rupees back to your original money currency before leaving Nepal or better yet just keep it, in case you are planning to come back to Nepal next time. 

On the other hand, US dollars are also highly used in Nepal. Some rates are indicated in USD too. 


WHY NOW IS THE TIME TO VISIT NEPAL

Do I have one question? Yes, why wait? Just do it!

But seriously, Nepal is a very beautiful country. It is filled with plenty of giant and breathtaking mountains, plus the world's highest mountain is there, the great Mount Everest. Although, Nepal have no beach but Nepal is surrounded with a lot of large and amazing lakes all over Nepal.  

Since the 2015 massive earthquake occurred, it is a sure thing that Nepal will not suffer another natural disaster until 60-70 years later. So it's pretty much safe to visit Nepal now. 

Another reason to visit Nepal is that the more people visit the country, the more it will help develop the country even better and help the Nepalese people to earn more income. Traveling to Nepal is also like traveling with a cause, which is helping them grow. 


KATHMANDU

"A very busy and chaotic city I ever seen in my life" 

Now that is what I thought about Kathmandu when I first arrived. The roads are bumpy and the floors were not even. Aside from the traffic and rough roads, there are many things to do and see in Kathmandu. This is the main city of Nepal, which explains why it is so busy and crowded. 

Left - Shopping areas in KathmanduRight - Cows chilling around the side roads

Left - Shopping areas in Kathmandu

Right - Cows chilling around the side roads

We were fortunate enough to have our Nepali friend, Bijay accommodating us when we were visiting Kathmandu. I feel like without our friend guiding us and bringing us to places, we wouldn't survive Kathmandu or we might have a hard time getting into places. 


THINGS TO SEE IN KATHMANDU

THE HIMALAYAN MOUNTAINS

Visiting Nepal will not be complete without experiencing any treks in Nepal. Mountains and hills are the golden treasures of Nepal, it is their pride and expertise. There are a wide range of trekking selections for you chose from being easy to difficult treks. There are plenty of trekking agencies for you to chose around Kathmandu. Please note that Trekking permits are required on most of the trekking routes around Nepal (TIMS), make sure to add this to your list of requirements. 

HERE ARE A LIST OF TREKKING ROUTES STARTING IN KATHMANDU:

  • Everest Base Camp (5,416 meters) - 12-13 days
  • Everest Base Camp 3 Passes Trek (5,540 meters) - 18 days
  • Mount Everest Summit (8,848 meters)
  • Gokyo (5,357 meters) - 12 days
  • Island Peak Trek
  • Cho-Oyu (8,201 meters)
  • Lhotse (8,586 meters) 
  • Makalu (8,463 meters)
  • Kangchenjunga (8,586 meters)


THE GREAT BOUDHA STUPA

H.jpg

The Boudha Stupa is one of the world's heritage site. This is the largest stupa in Nepal and the holiest Tibetan Buddhist temple. It was built in the 14th century. This heritage is not only for meditation but it is also a popular tourist site. The stupa consists of 3 large platforms and the top tower bears the Buddha eyes on all four sides. 

The entrance fee for a tourist is 400 NPR for a one day ticket. Inside the heritage, you can also see a lot of shops selling different types of goods such as, spices, cloths, souvenirs, paintings, sculptures, snacks, pots, religious beads and stones and jewelries.

I.jpg


DURBAR SQUARE

Durbar Square was built between the 12th and 18th century by the Malla kings. Durbar Square was where the city's kings were once crowned. Durbar Square has became a living museum from past to present. 

Since the deadly 2015 earthquake occurred, Durbar Square had been damaged horribly and most of its temples and buildings had been torn apart. Up until this day, you may still see the destruction caused by the 2015 earthquake. 


THAMEL

J.jpg

Thamel is a place for shopping, food and drinking. There are plenty of shops to buy your souvenirs and restaurants to fill your hungry stomach. There are also plenty of drinking places such as pubs, restaurant & bars, live bands, clubs and shisha bars around Thamel. Thamel is probably the only area that opens until late night. It may get crazy at night so be careful. Don't go there alone, always go with a group of people. 


KAISER LIBRARY

Kaiser Library is also known as the Leshar Library. Visiting this library should be on your list as the main reading room contains some antique globes, stuffed tiger's heads and antique armours. 


THE LIVING GODDESS

Kumari, the living goddess can be found in Basantapur, where the Kumari (goddess) lives. While visiting Nepal, you should definitely take the chance to have a glimpse of the living goddess. During late August or early September, the festival "Indra Jatra" is being celebrated and it is one of the most colourful festival in Nepal. The Kumari will also parade across the city in her golden palanquin. 


THINGS TO DO IN KATHMANDU

MOUNTAIN TREKKING

Trekking in Nepal is probably the most popular thing to do. Majority of the people visiting Nepal will most likely go for some trekking adventure. Why is that? The reason is that Nepal have so many beautiful mountains to trek. As you stroll around Kathmandu, you will see plenty of trekking agencies and trekking shops. 

When I visited Nepal on September 2017, I went trekking to the Mardi Himal for 6 days. I booked through "Plan Himalaya". I had a nice experience and I have definitely achieved what I came to Nepal for. I would be more than happy to share my trekking experience with you all.

My blog about my Mardi Himal Trek will be added within 2 weeks. 


ROADTRIP

K.jpg

Roadtrip around Kathmandu can be a fun and a thrilling experience. Getting around different places in Kathmandu would give you a chance to know more about the culture and its heritage. It is easy to rent a car in Nepal but be sure to look for a reliable car renting company and driver. 


FOOD TRIP

Food hunting is probably one of the things every visitors would appreciate. Trying out different types of dishes would want you to crave for more. There are plenty of nice restaurant around Kathmandu. Here are some of my recommendation of restaurant for you to try on.

Left - BBQCenter - Pad Thai Noodles in Nepalese styleRight - Buffalo Momo

Left - BBQ

Center - Pad Thai Noodles in Nepalese style

Right - Buffalo Momo

  • Tom Yum Goong
  • Atithi Satkaar Restaurant
  • The Tulip Kathmandu
  • Thamel House Restaurant
  • Thamel Momo Hut
  • Utsav Authentic Nepali Restaurant
  • Gorka Palace Restaurant & Bar
  • Zibro Restaurant & Bar


BUNGEE JUMP ADVENTURE

If you are craving for some adrenaline, then bungee jumping in Nepal should be on your list  It is situated in a 160-meter above a suspension bridge. Imagine free-falling from a 160-meter bridge to one of Nepal's wildest rivers and get a touch of its water onto your face as you fall. That sounds a bit scary but thrilling isn't it? 

It is a 3 hour ride from Kathmandu to the Bungee jumping area. Getting there would require you to through an area near the Tibet border and the famous Friendship Bridge to reach the jump location. The price starts from 70-150USD depending on seasons and different packages.   


SHOPPING

Most of the shops will offer you a good price and bargaining is fine but be sure to be reasonable of what price you are asking for. There is also a higher chance to get a better deal if you buy more things from the shop. But to be honest, everything in Nepal is very affordable.


POKHARA  

Pokhara is known as the city of lakes. There are about 9 lakes in the city surrounded by more than 20 something stunning mountains. The largest lake in Pokhara is the Phewa Lake and from there you may visit some of its heritage and temple. There are also plenty of mountains/ hills to do for trekking. 

V.jpg

I love staying in Pokhara as there are many places to do and see around this area. It is also  tourist-friendly and less chaotic than Kathmandu. Even though the journey going to Pokhara and getting out of Pokhara is hard but it was worth it. To know more about why it is a tough ride to Pokhara, read "How to get to Pokhara from Kathmandu' below. 


HOW TO GET TO POKHARA FROM KATHMANDU

Getting to Pokhara from Kathmandu takes about 210 kilometres. Pokhara is reachable by plane, tourist bus, local bus and even private car. 

BY PLANE - EXPENSIVE BUT FAST

Taking the plane to Pokhara would be the fastest way to get there within 30 minutes but the cost is not cheap. It would cost around 100-120USD per person for a one-way ticket via Buddha airlines, Tara airlines and Himalayan airlines. But of course taking the plane would reward you with a more comfortable ride and a nice view of the mountains and if you're lucky enough maybe Mount Everest might even pop out when it's not foggy. 


BY TOURIST/ LOCAL BUS - CHEAPER BUT LONGER RIDE

The most ideal transportation for budget travellers would be taking the tourist/ local bus to Pokhara. Most of the tourist visiting Nepal and even some locals would most likely take the tourist bus. Why? Because it's more convenient, it's air-conditioned, seats are more comfortable compare to local buses and not a lot of stop-overs. The travelling time to Pokhara via tourist bus takes 6-7 hours (if no traffic, engine break down or accidents). The prices starts from 4-20USD depending on the season and which bus company you are taking. Be sure to find a reliable bus company, do your research and don't forget to read customer's feedback to know more. The buses normally assemble at Kantipath Bus Station. All buses leaves at 7:00am sharp.


BY PRIVATE CAR

Please note that by taking a private car does not guarantee you a faster ride to Pokhara and vice versa. It will still be about 5-7 hours ride and probably a rough ride too. The only good thing about taking private car is you get to stop whenever you want to and the whole car belongs to you. The price for renting a private car will start from 60-100USD for a one-way ride. 


MY PERSONAL EXPERIENCE ON GETTING TO POKHARA

It is always good to GPS your location while traveling just to know where you are heading and how long will it take you.

It is always good to GPS your location while traveling just to know where you are heading and how long will it take you.

Being a budget traveller, i obviously chose to take the tourist bus to get to Pokhara. I took a tourist bus form "Global Vacation Travels & Tours" for 7USD. The ride took us 7 hours to get to the "Bus Park" in Pokhara. There were about 3 stop-over, one for toilet break, second for breakfast plus toilet break and third for lunch and toilet break. The ride was a bit bumpy and dusty but since it is an air-conditioned bus, the dust didn't really bothered me that much. I took a few minutes nap from time to time and enjoying the view. 

While the journey to Pokahara was smooth, going back to Kathmandu was very rough. I booked with "Blue Sky" for 7USD. The ride was smooth for the first 5 hours, no traffic and only two stop-overs for toilet break and lunch. After having lunch, the most unpredictable thing happened, our bus engine broke down and had failed to recover. So we had to wait and hitch in another tourist bus. The bus that we got on does not have any air-conditioner and we sat all way at the back, since that's the only available seats left. It was hot, dusty and horrible. We were stuck for some time when we reach the highway, maybe some accidents? (guess we'll never know). Overall, the ride took us 11 frigging long hours. My bums hurts and i feel very dirty with all the dust all over me. But I am still thankful that we reached back to Kathmandu safely without getting stuck there any longer than 11 hours and also we were not involved in any kind of accidents. This is an experience that I would never forget. 


THINGS TO SEE IN POKHARA

THE HIMALAYAN MOUNTAINS

U.jpg

Visiting Nepal will not be complete without experiencing any treks in Nepal. Mountains and hills are the golden treasures of Nepal, it is their pride and expertise. There are a wide range of trekking selections for you chose from being easy to difficult treks. There are plenty of trekking agencies for you to chose around Pokhara. Please note that Trekking permits are required on most of the trekking routes around Nepal (TIMS), make sure to add this to your list of requirements. 

HERE ARE A LIST OF TREKKING ROUTES STARTING FROM POKHARA:

  • Annapurna Base Camp (ABC) (4,30 meters) - 7-10 days
  • Annapurna Circuit (5,416 meters) - 15-20 days
  • Mardi Himal Trek (overlooking the Machapuchre) (5,587 meters) - 5-7 days
  • Sarangkot Naudanda Hiking - 1 day (4-5 hours)
  • Poon Hill Trek (3,210 meters) - 5-7 days
  • Manaslu Trek (5,135 meters) - 14 days
  • Khopra Danda Trekking - 6-7 days
  • Dhampus Village Trekking - 1-2 days
  • Upper Mustang Trekking (3,810 meters) - 10-15 days


WORLD PEACE PAGODA

N.jpg

The World Peace Pagoda is a massive Buddhist stupa and it is situated on top of a hill on the southern part of the Phewa Lake. The view up there is fantastic and it is definitely gives you a panoramic view of the himalayan mountains. 

We took a boat ride from the Lakeside to get to the other side for 650 NPR for 2 people for a one-way ride. The boat takes us about 15 minutes to get to the other side of the lake. Then, we hike up for 30 minutes up to the Pagoda. We met a nice dog along the way and he followed us until he wasn't allowed to enter the World Peace Pagoda. There is no entrance fee to the World Peace Pagoda. 

Getting back to the Lakeside can do the same direction as how you reach the Pagoda in the first place or you may take a shorter trip by taking a taxi back to the Lakeside. The taxi fare cost us 900 NPR. 


OLD BAZAAR

If you have spare time in Pokhara, then you must visit Pokhara's Old Bazaar. This is where the old market started before Lakeside became the new shopping destination. One of the most important Shrine the "Bindhyabasini Mandir" is situated in the Old Bazzar. It is around 4km from the Lakeside.  

While visiting the Old Bazaar, you may notice that most of the shops are closed. Don't be surprise as this is very normal as most of the shops have already moved to the Lakeside, where the business are. However, there are still some shops offering you some golds, jewelries, spices, cloths and cosmetics. Visiting the Old Bazaar is not just for shopping but also to take some time to visit one of the heritage in Pokhara and to also help out the locals to earn some living by buying some of their goods. 


INTERNATIONAL MOUNTAIN MUSEUM

Left - Memorial for mountaineers who have lost their livesCenter - My favourite photograph in the Museum. It is a picture of a Porter carrying some heavy bags and sacks filled with equipment, cloths and food.Right - The founders and creators of the …

Left - Memorial for mountaineers who have lost their lives

Center - My favourite photograph in the Museum. It is a picture of a Porter carrying some heavy bags and sacks filled with equipment, cloths and food.

Right - The founders and creators of the International Mountain Museum

International Mountain Museum is one of the largest museum and the only mountain museum in Nepal. If you love mountains or if you are about to go for some trekking activities then visiting the Mountain Museum would be resourceful before doing your trek. The reason why Pokhara was chosen to build the Mountain Museum was because of its scenic location. 

The museum is very simple and informative. It has 4 different sections for visitors to see.

1 - Hall of Mountain People 

2 - Hall of World Mountains

3 -  Hall of Mountain Activities (equipments, ecology and environment)

4 - Hall of Temporary Display (Lakhang, library, artificial climbing wall, Mt. Manaslu & Yak model)

We took a taxi ride for 900 NPR (roundtrip). The museum charges 400 NPR for tourist, 80 NPR for Nepali nationals and 40 NPR for students. 


BARAHI TEMPLE

P.jpg

Barahi Temple is located in the middle of the Phewa Lake. Barahi Temple is a very important religious monument in Pokhara. It is used to worship by both Hindus and Buddhists. The temple is small but very peaceful and relaxing. Getting there will require you to take a boat ride, you can easily rent a boat around the Lakeside for a roundtrip ride. 


THINGS TO DO IN POKHARA

MOUNTAIN TREKKING

Trekking in Nepal is probably the most popular thing to do. Majority of the people visiting Nepal will most likely go for some trekking adventure. Why is that? The reason is that Nepal have so many beautiful mountains to trek. As you stroll around Pokhara, you will see plenty of trekking agencies and trekking shops. 

T.jpg

When I visited Nepal in September 2017, I went trekking to the Mardi Himal for 6 days. I had a nice experience and I have definitely achieved what I came to Nepal for. I would be more than happy to share my trekking experience with you all.

Check out my Mardi Himal Trek experience by clicking this link "The Mardi Himal Trek" to know about the trek.


PARAGLIDING & ZIP LINING

Q.jpg

If you are craving for some adrenaline rush, well then Paragliding and Zip Lining are definitely your thing. it both gives you a 360 degree view of the Lakeside and some mountain views. 

You can easily book a Paragliding tandem flight and Zip Lining anywhere around the Lakeside in Pokhara. Just make sure to find the right and trustworthy agency. For booking of Paragliding, it must be done a day before your designated date. 

I booked my Paragliding flight with Buddha Paragliding for 65USD (including pick-up from hotel and pictures and videos)


ULTRA LIGHT & HELICOPTER TOUR

Ultra Light and Helicopter tour both brings you to a closer and nicer view of the mountains. There are different types of packages for both rides, which starts from 15 minutes to 1 hour. Prices may increase or may be cheaper depending on the season. Both of these tour operates daily and with a very precise schedule time too. They mostly do it in the morning time.


WATER RAFTING

If you fancy some water sports in Nepal, then you would probably enjoy water rafting. There are many rivers in Nepal and in Pokhara. The famous one would be the Mardi River, the water comes from the Holy mountain, Machapuchre. 

Water rafting can get really fun and wet too. I would say that you should definitely pick a perfect and suitable time to do this activity. 


SHOPPING

R.jpg

There are plenty of shops around the Lakeside in Pokhara. You can find a lot of cashmere and wool clothing shops, souvenir shops, stones and runes shops, trekking shops, supermarkets, tea shops and many more others. 


Most of the shops will offer you a good price and bargaining is fine but be sure to be reasonable of what price you are asking for. There is also a higher chance to get a better deal if you buy more things from the shop. But to be honest, everything in Nepal is very affordable.


FOOD TRIP

There are plenty of nice restaurants in Pokhara. Most of the restaurant are actually open very early but close quite early at night time. For some reason, people tends to close early around Nepal. 

S.jpg

HERE ARE SOME OF MY RESTAURANT RECOMMENDATION IN POKHARA:

  • The Blind Tiger
  • The Moondance Restaurant and Bar
  • Busy Bee Cafe
  • Dunga Restro & Lounge Bar
  • The Harbor at the Glacier
  • Merhaba Kebab House
  • Pokhara Thakali Kitchen
  • Pokhara Pizza House
  • Cafe Concerto
  • The Black and White


RENT A BICYCLE

You can rent a bicycle but not a motorcycle as it is banned by the government due to road safety. Renting a bicycle is very easy. All you have to do is pay the deposit plus the rent fee and while handing over and leaving your passport or identification may be required, in case you didn't return their bikes. A nice bike ride around the Lakeside sounds very refreshing and relaxing. 


Overall, my Nepal experience was great and it is something I would cherish all my life. I would definitely come to Nepal and explore more places that I didn't have the chance to visit.

Would I recommend Nepal? Of course my answer will be Yes! Nepal is very rich in culture and I feel that people should come to Nepal to experience it themselves. 

If you got any questions, feel free to comment below or by email. I will be more than happy to help.


Yours Truly, 

Michelle Chan